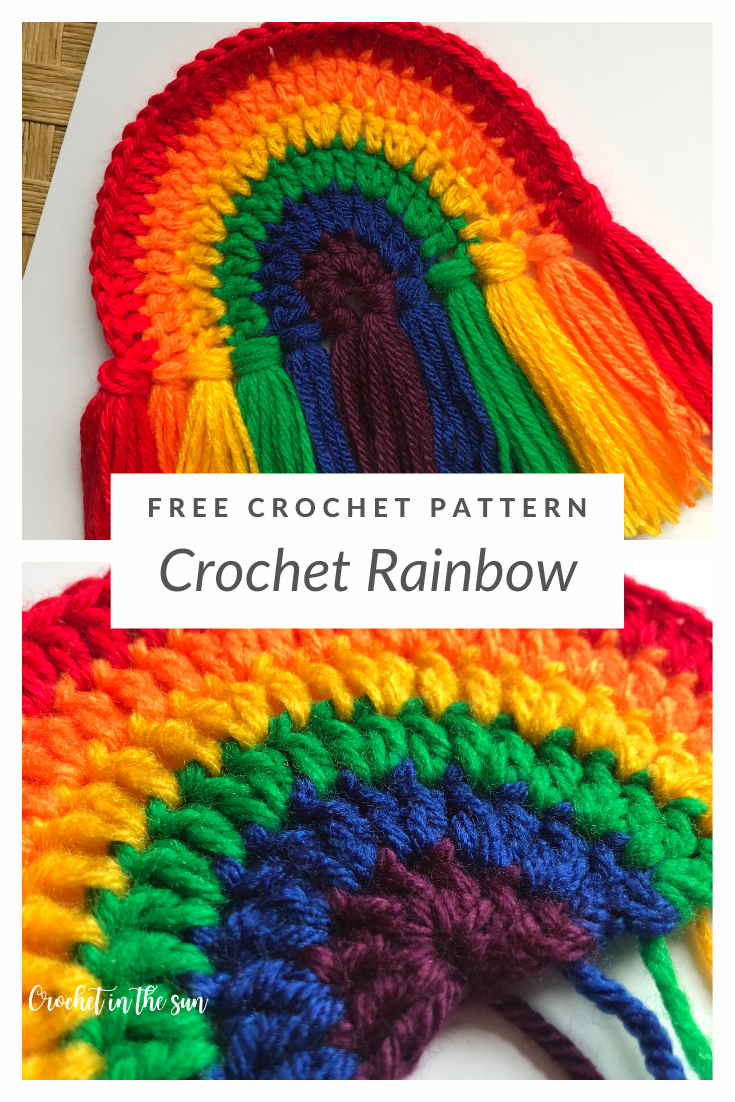
Bring on the positive vibes with this rainbow crochet pattern! Given the uncertainty in the world right now, I am loving that my Instagram and Facebook feeds have been filled with bright colors and all sorts of rainbow crafts lately! Inspired by all the colorful creations, I wanted to create my version of a crocheted rainbow pattern that uses a stitch repeat that is super easy to remember.
This rainbow crochet pattern is great for beginners. Not only is it a short and easy pattern, but you only need a small amount of yarn to finish this quick project. Or maybe you’ll get addicted and make a bunch of rainbows in different colors like me 🙂
Boost your mood
Certain colors evoke certain emotions. As you work through the rainbow, my hope is that these colors subconsciously bring some positive vibes or happiness to your brain.
Crochet stash buster project
These rainbows are the perfect crochet stash buster!! Only a small amount is needed, you can mix up the colors, and feel free to mix and match with different yarn fibers too! I have made a couple of rainbows so far playing around with cotton yarn, acrylic yarn, and mixing the two together.
Just like the crochet cup cozy project, this is a great opportunity to test out yarn that you haven’t used before.
Colors
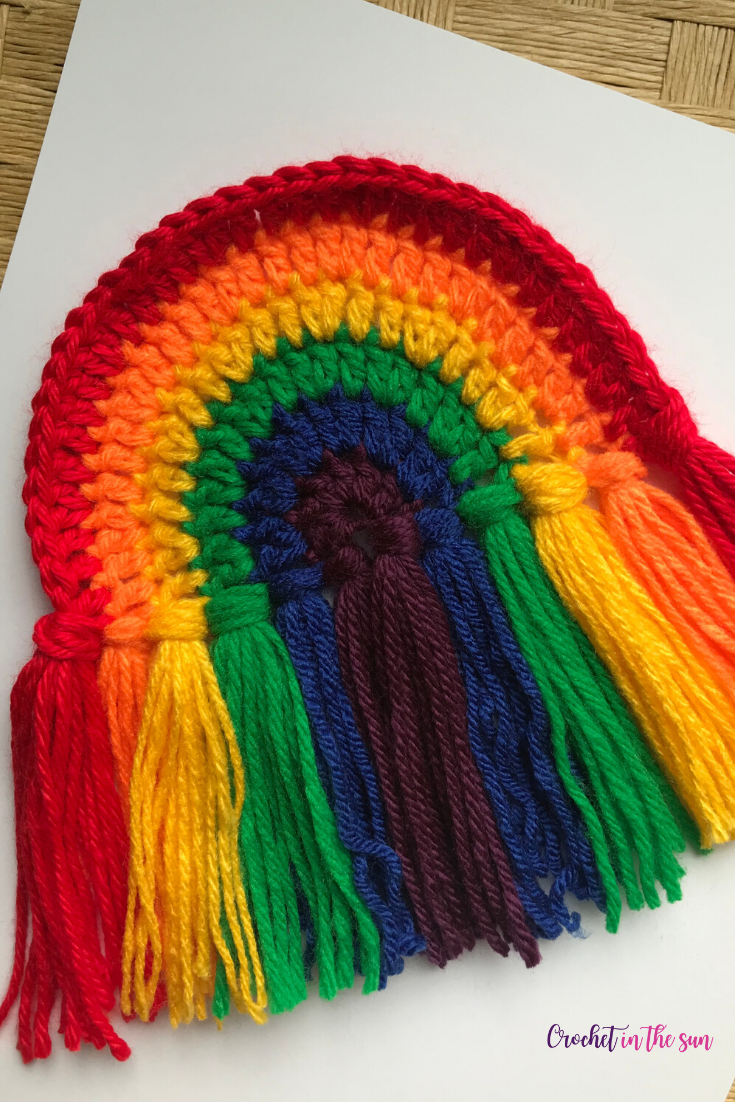
I followed the typical “Roy G Biv” (Red-Orange-Yellow-Green-Blue-Indigo-Violet) for the rainbow you see below, but this is a great time to think outside the box with the colors! Try using pastels instead of the rich rainbow colors. Or, be a total rebel and use completely random colors.
Think: Upcoming holidays? Personal favorite colors? Favorite TV show or character for a kiddo? Incorporate color inspiration from any of those ideas and bring them into your rainbow.
For one of my next rainbows, I am going to make a Disney themed rainbow following one of the Disney Color Palette’s I put together. You know I always will incorporate Disney into my projects if possible 🙂
You only need a single strand of yarn
Boom! This is 1 reason I wanted to create this rainbow crochet pattern.
Don’t ask me why, but I always shy away from projects that require you to double-strand yarn (this is where you hold 2 strands of yarn together while you work your stitches).
Maybe it’s because I prefer simplicity, or maybe its just less yarn to get tangled. Or sometimes messy to pull from both the center and outside of your skein of yarn. But one of the main reasons I wanted to create this rainbow pattern was because I wanted to use 1 strand and many patterns call for 2. It’s just a personal preference!
Pattern inspiration
When I first started thinking of how I can create an even rainbow, I used the basic pattern for a circle as my guide. I covered the bottom half of the circle and went from there. I went through 2 or 3 iterations of this pattern, as the edges weren’t totally straight at the beginning.
After some math and trial and error, I am happy with the end result! It’s even and looks neat and pretty 🙂
So if you have crocheted a circle before, this will feel familiar. It’s not exactly the same, but this is where the inspiration came from!
Skill level
Easy
If you don’t know how to crochet, or maybe just want to brush up on the basics, we have a great resource for you!
Hop over to the Ultimate Beginner’s Guide to Crochet. This breaks down the basics of what you need to learn, in what order, and link you directly to some great resources! And best of all, it’s free! Enjoy 🙂
Yarn


Any worsted weight yarn will work for this project. If you’re interested, here are the details on the yarn I used in the pictures below. These are all 100% acrylic, so the yarn is a bit fuzzy in the photos!
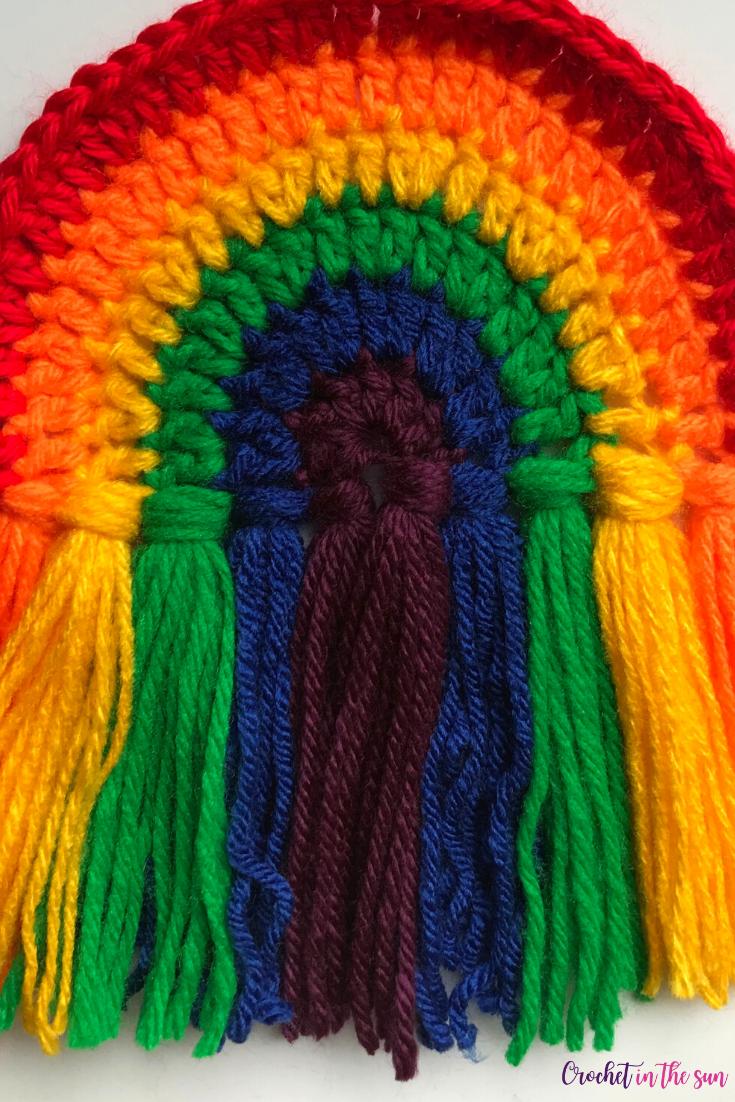
- Red yarn: Caron Simply Soft in Red
- Orange, yellow, and green: These were actually miscellaneous yarns in my stash – no brands available, sorry!
- Blue yarn: I Love This Yarn in Royal
- Purple yarn: Red Heart Soft in Grape
Materials


- 4.5mm crochet hook – here the one I used from my Clover hook set
- Craft scissors
- Yarn needle, only if you aren’t adding tassels (since there is no need to weave in the ends if you add tassels)
Stitches (US Terms)
- chain (ch)
- double crochet (dc)
If needed, refer to my Beginner’s Guide to crochet. Those stitch tutorials will walk you through how to complete the above stitches. If you need to convert from US to UK terms, have a look at this chart.
Gauge
Gauge is not crucial here, but have a look at the finished measurement size for some guidance…
Finished measurement
6 inches wide x 3.25 inches tall
Pattern Notes
- The beginning ch3 of each row counts as a dc
- At the end of each row, fasten off. No need to slip stitch or attach to anything. Simply cut your yarn and pull through
- You will always attach your new color into the top loop of the ch3 from the previous row.
- If you’re looking at the finished rainbow, this pattern works from right to left.
- BONUS: No need to weave in your ends if you’re adding tassels at the bottom. Simply treat that as one of the strands in your tassel!
Pattern
- Get the inexpensive ad-free PDF printable from my Etsy Shop
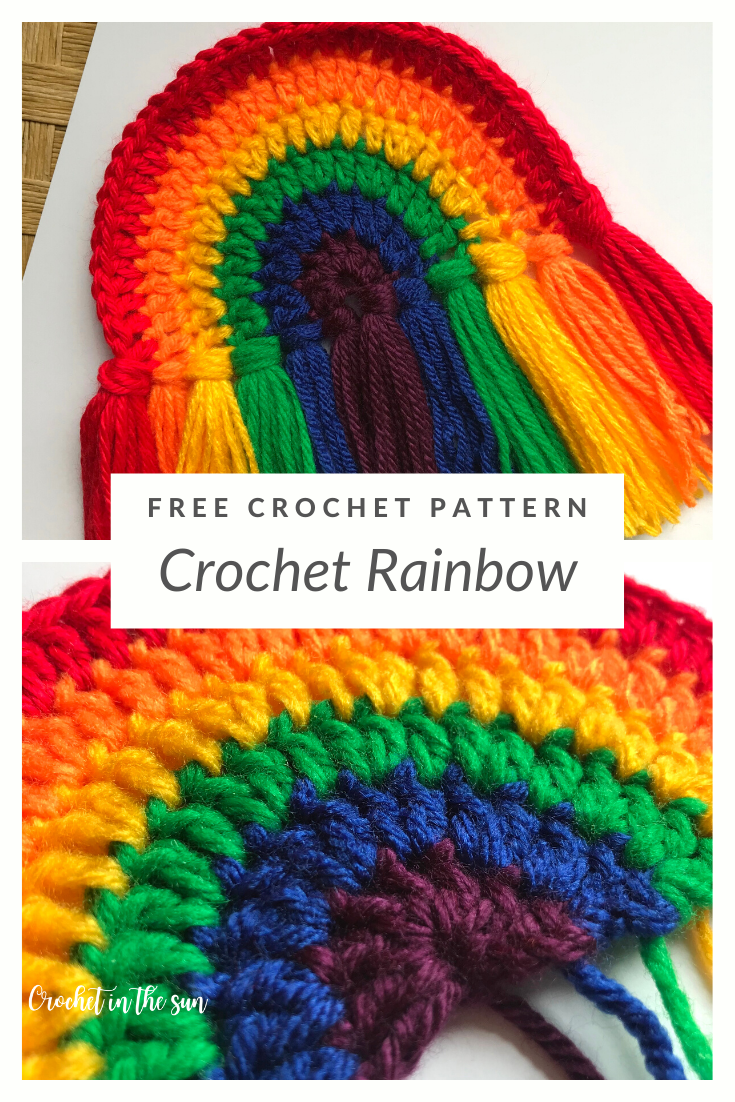
- Pin this pattern to your Pinterest Boards here
- Add this pattern to your Ravelry queue
To start: Make a Magic Circle
Row 1: ch3, work 7dc into the magic circle [8].
Heads up: You don’t need to slip stitch to make this magic circle an actual circle. Rather, fasten off and leave it as a semi-circle. See below.
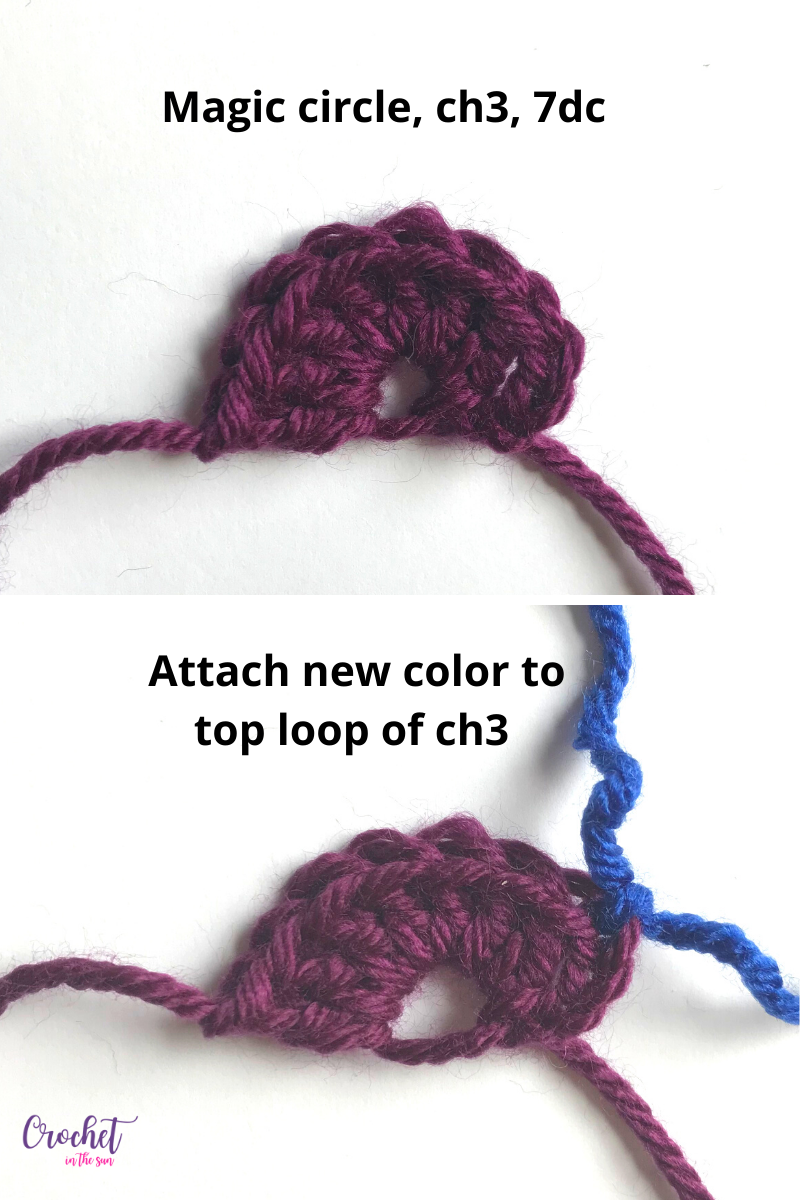
Reminder: See pattern notes regarding where you attach your new yarn color!
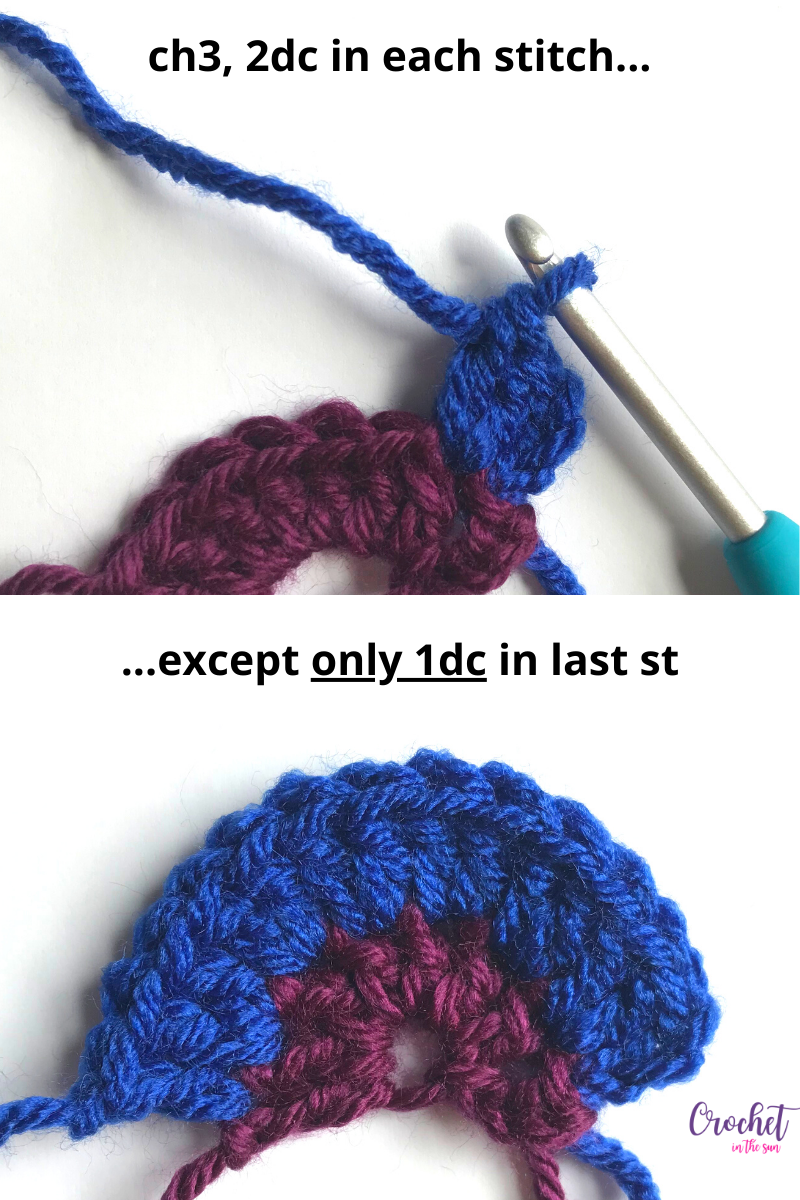
Row 2: ch3, 2dc in each stitch across, BUT only 1 dc in the last stitch [14]
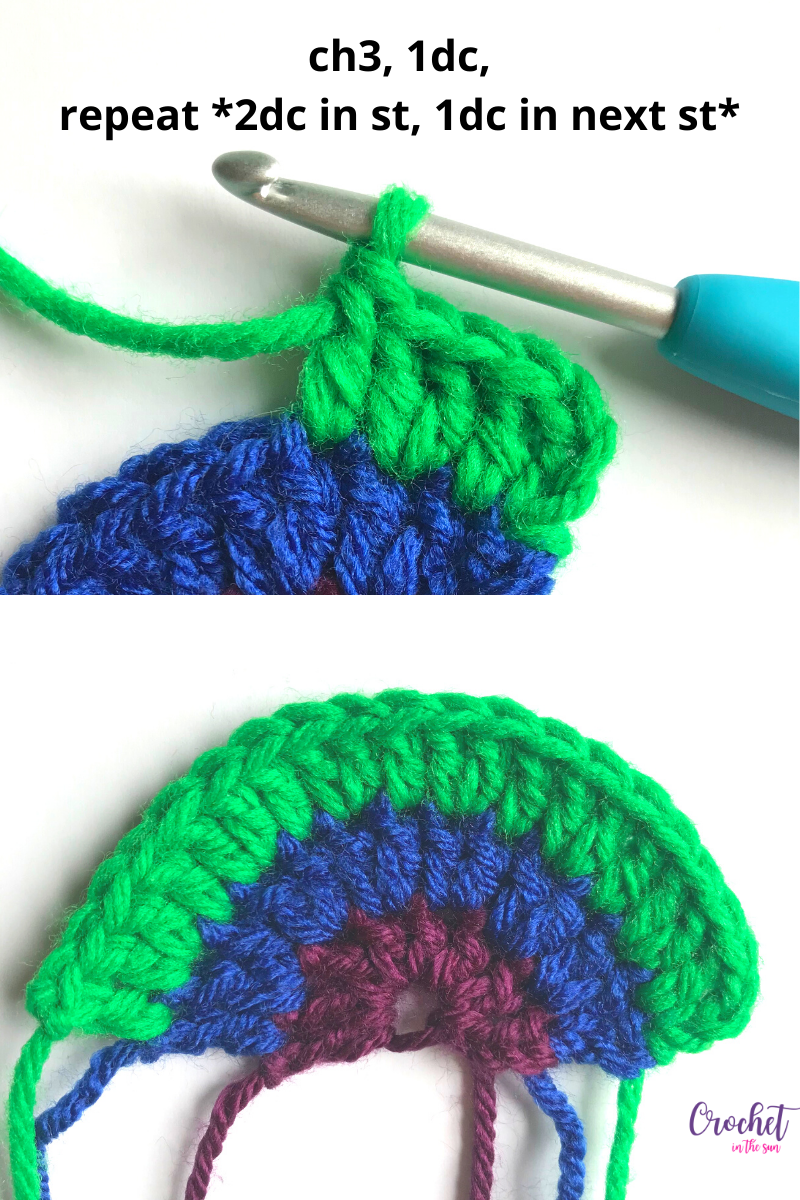
Row 3: ch3, 1dc in the next stitch, *2dc in stitch, 1 dc in the next stitch*. Repeat from *. [20]
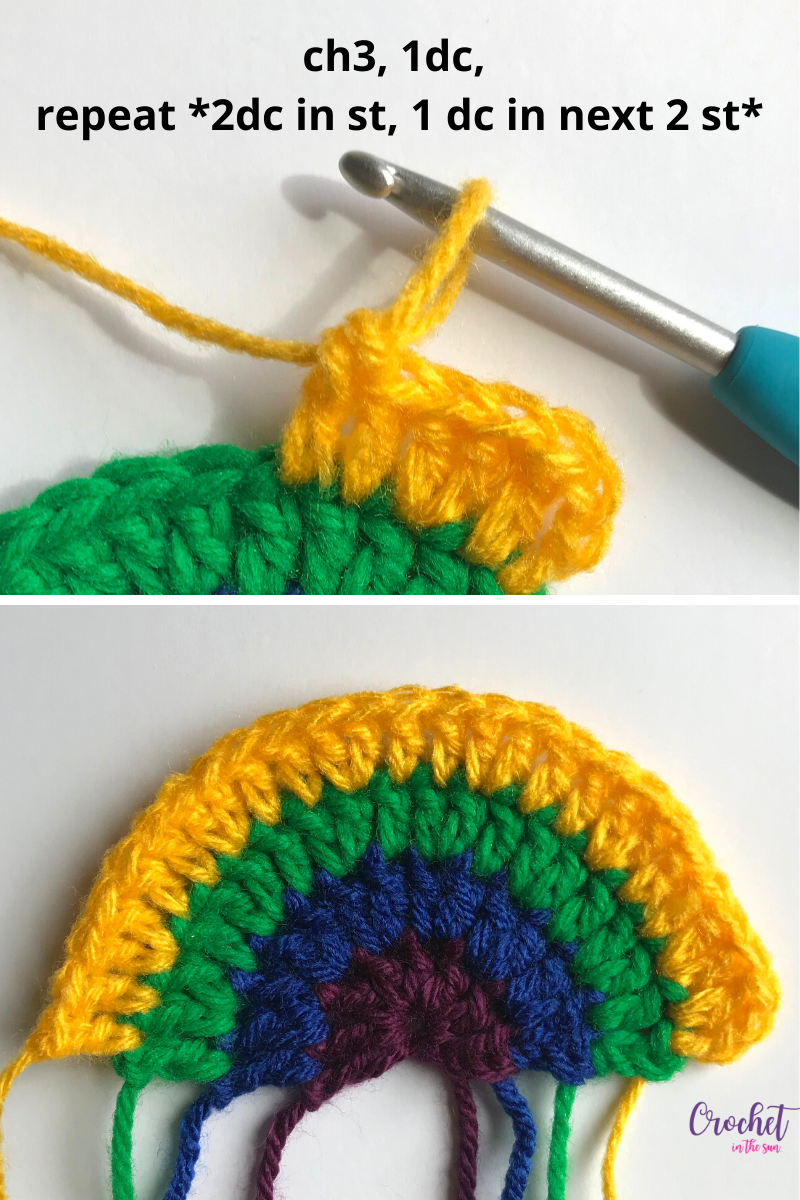
Row 4: ch3, 1dc in the next stitch, *2dc in stitch, 1 dc in the next 2 stitches*. Repeat from * [26]
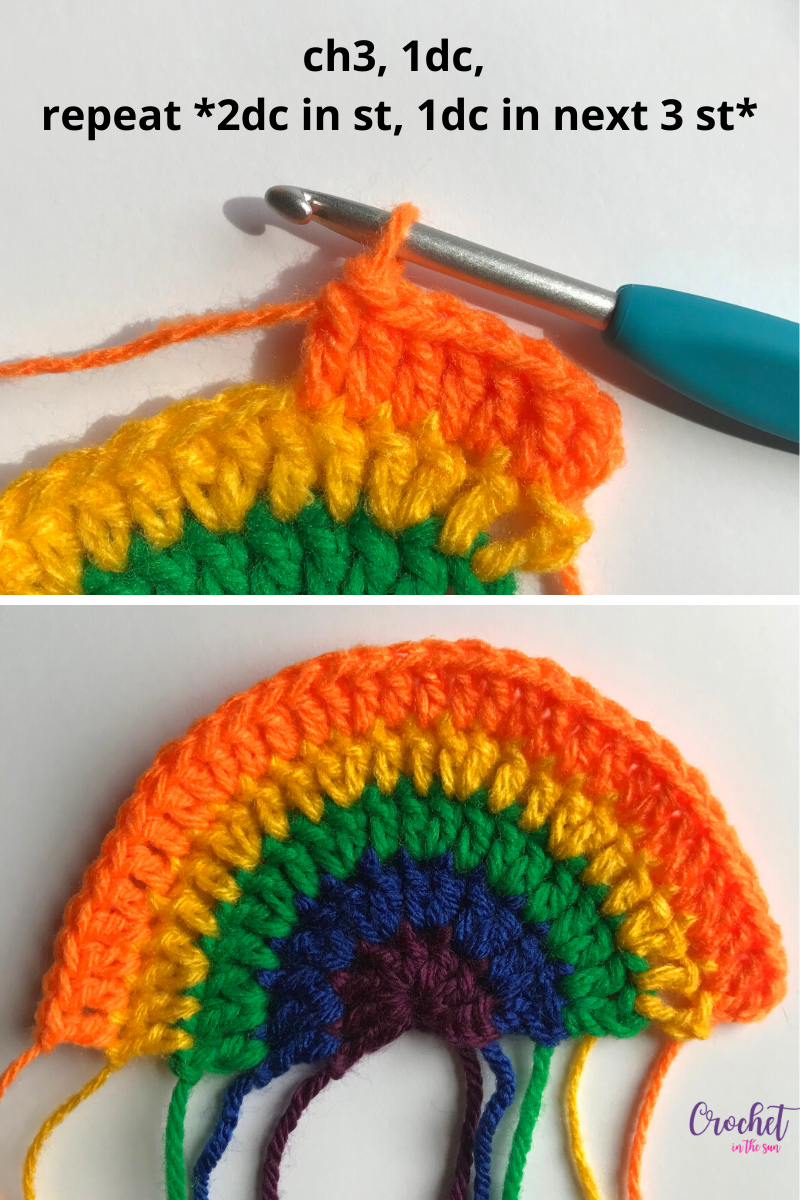
Row 5: ch3, 1dc in the next stitch, *2dc in stitch, 1 dc in the next 3 stitches*. Repeat from * [32]
Row 6: ch3, 1dc in the next stitch, *2dc in stitch, 1 dc in the next 4 stitches*. Repeat from * [38]
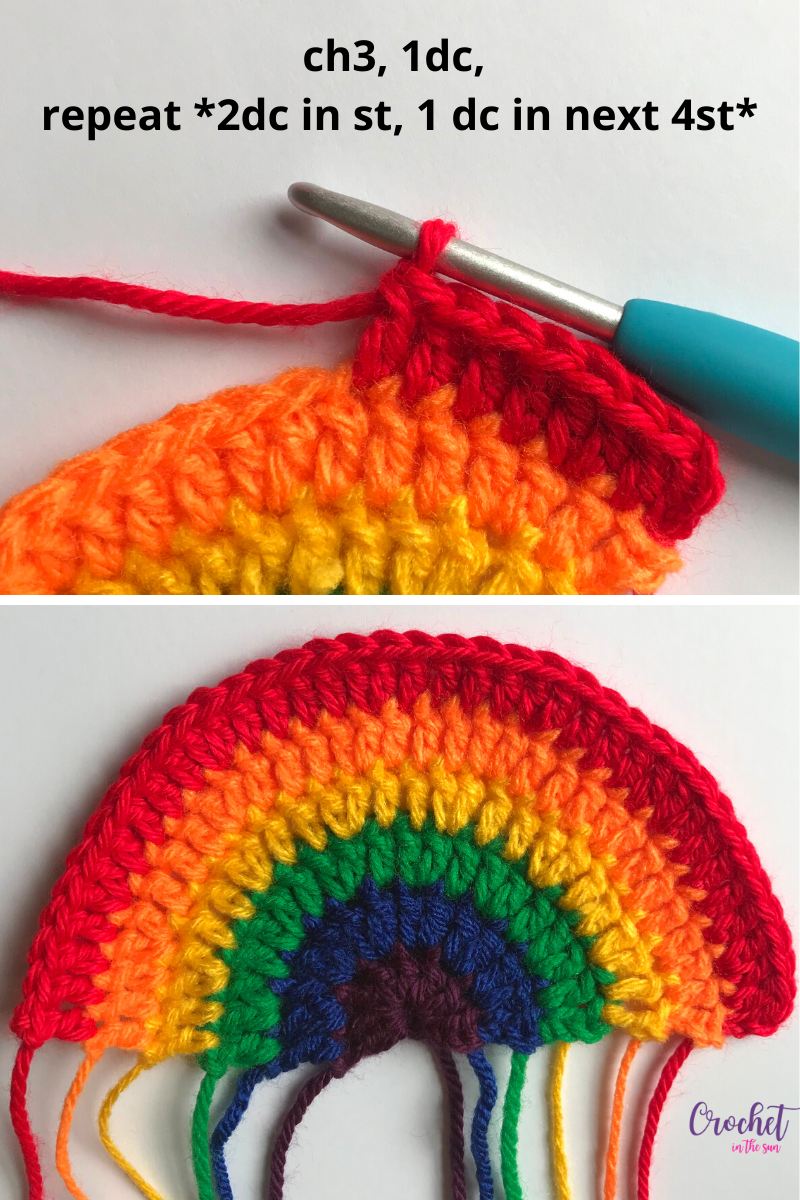
Nice work! You just made a beautiful crocheted rainbow!!
Optional finishes
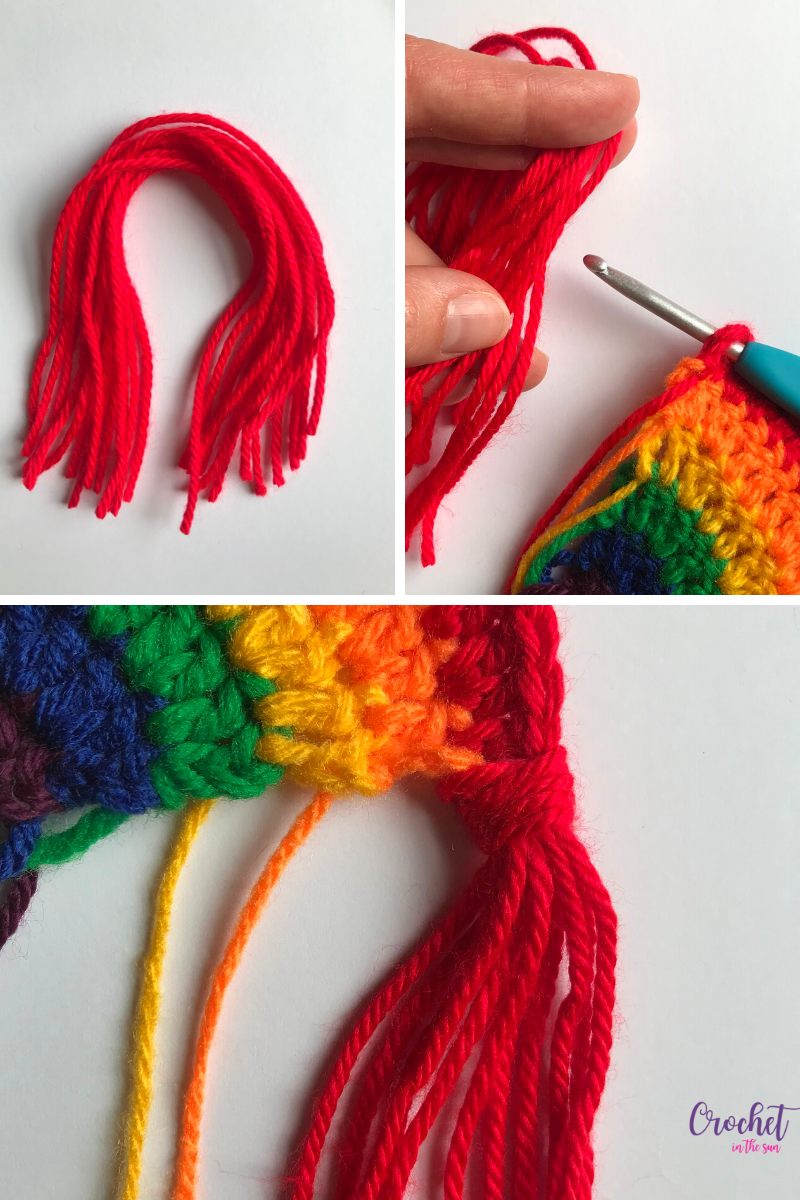
Add tassels or poms if you’d like!
Tip for adding tassels: Flip your rainbow over (wrong side), insert your hook, pull the yarn through, and create the tassel. It looks slightly different if you make the tassel from the right side. But feel free to experiment and see what you like best!
Thanks for following along! I hope you enjoy making these crochet rainbows. I would love to see them! If you make one (or many) and share on social media, please link back to my blog and provide credit for the pattern. Also, tag @crochetinthesun or #positivevibesrainbow so we can see those rainbows come to life!
Pin for later
Other useful crochet references

Happy crocheting,
Jennifer
Thanks for the Rainbow pattern,its great.
Thanks Alison! I’m so happy you enjoyed it 🙂
The ROY G BIV was not exactly followed in your pattern, but I was able to figure out how to add the additional row.
Can you please share the pattern with all 7 colors of the rainbow?
Thanks for the pattern, planning to make them for the lamp posts 💜💙💚💛🧡❤️
Any chance you can make a video? I don’t understand written patterns. No matter how hard I try to read them.
Lovely and easy, thanks from France