
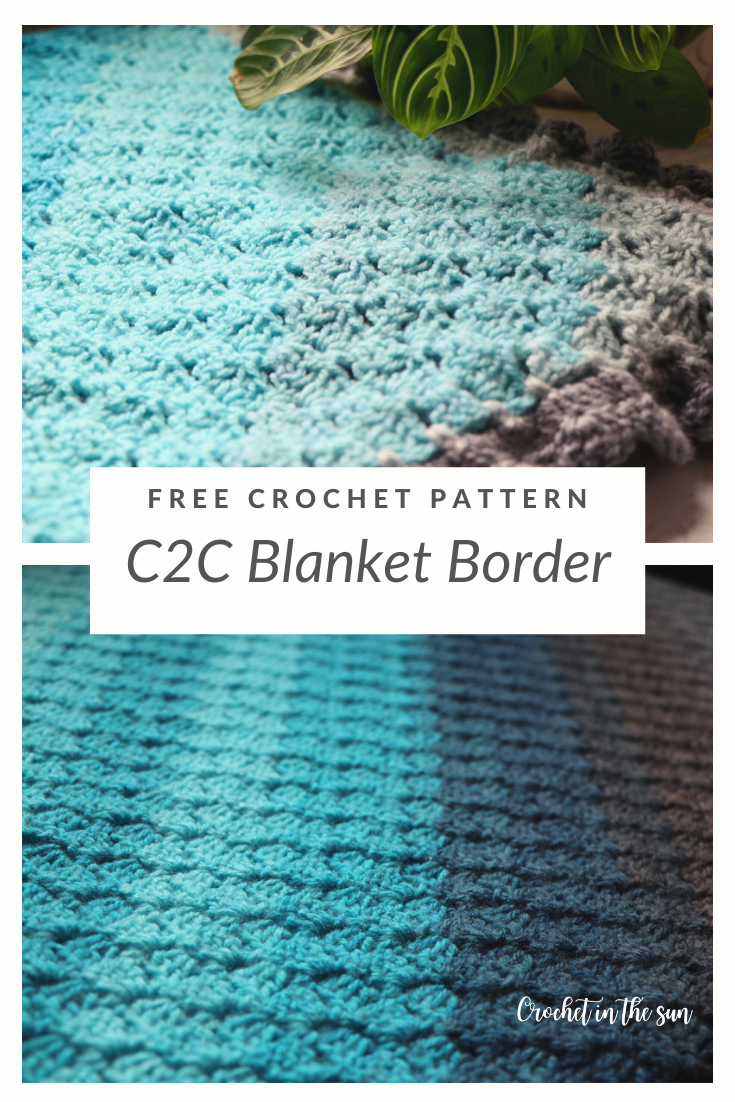
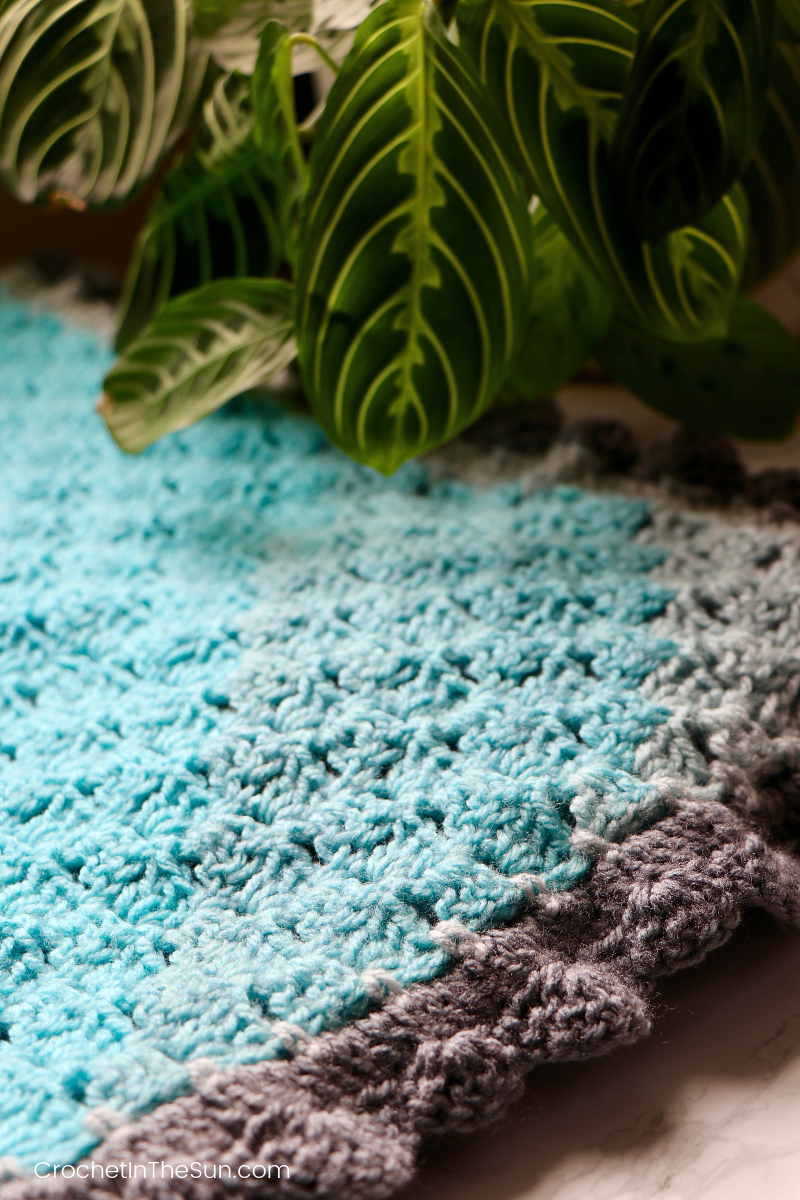
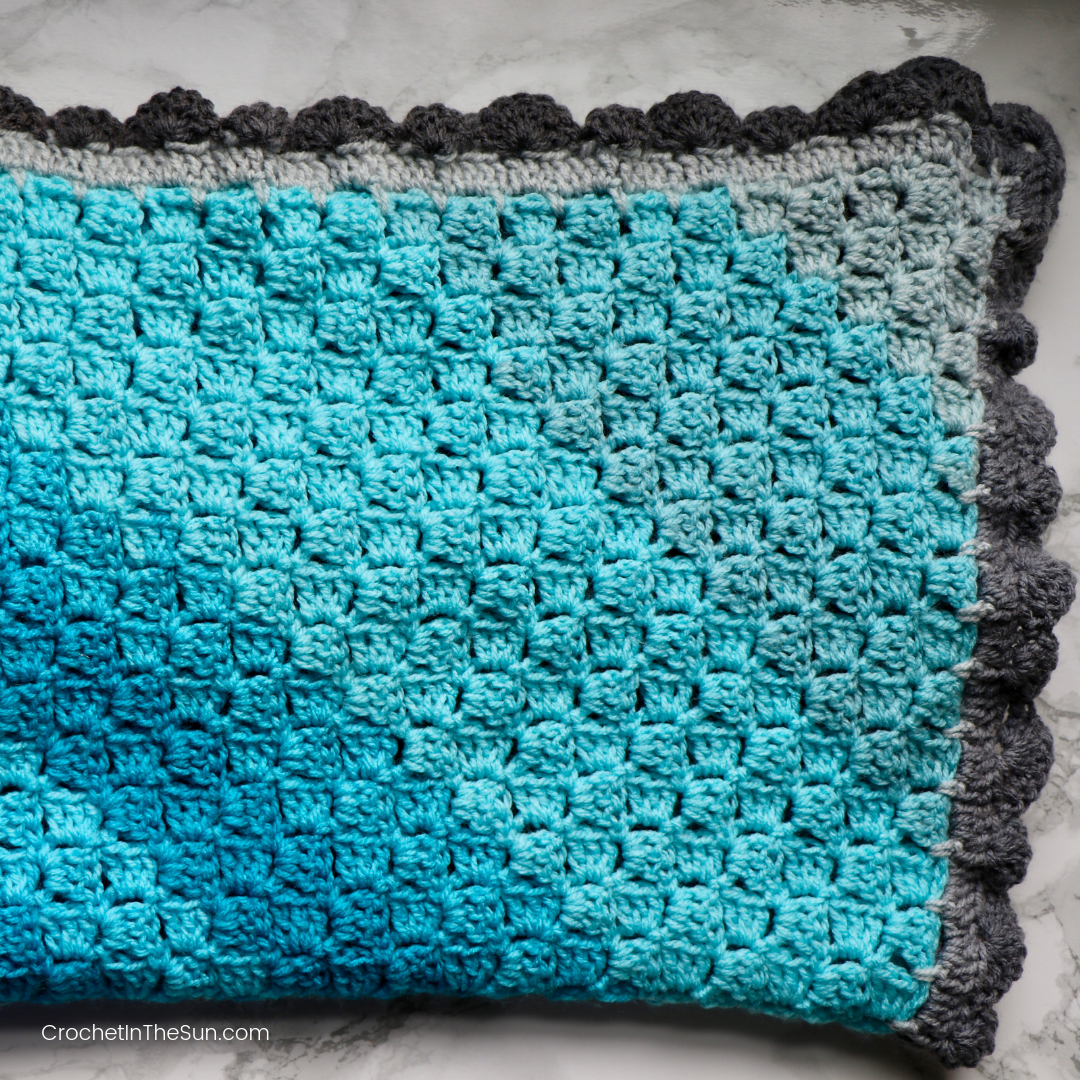
Summer Storm C2C Blanket
Have you used the C2C (Corner to Corner crochet) technique yet? If you haven’t, you’re in for a treat!
What exactly is Corner to Corner?
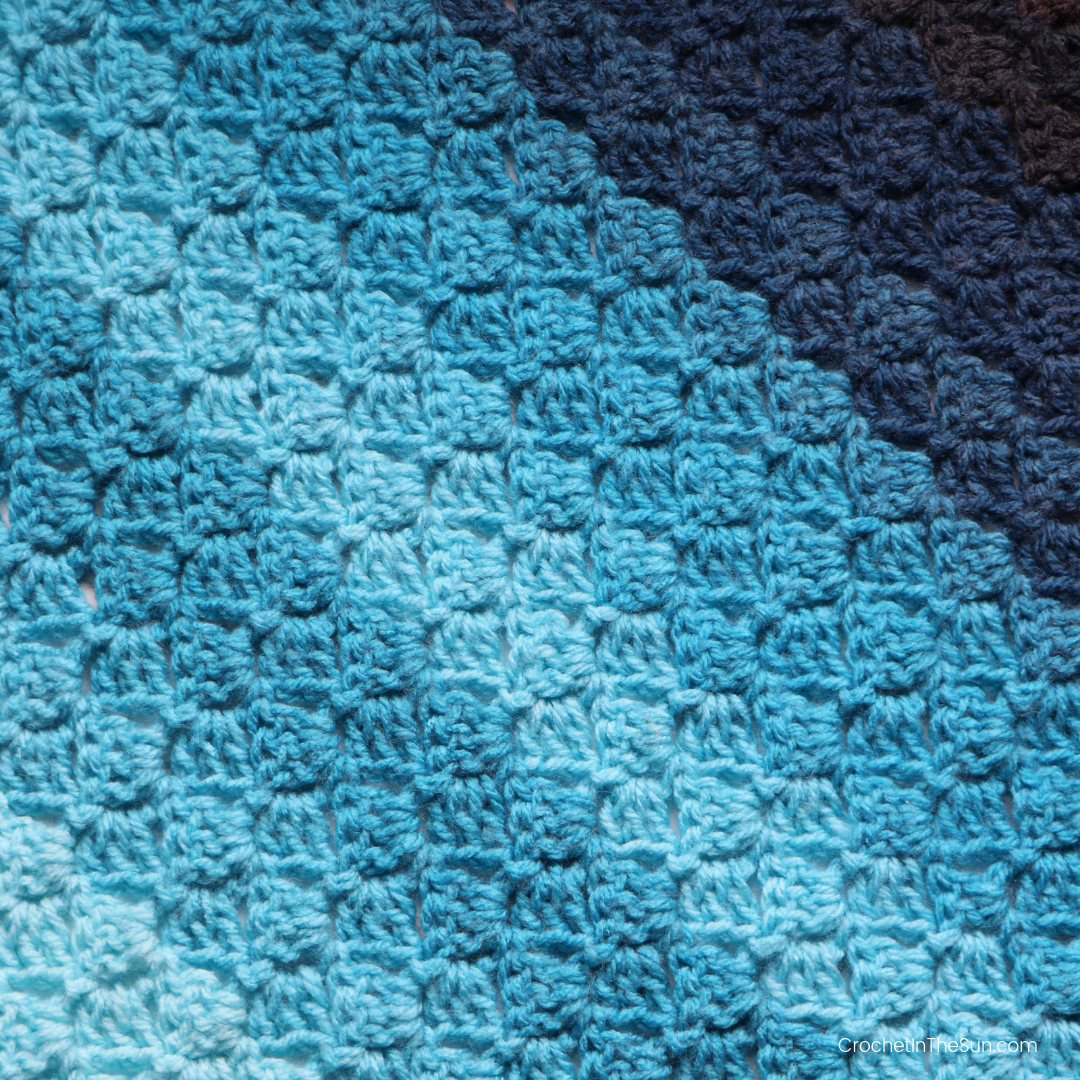
With Corner to Corner crochet, you start your project in 1 corner, work lots of blocks (or ’tiles’) in a diagonal fashion, and end in the opposite corner.
Need some supplies? Check out my Amazon storefront, which has a consolidated list of my favorite yarns, crochet hooks, and other crochet accessories you’ll need to complete your projects! These are the actual products I personally use and highly recommend.
As an Amazon Influencer, I may earn from qualifying purchases.
Why is C2C awesome?
Ease of the “Blanket of 3’s” pattern
Once you get the stitch pattern down, it becomes a nice and sometimes mindless project, since it constantly repeats. I think of it as the Big 3 pattern because I always found I’m counting “1, 2, 3, 1, 2, 3…”. Chain 1-2-3, 1DC, 2DC, 3DC, slip stitch, chain 1-2-3, 1DC, 2DC, 3DC, repeat.
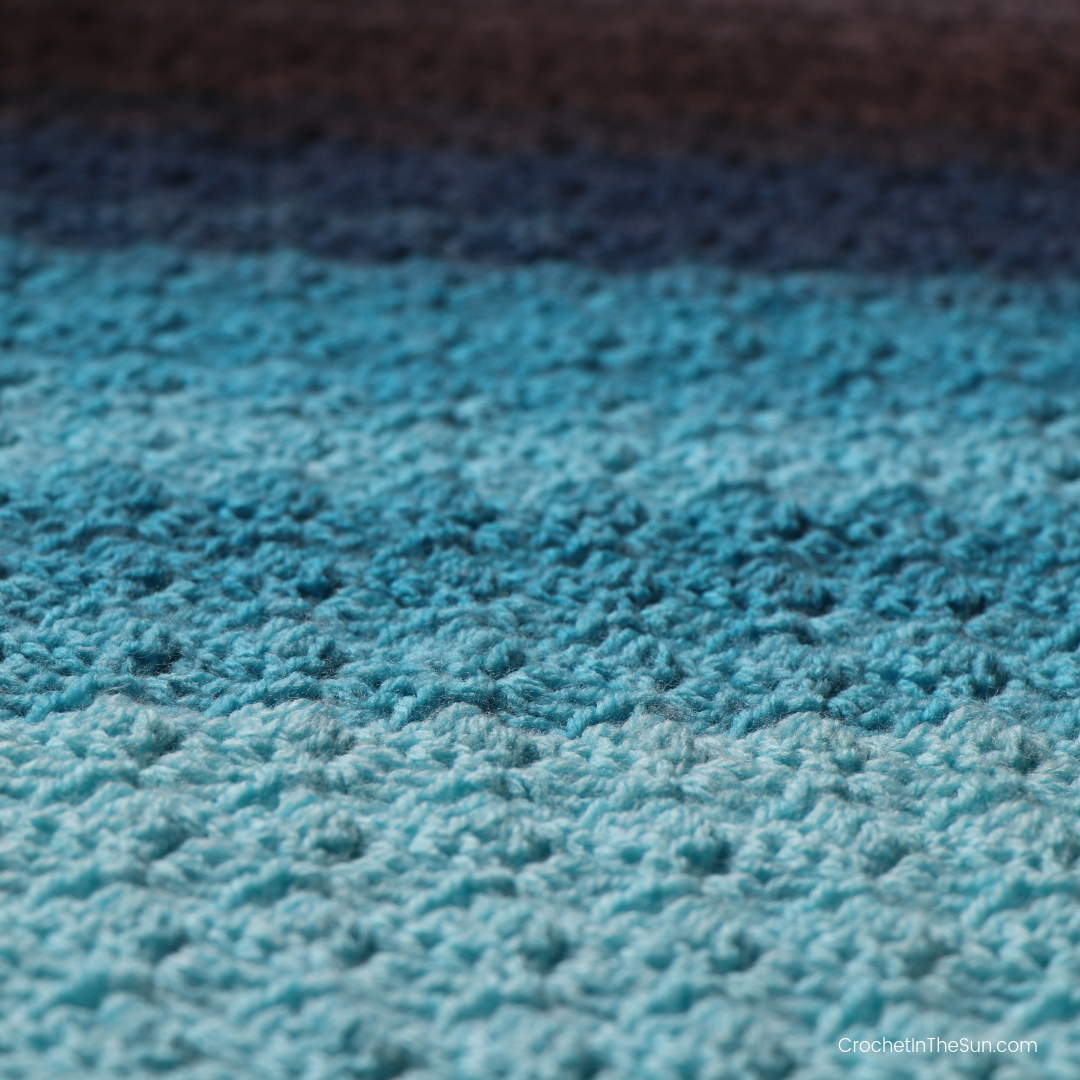
Also, simple color changes are fairly simple in C2C (yahoo!)
So many possibilities
May sound cheesy, but its true! C2C is so versatile, once you get the basics down, you can tackle blankets, wall-hanging decor, pillow covers, and many other designs using this technique.
Creative freedom
Do you like to let your creativity guide your work, or make changes on the fly? This lets you do just that.
The size of the project is determined by when you start to ‘decrease’. The design will keep getting bigger in both width and height until you start to decrease on 1 and eventually both sides.
This is pretty cool because you don’t necessarily need to have the exact dimensions planned out ahead of time, you can make these decisions as you go! However, if you’re following a set pattern or graph, then follow the pattern as stated.
So for example, depending on how quickly the color changes are coming (especially if you use self-striping, as you can’t plan that out), or honestly how long you want to work on the project, you can decide when to start wrapping up the project. Once you start decreasing on both sides, the design gets smaller and smaller, which is also great for us mentally because time flies by at the end!
Graphgans
Corner to Corner crochet is very unique since it allows you to crochet “pictures” – think anything from a heart, to a picture of a tiger, to an abstract design. That’s called a graphgan (its an afghan that is made of a graph of different colors, which form the picture or design). These possibilities are what honestly drew me to C2C in the first place.
Beauty
And lastly, it’s truly a beautiful stitch
Learning C2C
When I first started crocheting, I had never heard of C2C. I remember I was searching for Disney crochet patterns (as I always do), and found a blanket with the Mickey Mouse ears pattern. That was what led me to realize you can make a picture or detailed design using C2C. I was so excited! But soon after the excitement came a huge amount of confusion as to how the heck we actually work the stitches. At one point, I thought this was simply one aspect of crochet I wouldn’t tackle. But I promise, it’s not nearly as tricky as it seems!! Once you learn the technique, you’re set – off and running with endless design possibilities!
Have I convinced you to try C2C yet? Lets go!
Skill level
Easy
Note: If you don’t know how to crochet, or maybe just want to brush up on the basics, we have a great resource for you!
Hop over to the Ultimate Beginner’s Guide to Crochet. This breaks down the basics of what you need to learn, in what order, and link you directly to some great resources! And best of all, it’s free! Enjoy 🙂

Supplies


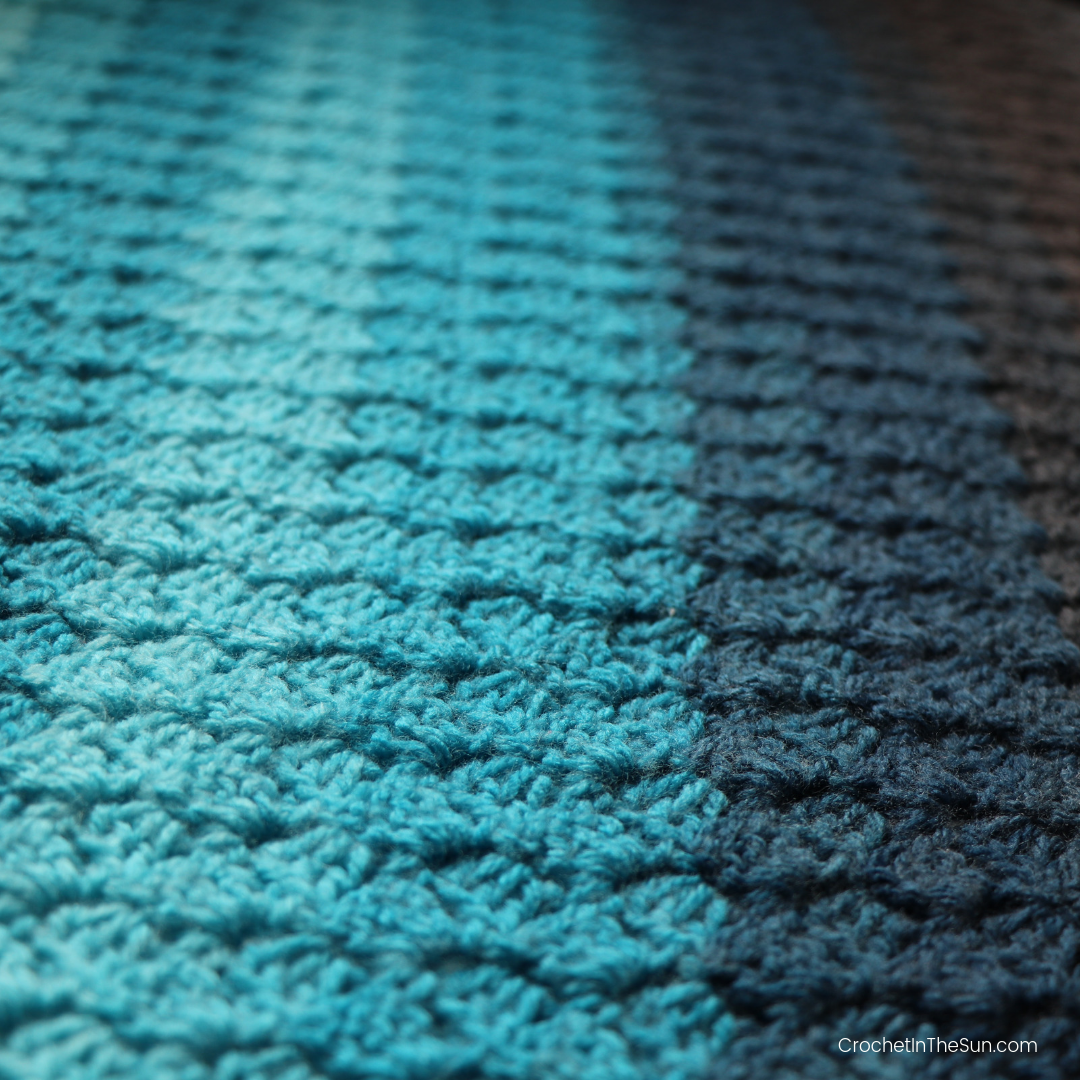
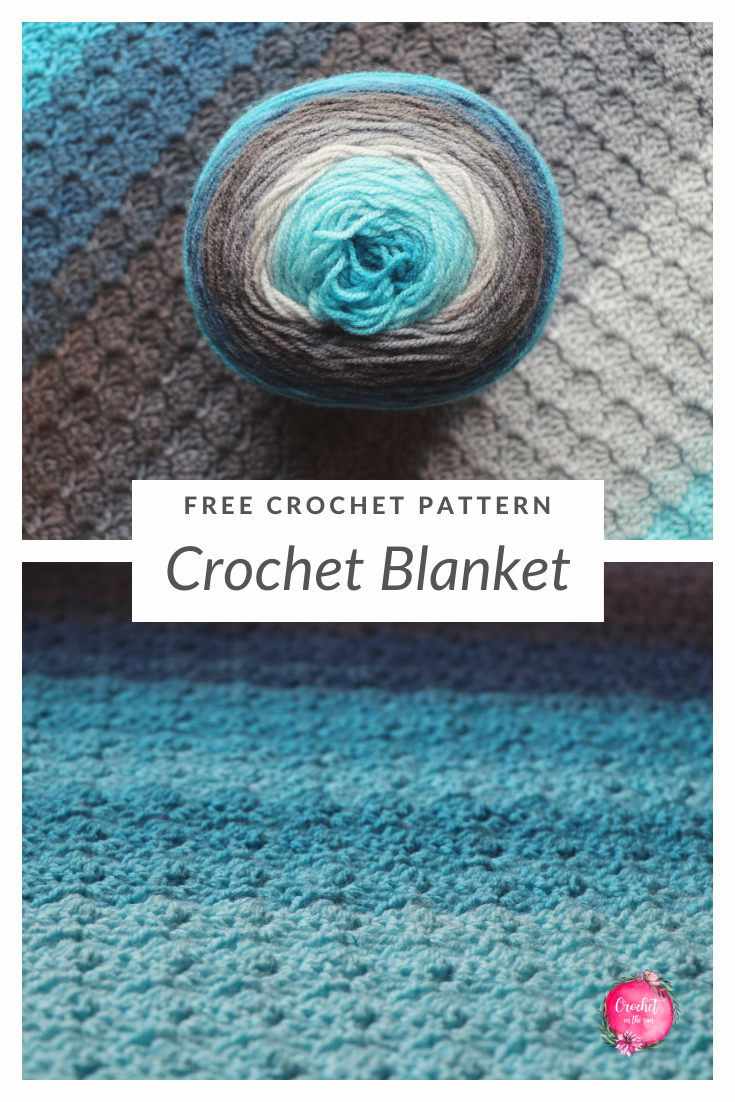
- Lion Brand Mandala in Spirit
- 5mm hook (I use ‘Loops & Threads’ and ‘Boye’ ergonomic hooks. You can find a full hook set here if you’re starting out or need to stock up!)
- Yarn Needle and scissors
Stitches (US terms)
- double crochet (dc)
- single crochet (sc)
- chain (ch)
- slip stitch (sl st)
If needed, refer to my Beginner’s Guide to crochet. Those stitch tutorials will walk you through how to complete the above stitches. If you need to convert from US to UK terms, have a look at this chart.
Special stitches
Here are the 3 special stitches you need for this last row of the border:
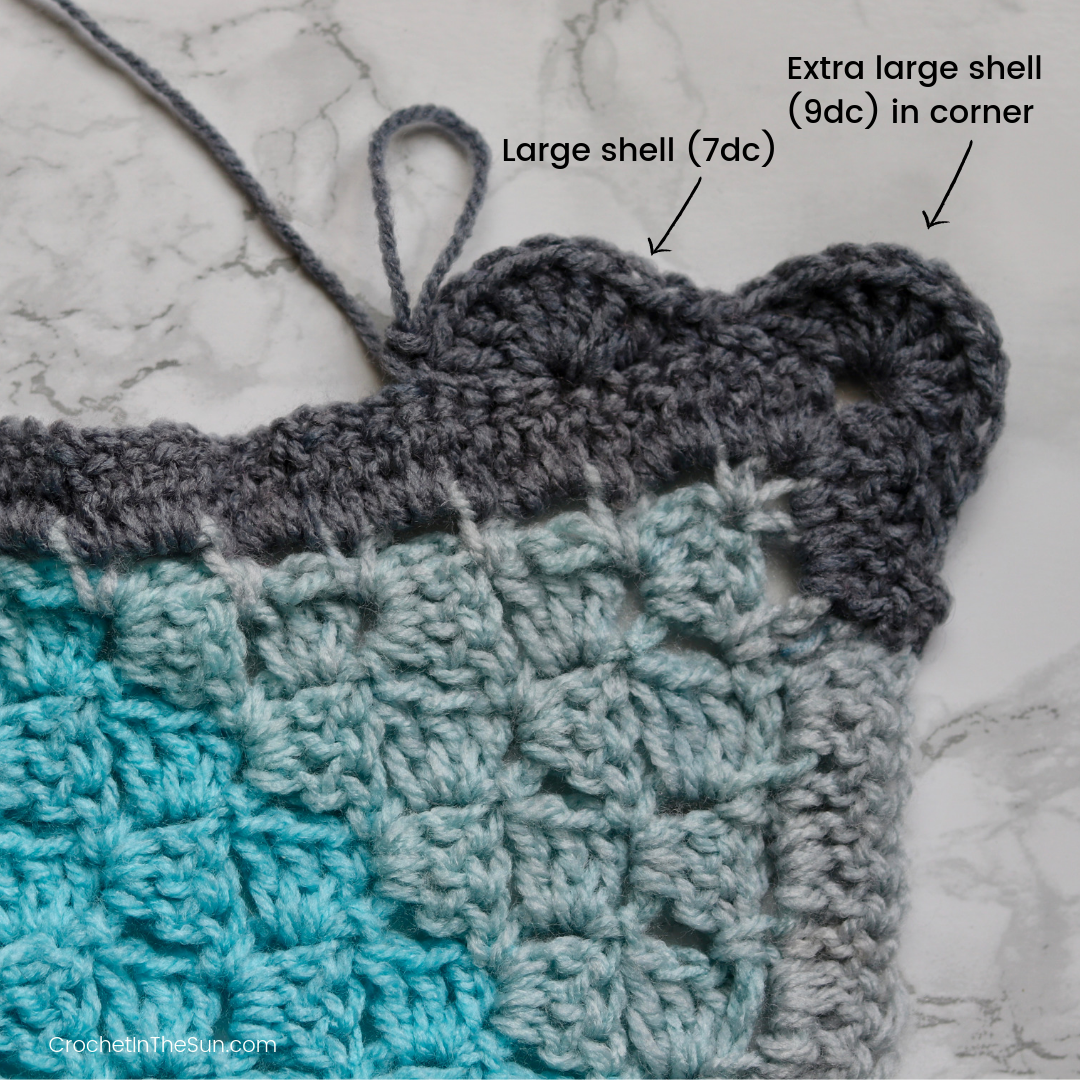
- Extra large shell: sc in the next st, skip 3 st, 9 dc in the corner, skip 3 st, sc in next st. Working 9 dc instead of 7 dc will make this shell a bit bigger, which is why we work this in the 4 corners
- Large shell: sc, skip 3 st, 7 dc in the next st, skip 3 st, sc in the next st
- Small shell: sc, skip 1 st, 4 dc in the next st, skip 1 st, sc in the next st
** IMPORTANT NOTE: In this pattern, since the border has the shell stitches continuously next to each other, we will count the last sc of one shell as the first sc of the next shell. You do NOT need to work 2 sc’s back-to-back.
Gauge
4 inches = 6 blocks x 6 blocks (so thats 24 dc’s x 6 rows)
A “block” is a set of 4 double crochets (ch3 + 3 dc in the chain space from the previous row)
Finished measurement
31 x 28 inches (not blocked)
Useful crochet resources
- Crochet hook size conversion chart
- Yarn weight conversion chart
- Stitch conversation chart (US vs UK)
- Ultimate Beginner’s Guide to Crochet
Pattern
- Get the inexpensive ad-free printable PDF from my Etsy Shop
- Pin this pattern to your Pinterest Boards
- Add this pattern to your Ravelry queue
- Buy directly below using Shopify
Blanket
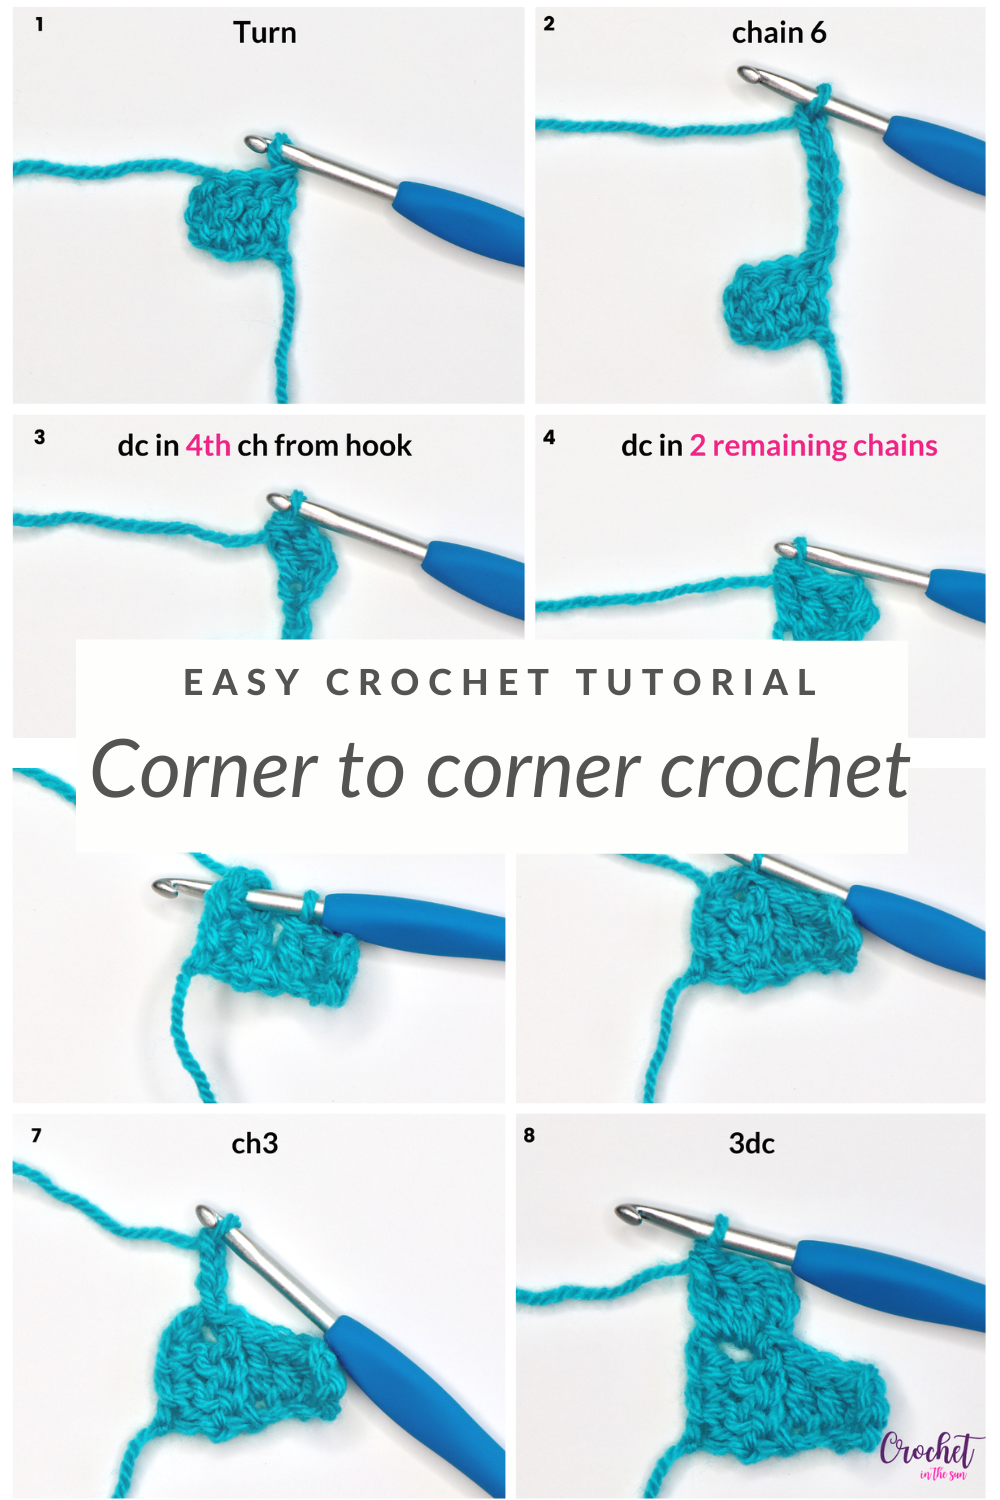
New to c2c? Learn how to corner to corner crochet with my step-by-step photo tutorial:
Work the C2C pattern until you have 37 blocks wide x 40 blocks.
This means two opposite sides will have 37 blocks and the other two opposite sides will have 40 blocks.
Border
The border is worked in 3 rows. The 1st is the border prep, the 2nd lays a nice base of double crochets, and the 3rd and final round is the fancy part.
Row 1: Border Prep
If you’re using the same yarn as the blanket:
- Finish the last C2C square and sl st to join. This brings you to 1 square to the side of the corner (see photo).
- Chain 3 then sc in the next gap between the squares. Repeat (ch 3, sc) until you reach the corner.

- In the corner: sc, ch 3, sc
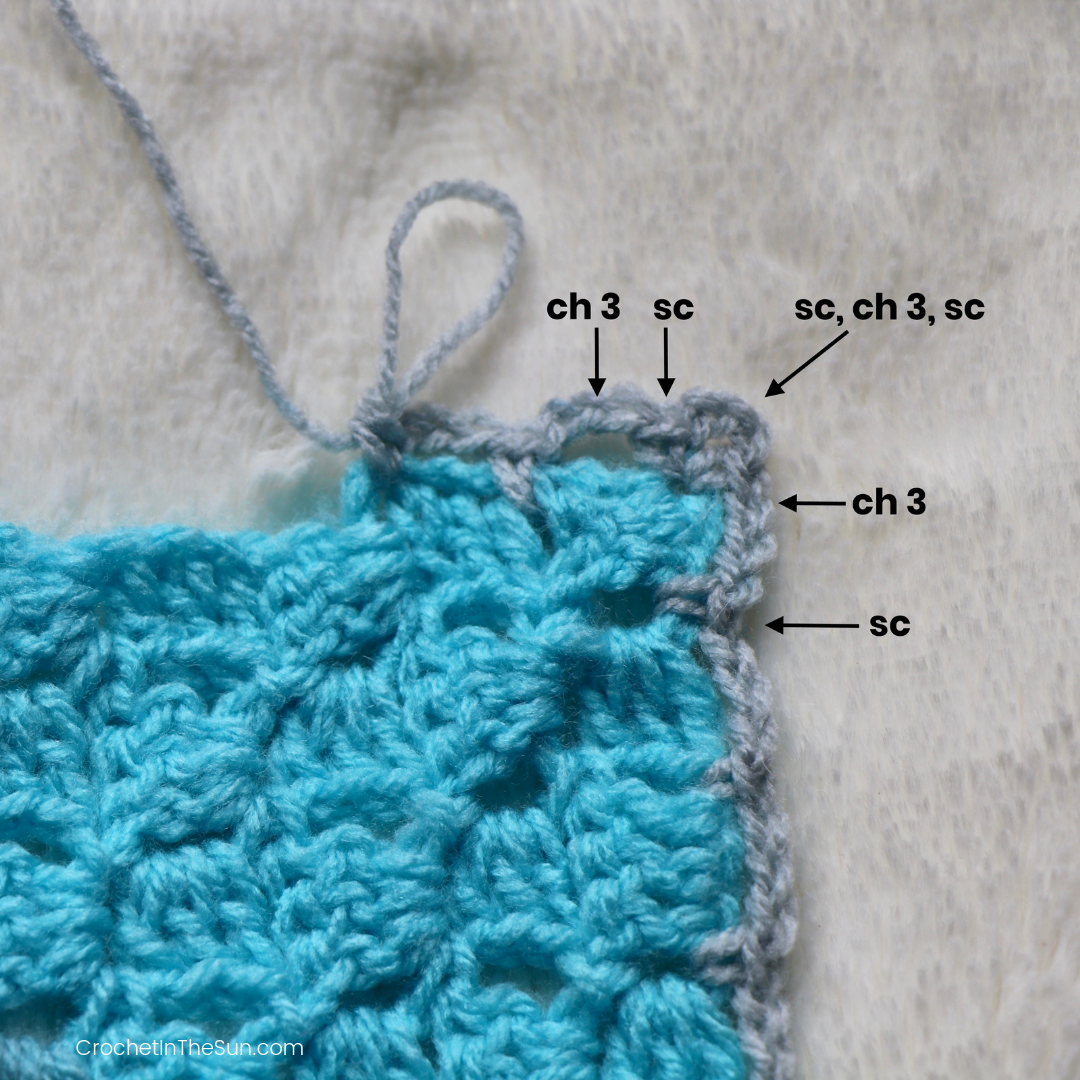
- Continue repeating (ch 3, sc) along the sides and (sc, ch 3, sc) in the corners).
- Repeat until you finish the row, where you will work a sc right before the first ch 3 you completed in this row. Do NOT turn.
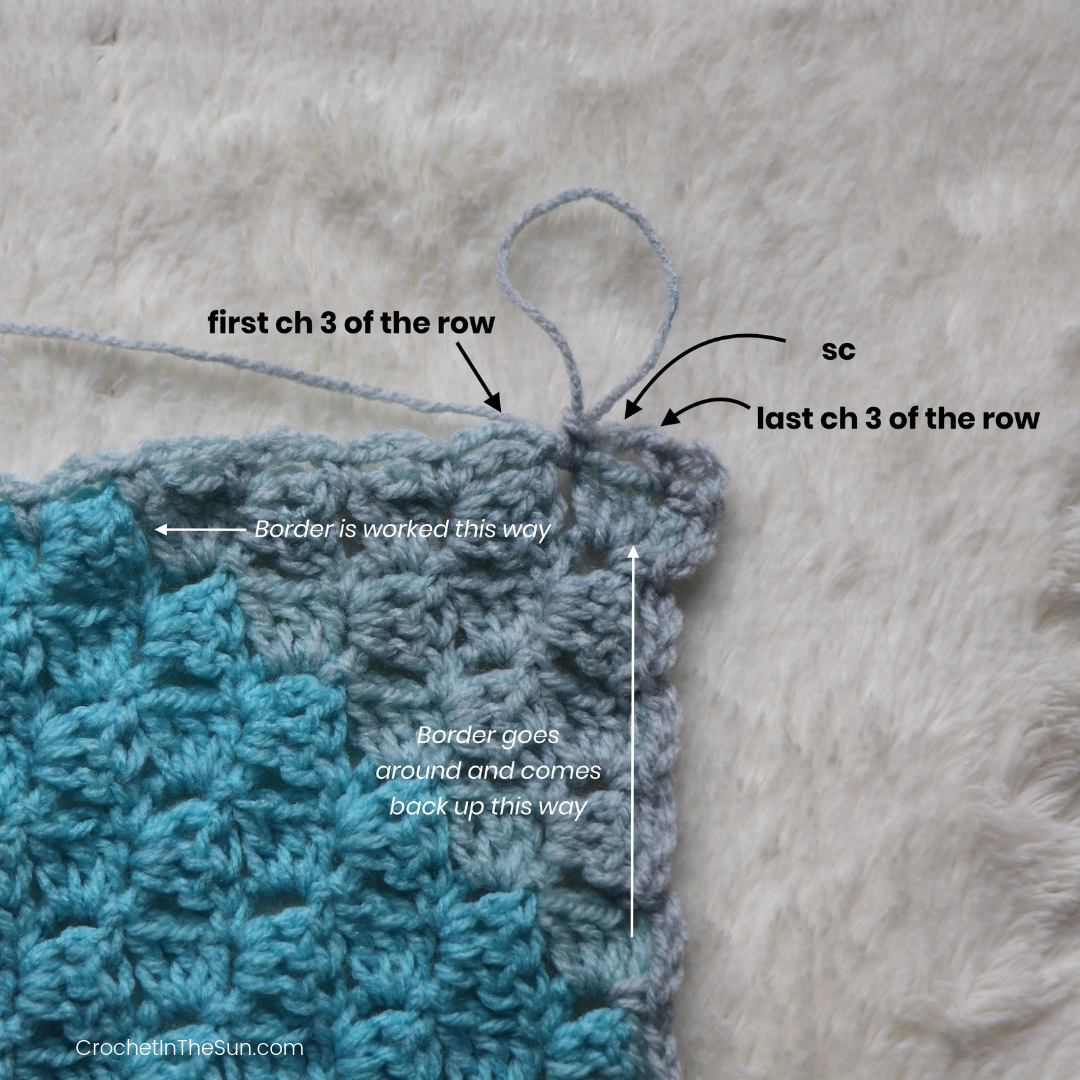
Working this “border prep” will make it easier to add a border to any corner to corner piece because we now have the same pattern along every edge, regardless of which way the C2C squares were facing.
If you want to use a different yarn for your border:
- Insert your hook through the gap in between any 2 squares (it doesn’t matter where you start) and work a single crochet.
- Follow the same instructions as above where you continue repeating (ch 3, sc) along the side and (sc, ch 3, sc) in the corners). When you finish the round, sl st in the original sc to join.
Row 2: Double crochets
- ch 3, Repeat (3 dc in the ch 3 space, dc in the sc) until you reach the corner.
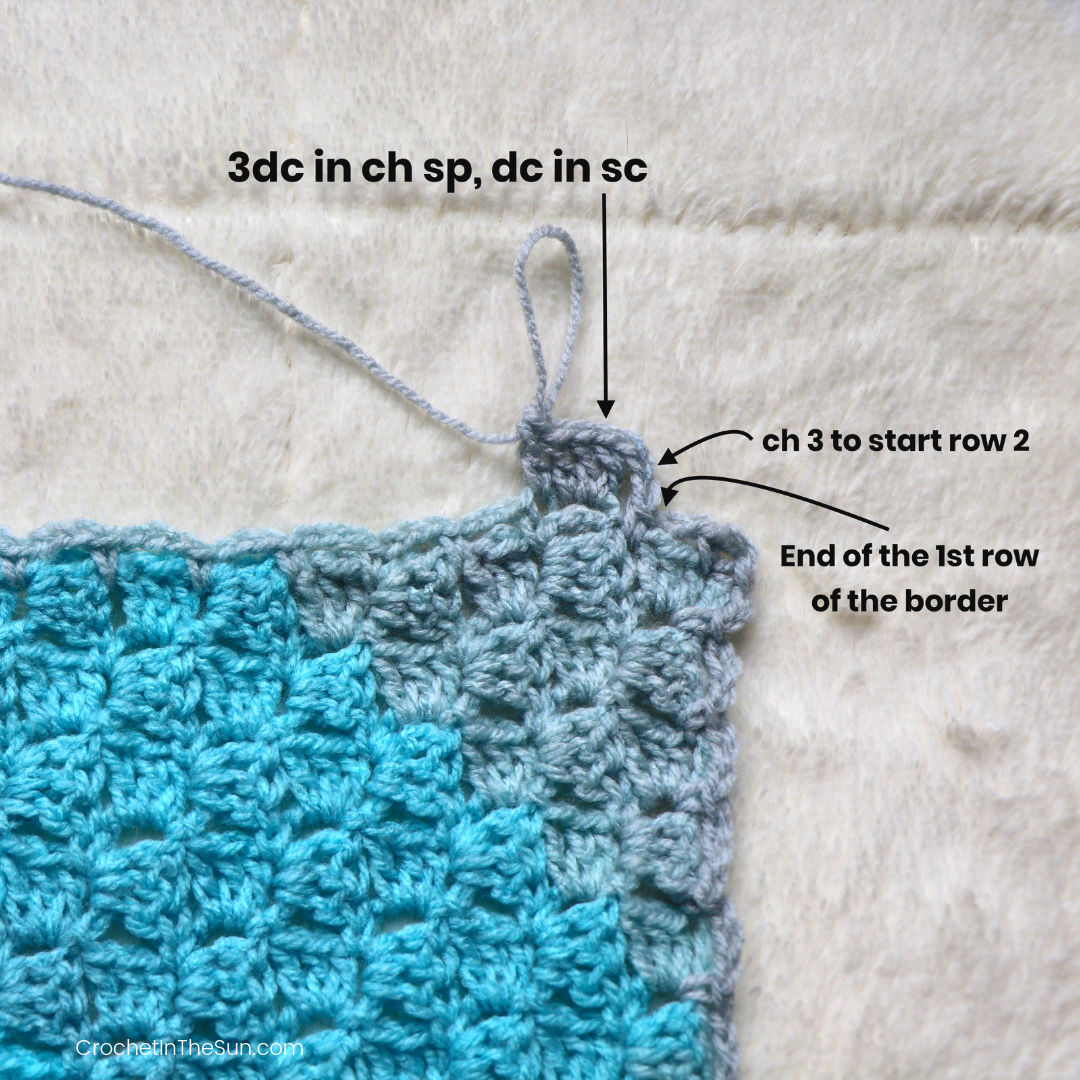
- In the corner: 2 dc + ch 2 + 2dc in the corner stitch
- Along the sides: dc in the sc, then repeat (3 dc in the ch 3 space, dc in the sc).
- Continue repeating the above 2 bullet points until you finish this row.
- sl st to join with the initial ch 3 of this round. TURN your work.
Row 3: Shell border
Ok, here’s the fancy fun part 🙂
Heads up, if you have a different number of blocks than planned, DO NOT WORRY. The great thing about blankets is there is no wrong size! Keep on stichin’ and absorb any difference in stitches by making a shell a bit bigger or smaller as needed (i.e. adjust the number of stitches you skip, and the number of dc’s if needed). Remember, Homemade does not mean it has to be perfect every single time!
Side 1
- Sl st in next 2 stitches. You should now be in the 5th stitch from the corner. I did this so we could complete the corner shell, then work from there. (I personally think its easier to tackle that way)
- Extra large shell in the corner
- Repeat (large shell, small shell) across the side. You should have 12 large shells and 12 small shells. After you finish those 24 shells, you will be 6 stitches from the corner.
- Sl st into the next stitch, bringing you to the 5th stitch from the corner
- Extra Large shell in corner: sc in the 4th st from the corner, skip 3 st, 9 dc in corner, skip 3 st, sc in the next st.
Side 2
- Repeat (large shell, small shell) across the side. You should have 13 large shells and 13 small shells. You should now be in the 6th stitch from the corner.
- Sl st into the next stitch, bringing you to the 5th stitch from the corner
- Extra Large shell in corner: sc in the 4th st from the corner, skip 3 st, 9 dc in corner, skip 3 st, sc in the next st.
Side 3
- Repeat (large shell, small shell) across the side. You should have 12 large shells and 12 small shells.
- Extra Large shell in corner

Side 4
- Repeat (large shell, small shell) across the side. You should have 13 large shells and 13 small shells.
- Sl st into the 1st sc of the corner shell. Fasten off and weave in your ends. You’re done!!
I hope you enjoyed making this blanket! Especially if this was your first C2C blanket, great job sticking with it!! If you make one and share on social media, please link back to my blog and provide credit for the pattern. Also use the hashtag #crochetinthesun so we can see those beautiful blankets!
Happy crocheting,
Jennifer
Pin for later


Thank you for this easy pattern. I was able to follow easily, which is big for me since I just started learning to crochet.
I would like to make this same blanket for a twin size bed the measurements would be about 60×90. Would I make it 77 blocks wide and 117 blocks long?
Hi Kristi! Overall, I would suggest measuring it along the way, and once you get to the desired dimension on one side (e.g. 90 wide), start your decrease, then keep doing that until you reach the other desired dimension e.g. 60 long.
Or – you can change that around and work until it’s 60 wide, start decreasing, and keep going until it’s 90 long. I hope that helps!
Beautiful blanket! I am planning on making this exact same blanket with the Mandela ombre yarn. I have used ombre yarn in the past and just randomly joined the next cake when I ran out of one. I am trying to find something that shows me how to make the colors flow without having to chop up the yarn and figure out the colors (going from light to dark or from dark to light). Not sure if that makes any sense at all, but I can’t find any instructions like that anywhere. What I mean is that I want the colors to go dark to light then light to dark.
Stunning! Can you share how much yarn was used for the size you created? I’ve read it twice but can’t find exact yardage or number is skeins used.
Thank you!
Hey! How much yarn was used to create this blanket? Was it one or two cakes? Or more? Hoping to make it for a baby shower but want to make sure I have the proper amount first!
Author
Hi! I used 2 cakes and a little bit of a 3rd. If you want to keep it to 2 cakes though, you could start decreasing 1 or 2 rows sooner so you use less yarn.
I’ve been searching for a good border for my C2C blankets – this one is perfect! Thanks so much for the tutorial!
Author
Aw thanks Sarah! Feel free to share some pictures of the blankets too!
Perfect just what I was looking for, making a small c2c baby blanket. Wanted something light and airy looking!