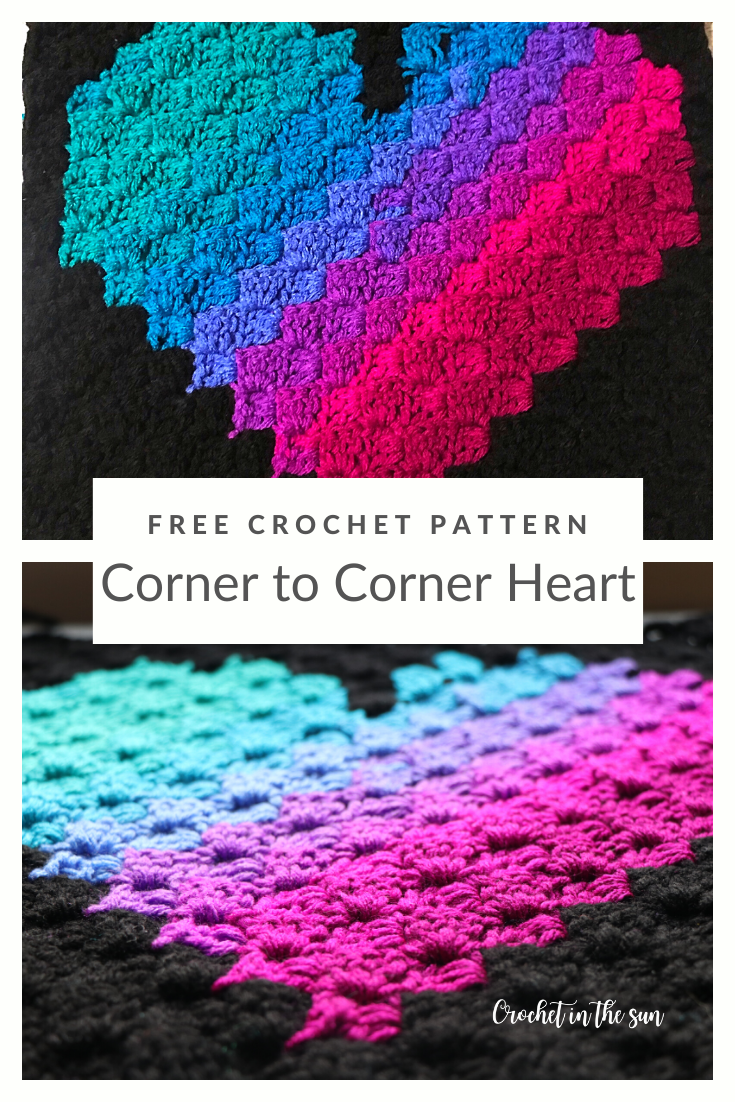
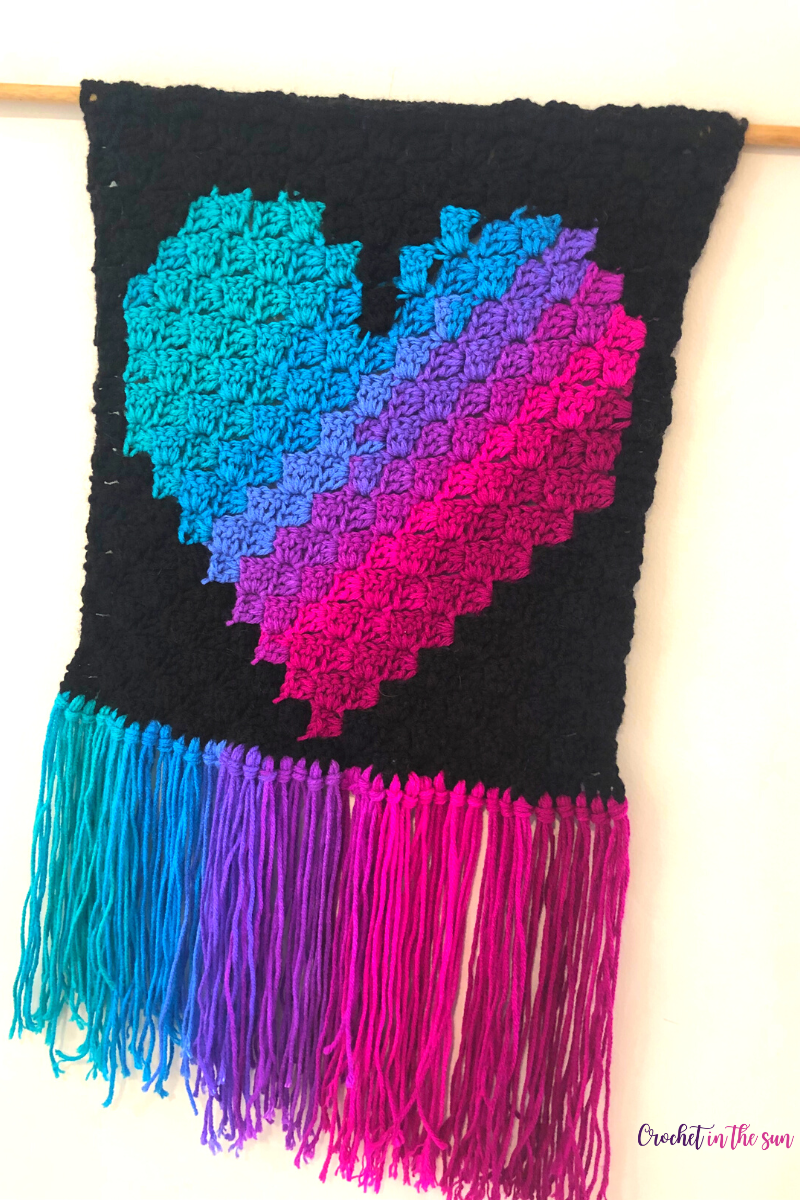
Hearts + crochet + wall hanging = awesome crochet project! This crochet wall hanging was made using the Corner to Corner (C2C) method, following a simple pattern for the heart design.
The Corner to Corner method is a favorite within the crochet community, and there have been TONS of wall-hanging crochet patterns popping up on Pinterest lately, so this pattern is the best of both worlds 🙂
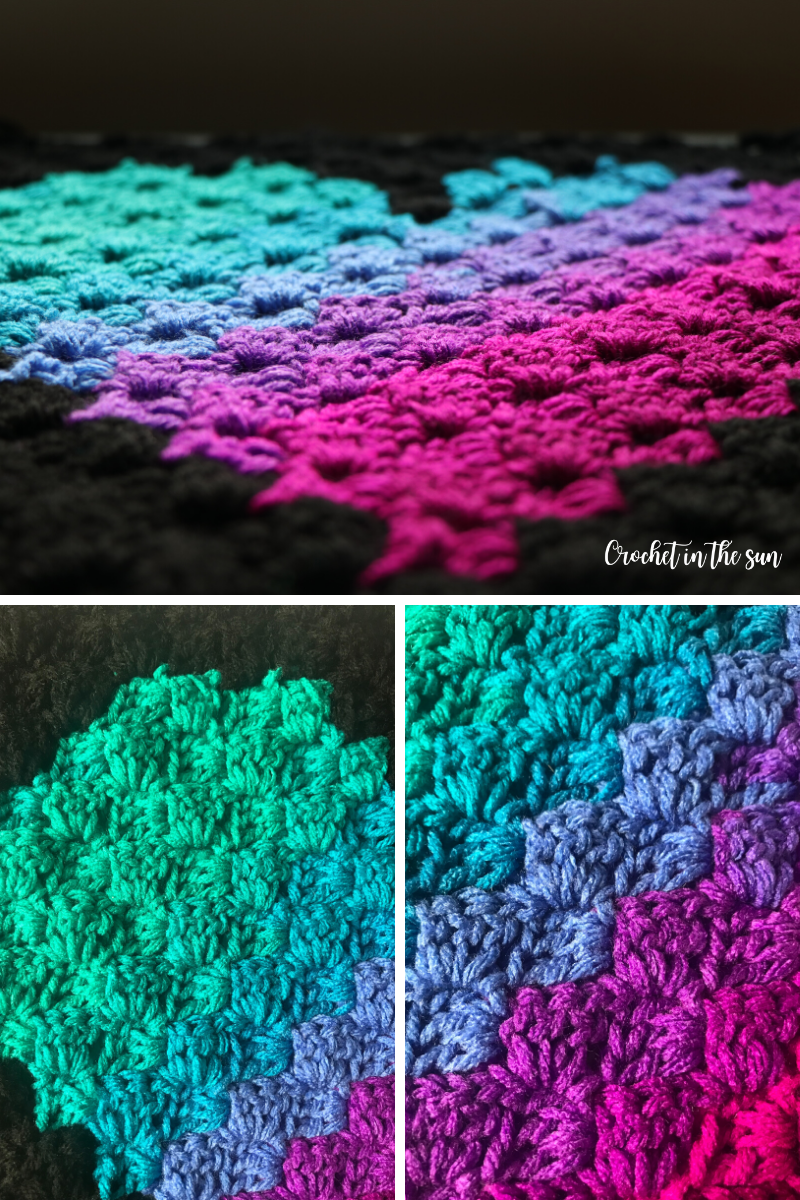
Red Heart Stripes was used for the “heart” portion of this design, but feel free to try this using 1 solid color for the heart, different colors every row of the heart, or something in between. (On ombre would look great!). Depends on what look you’re going for!
This design was made as a wall-hanging (attach to a dowel and add tassels), but could also be:
- Pillow cover – use neutrals for a cool/relaxing space, or use more bold and bright colors for an accent pillow.
- A granny square-like Blanket, by stitching together a bunch of these blocks, as you would a typical granny square blanket.
- Large afghan – With some math, you can enlarge this pattern to 1 GIANT heart.
- Scarf – Again, with some math, you can make this pattern smaller overall and turn this into a scarf by connecting the small heart squares in 1 or 2 rows.
New to crochet?
If you don’t know how to crochet, or maybe just want to brush up on the basics, we have a great resource for you!
Hop over to the Ultimate Beginner’s Guide to Crochet. This breaks down the basics of what you need to learn, in what order, and link you directly to some great resources! And best of all, it’s free! Enjoy 🙂
Now, onto the details!
Skill Level
Easy
Yarn and materials


- Red Heart Super Saver Stripes in Black (1 skein)
- Red Heart Super Saver Stripes in Polo Stripe (1 skein)
- 5mm crochet hook (US H-8)
- Needle and scissors to cut the yarn and weave in the ends. I linked a colorful pair to cheer up your craft stash 🙂
- Wooden dowel, if you want to use attach & use as a wall-hanging
Stitches (US Terms)
- chain (ch)
- double crochet (dc)
- slip stitch
If needed, refer to my Beginner’s Guide to crochet. Those stitch tutorials will walk you through how to complete these stitches. If you need to convert from US to UK terms, have a look at this chart.
Gauge
4 inches x 4 inches = 5 “tiles” across and 5 “tiles” down
Finished Measurement
13.5 inches x 13.5 inches (not blocked)
Pattern Notes
- Linked below is a step-by-step photo tutorial for Corner to Corner, in general. You will follow those instructions but use this pattern’s chart to determine when to change colors and when to start decreasing.
- Link: Learn corner to corner (c2c) crochet with my step-by-step photo tutorial.
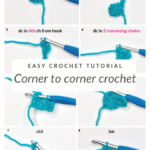
- This tutorial includes a Chart as well as written instructions (Rows 1-33)
- This pattern uses 2 balls of yarn (black and the polo stripe in my case), however please note that you will need 2 working strands of the background yarn at certain times. Below shows why – you will have to pick up the black yarn at either end of the heart:
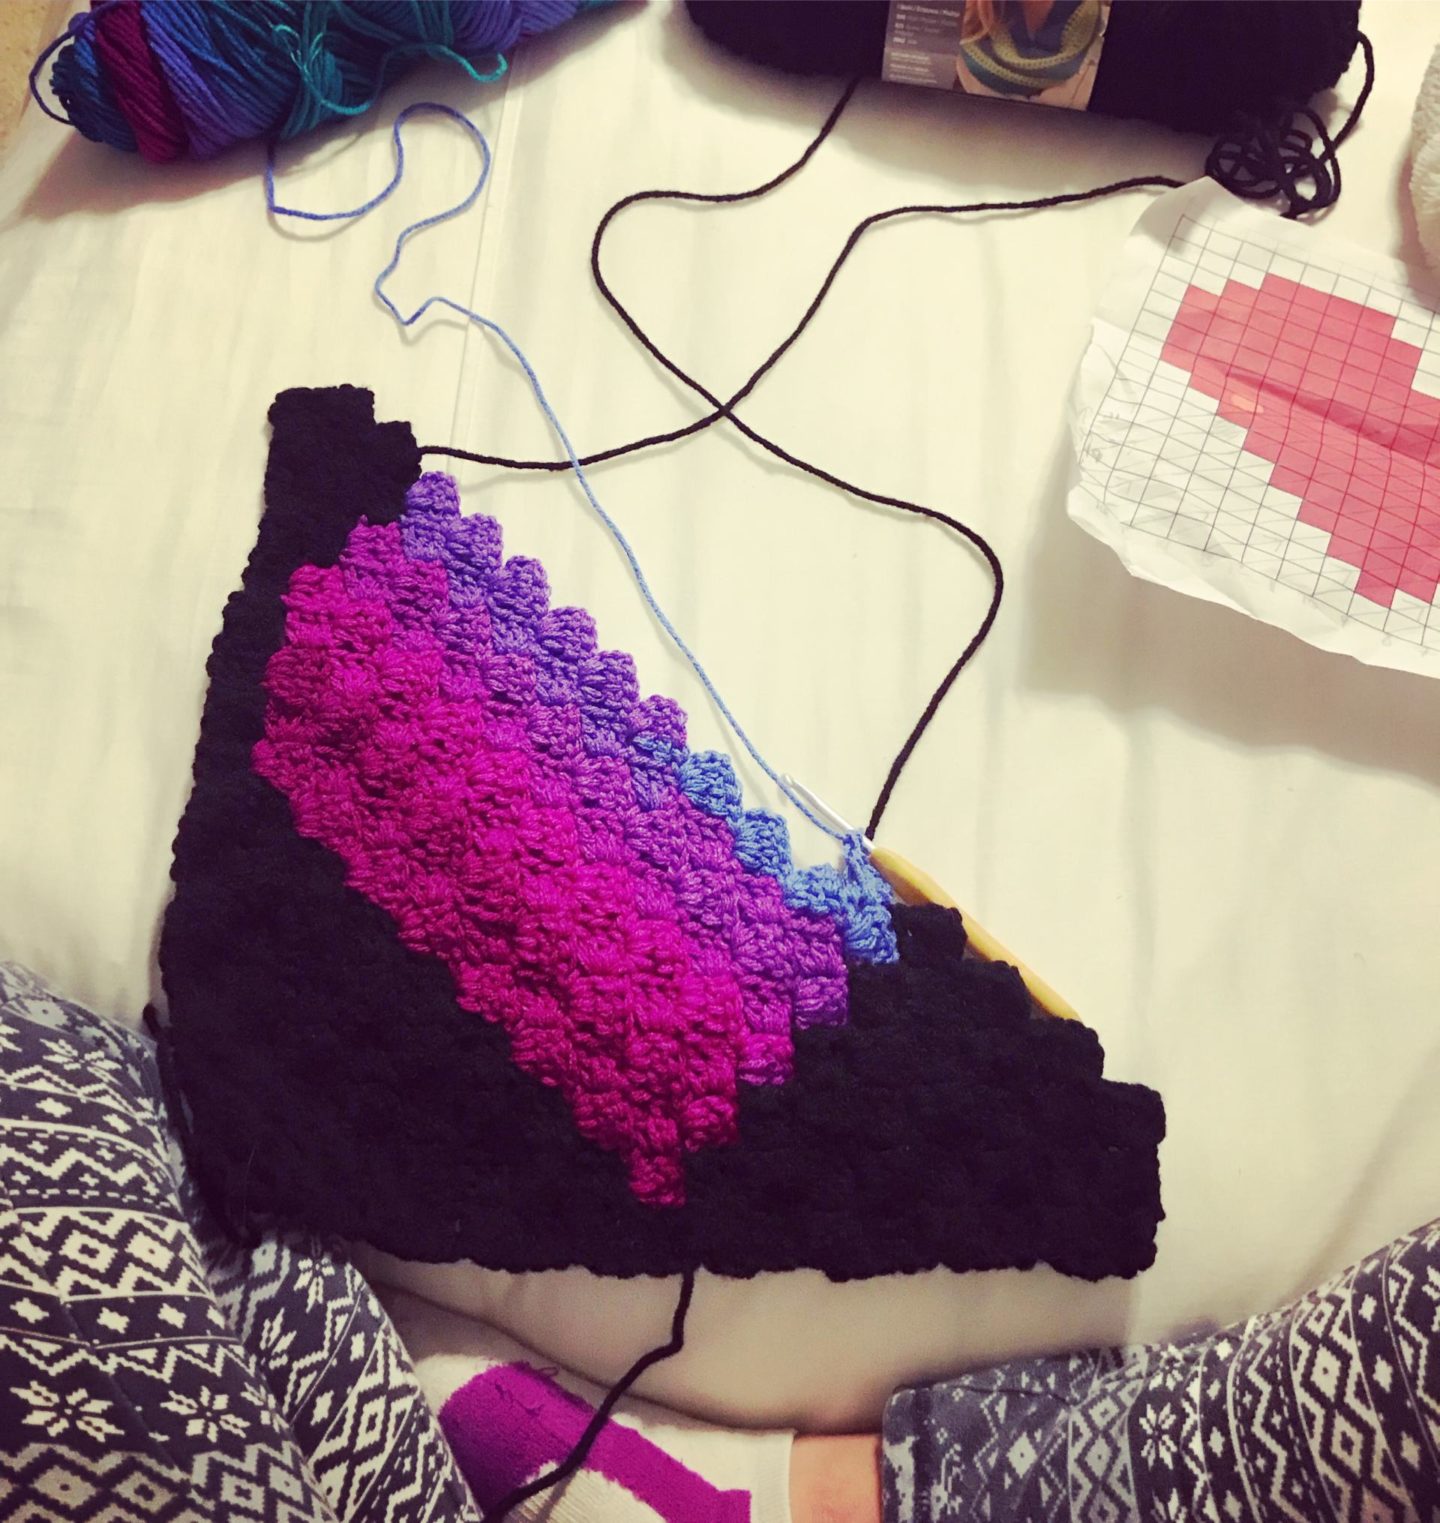
Note: Technically you could carry the black yarn back and forth, but that would waste a lot of precious yarn!
Tips on color changes
This does involve quite a few color changes, but don’t be scared! Let’s break it down into steps:
- How to change colors in crochet – in general?
- In what stitch do I change colors in Corner to Corner?
For #1: In general, you change colors in crochet by completing the last part of the previous stitch with the new yarn. (When I say the last part of the stitch, thats the last ‘yarn over, pull through’ sequence.)
For #2: In the tile before you want to change colors, complete the last stitch of the dc in your new color. Then continue as you would, with the new color (sl st, ch 3, 3dc, repeat). See below
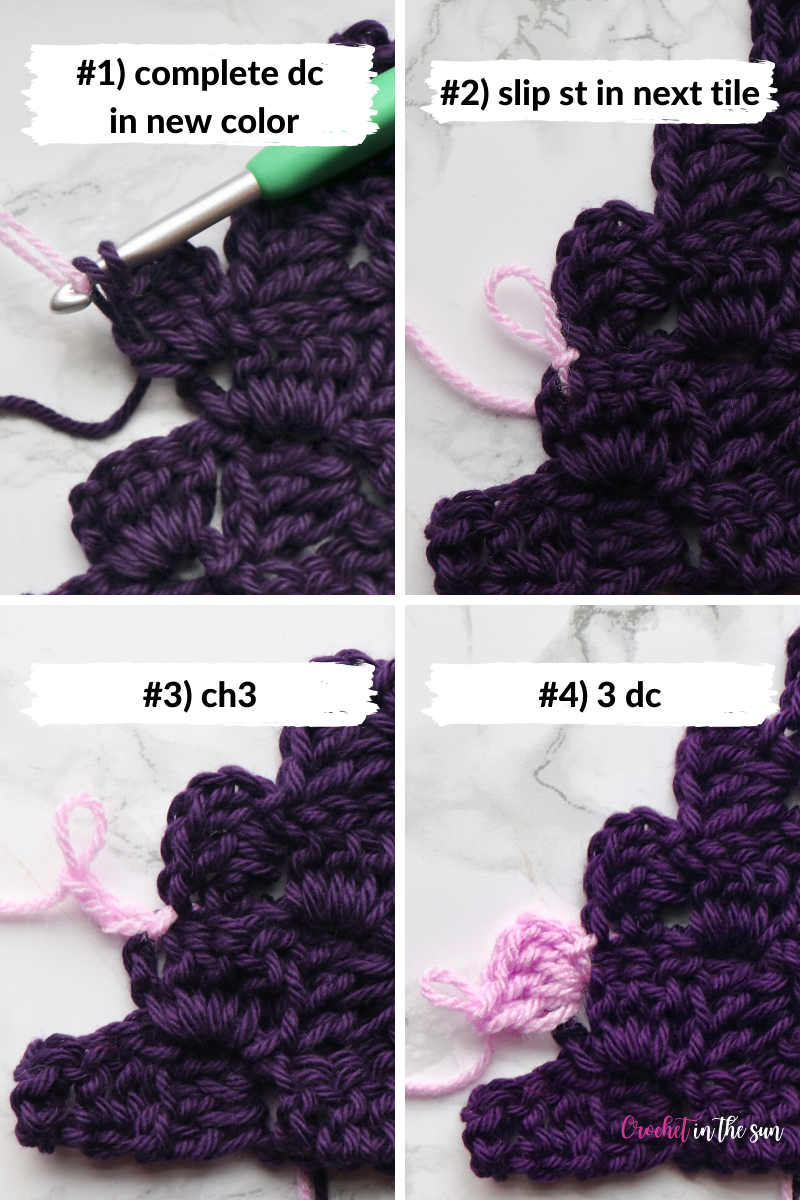
There you go!! You completed your first color change in corner to corner!
Pattern
- Get the inexpensive ad-free PDF printable from my Etsy Shop
- Pin this pattern to your Pinterest Boards
- Add this pattern to your Ravelry queue
- Buy this pattern directly below via Shopify
Pattern (written)
Below will refer to the number of Tiles in each row. The total number of tiles for the row is written in brackets.
- MC = main color (black yarn)
- AC = alternative color (self-striping yarn)
Row 1: 1 MC (odd rows go ‘up’ the chart)
Row 2: 2 MC (even rows go ‘down’ the chart)
Row 3: 3 MC
Row 4: 4 MC
Row 5: 5 MC
Row 6: 6 MC
Row 7: 7 MC
Row 8: 8 MC
Row 9: 9 MC
Row 10: 1 MC, 8 AC, 1 MC [10]
Row 11: 2 MC, 8 AC, 1 MC [11]
Row 12: 1 MC, 9 AC, 2 MC [12]
Row 13: 3 MC, 9 AC, 1 MC [13]
Row 14: 1 MC, 10 AC, 3 MC [14]
Row 15: 4 MC, 9 AC, 2 MC [15]
Row 16: 2 MC, 10 AC, 4 MC [16]
Row 17: 5 MC, 9 AC, 3 MC. [17] Begin decreasing here!
Row 18: 2 MC, 10 AC, 4 MC [16]
Row 19: 4 MC, 9 AC, 2 MC [15]
Row 20: 2 MC, 9 AC, 3 MC [14]
Row 21: 3 MC, 5 AC, 1 MC, 2 AC, 2 MC [13]
Row 22: 4 MC, 6 AC, 2 MC [12]
Row 23: 2 MC, 6 AC, 3 MC [11]
Row 24: 3 MC, 6 AC, 1 MC [10]
Row 25: 1 MC, 6 AC, 2 MC [9]
Row 26: 2 MC, 5 AC, 1 MC [8]
Row 27: 1 MC, 4 AC, 2 MC [7]
Row 28: 2 MC, 3 AC, 1 MC [6]
Row 29: 5 MC
Row 30: 4 MC
Row 31: 3 MC
Row 32: 2 MC
Row 33: 1 MC
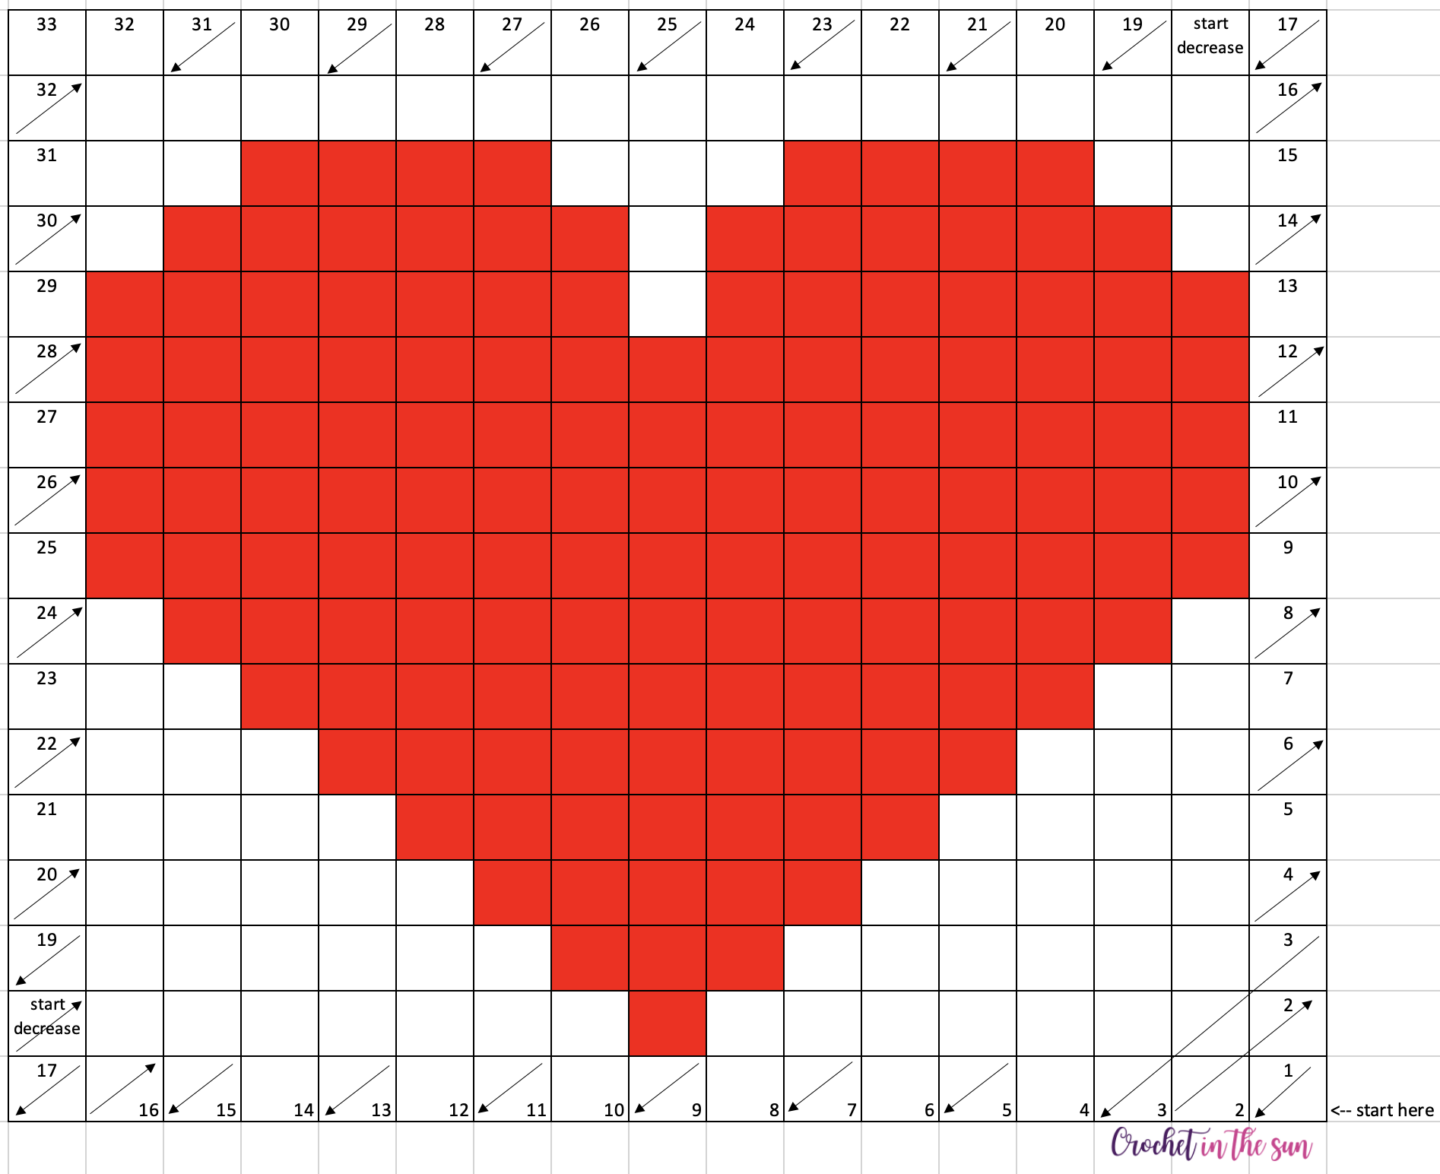
Pattern (chart)
Given this C2C chart, you will start from the bottom right corner and end at the top left corner.
And remember, at the end of each row, you turn your work. Yes, it can get a bit messy when you have multiple balls of yarn attached, but please just be patient! Try and turn your work each time so it kind of “cancels” each other out e.g. turn right, turn left, turn right, turn left, etc.
The twisted yarn will be worth it, trust me!! You’ll end up with a gorgeous little heart, and might even venture into some more difficult C2C graphs in the future 😉
NOTE: You can also use this chart while following intarsia crochet method. I haven’t tried that yet, but I would love to see if others try it out! So please share if you do 🙂
Tassels
First, decide if you want to randomly spread the colors of the tassels across the project, or have the tassels coordinate with the heart. I decided to have them coordinate, so the tassels are the same color as the heart, but both would look great!
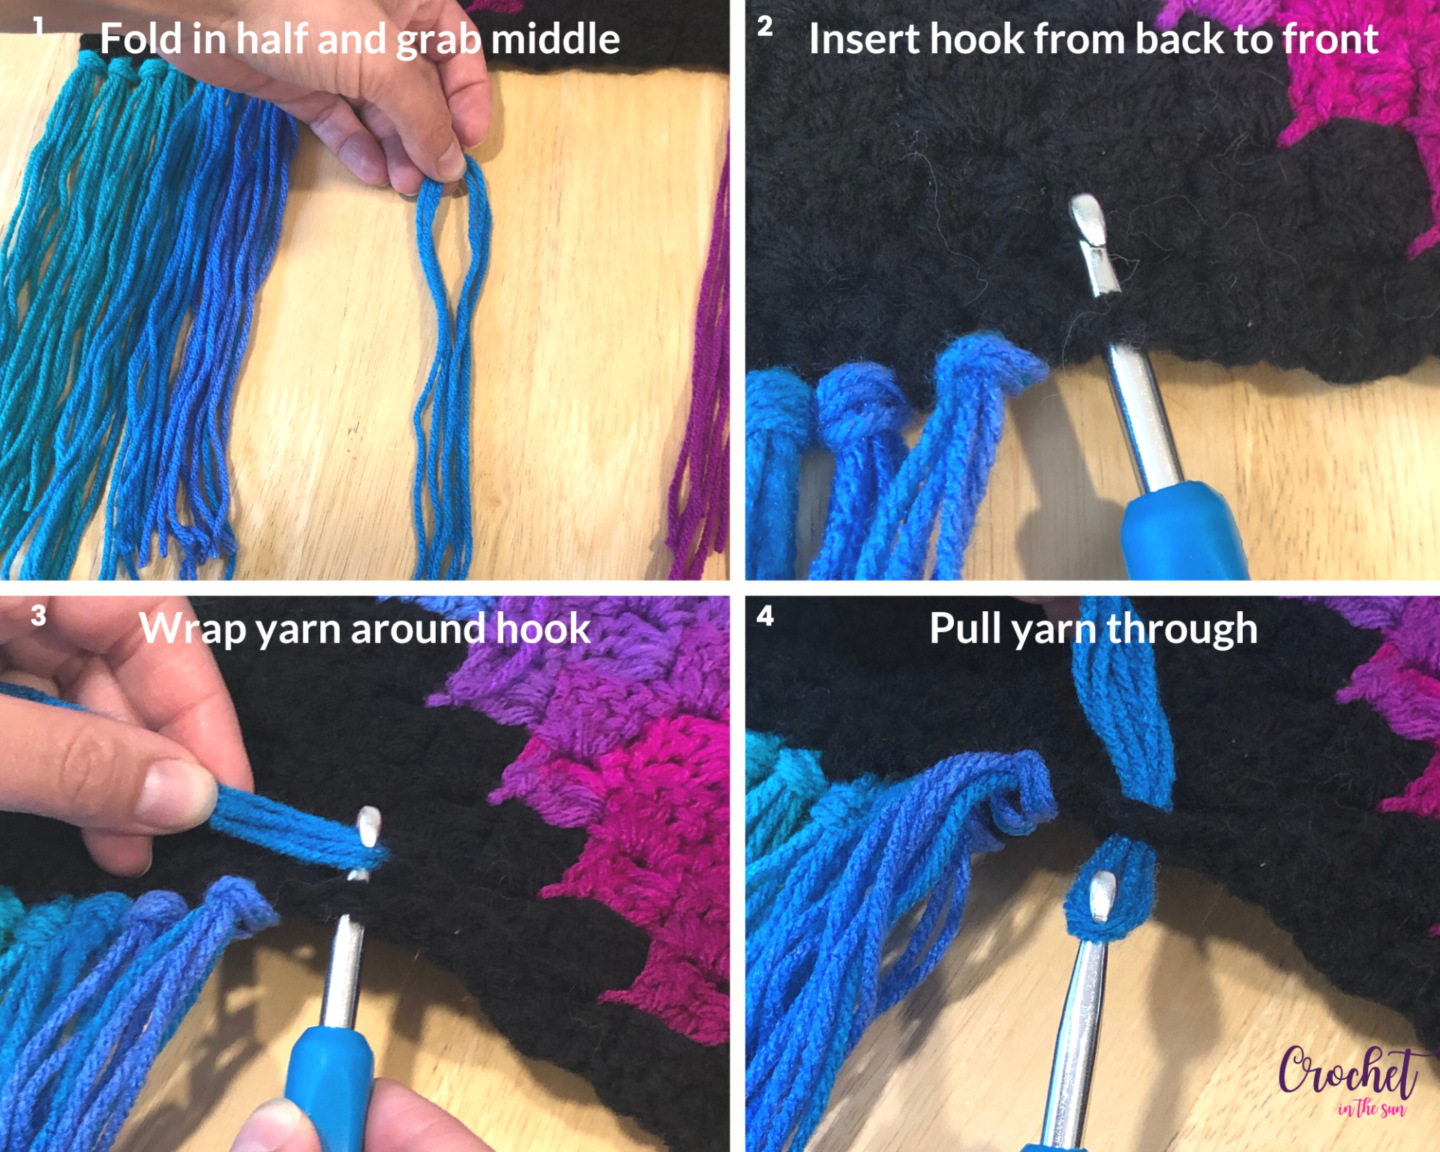
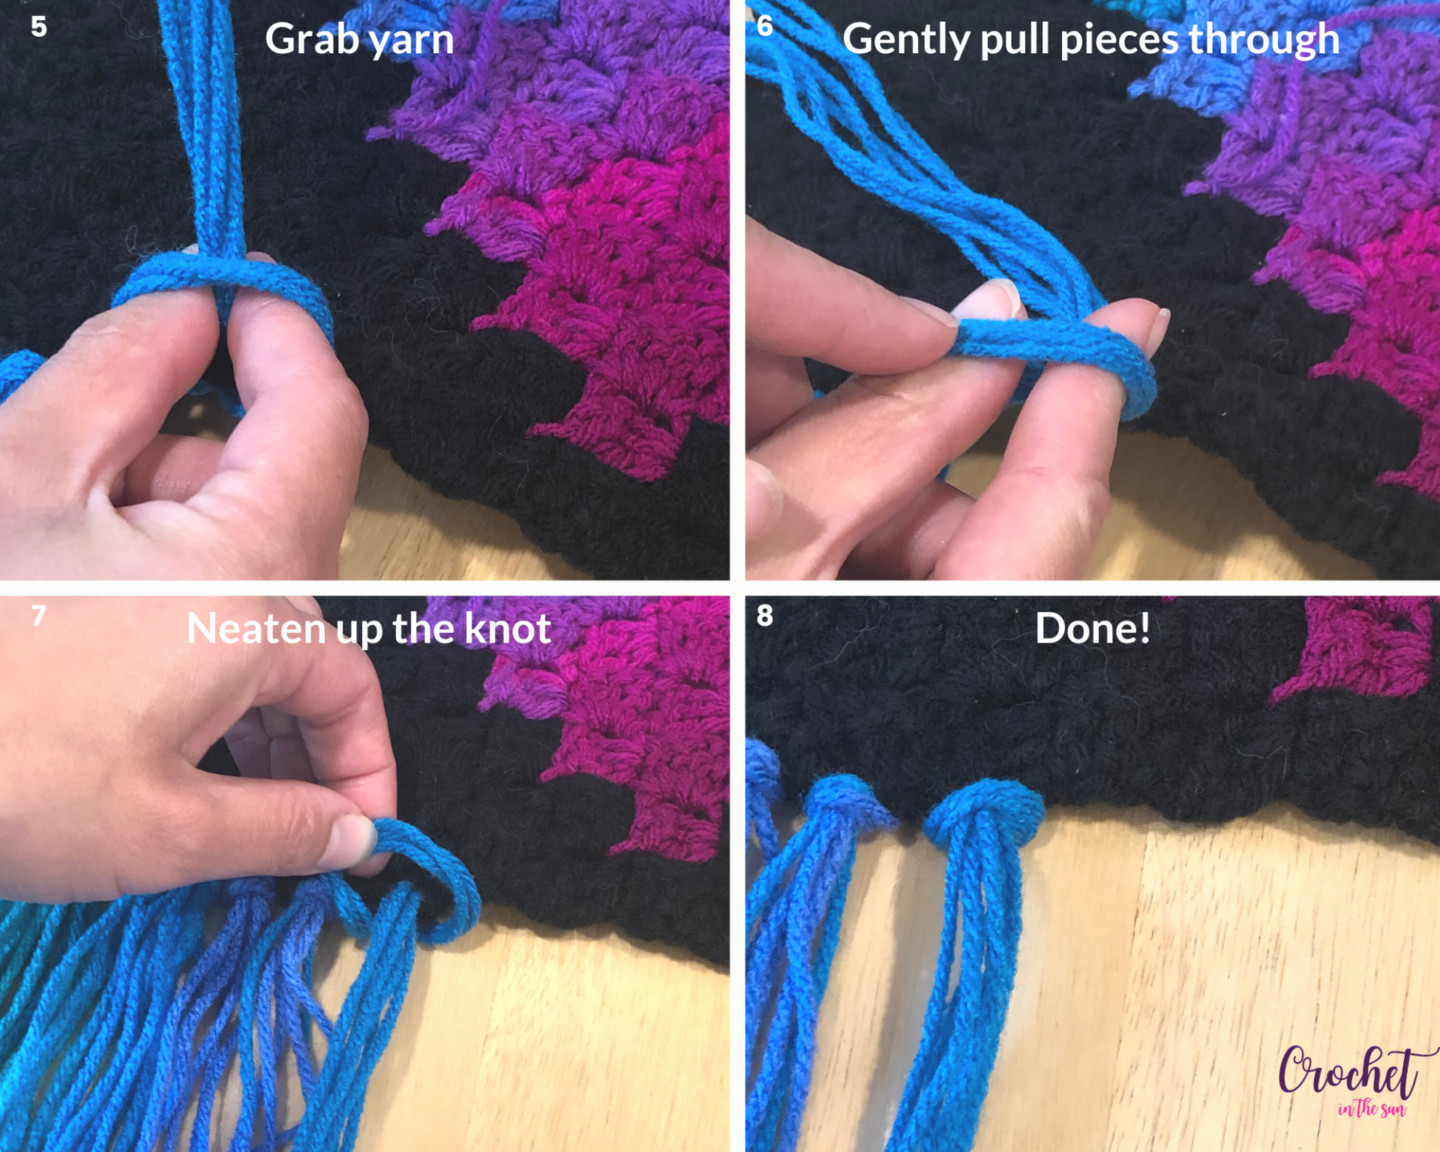
- Cut many pieces of yarn to the same length. (Batch this step!) You can decide how long you want the pieces to be, and how many to put through each tassel. For reference, I used 3 pieces of yarn per tassel.
- Holding the yarn together, fold in half, and grab it by the middle. Put aside for a second.
- Insert your crochet hook through the bottom stitch of the project, from back to front.
- Wrap the pieces of yarn around the hook and pull through.
- Drop the crochet hook and pop your fingers into the loops you just pulled through.
- Grab the yarn and gently pull the pieces through. Neaten up the knot as needed.
To attach to a wooden dowel
If you’d like to attach your finished piece to a wooden dowel/stick/rod, you can follow 1 of 2 methods:
- Single Crochet: Using the black yarn you just finished the project with (don’t cut it!), single crochet (sc) your project onto the wooden dowel. Tip: try putting the dowel right above your top row and work over it. It can be tricky to start but you will get the hang of it. The dowel may move around a bit as you work onto it, but be patient!
- Sew around the dowel: Cut your working yarn you finished the project with.Attach a new, long piece of black yarn to one end of your project. To be safe, make it ~27 inches long. Thread that through a yarn needle, and keep wrapping through the top part of your project and around the dowel until you reach the end.
If you enjoyed this, you should check Pinterest from some C2C graphs (graphgans). There are SO many graphs and designs out there – we have some seriously talented crocheters in our community!!
Thanks for following along, and I hope you enjoyed making this corner to corner heart design! If you make this design and share on social media, please link back to my blog and provide credit for the pattern.
Also, I would love to see your creations! When sharing, tag me @crochetinthesun so we can see these pretty hearts all over the internet 🙂
Happy crocheting,
Jen
Pin for later
Other useful crochet references
- Crochet hook size conversion chart
- Yarn weight conversion chart
- Ultimate Beginner’s Guide to Crochet