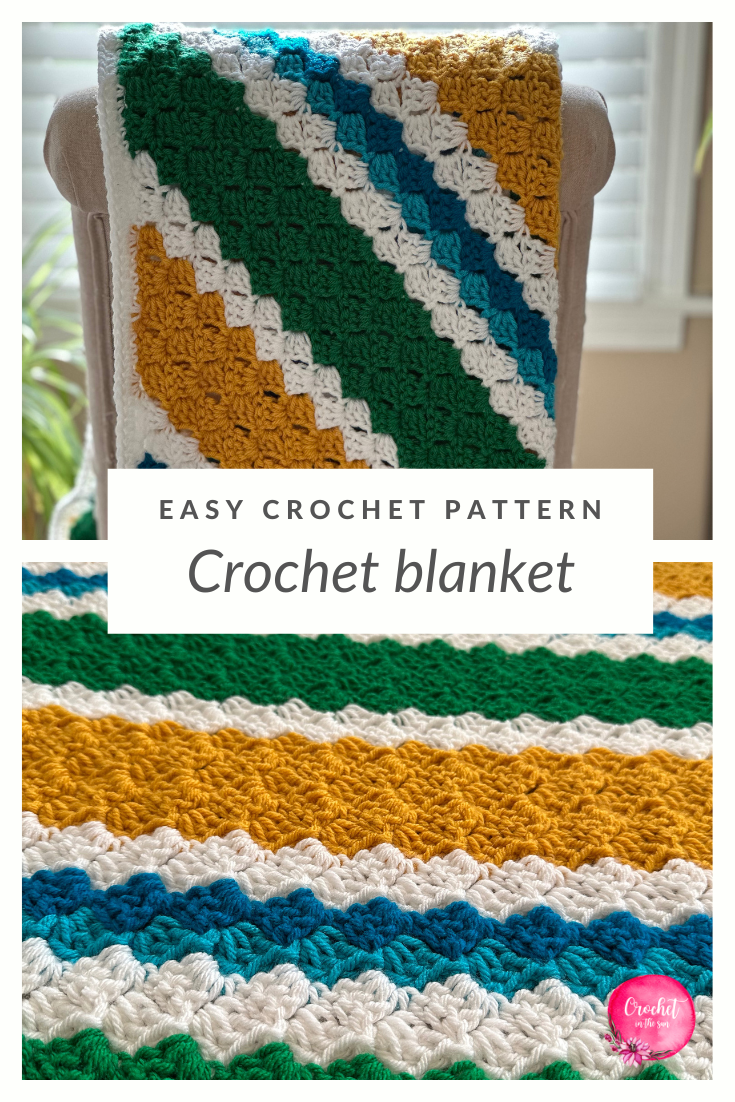
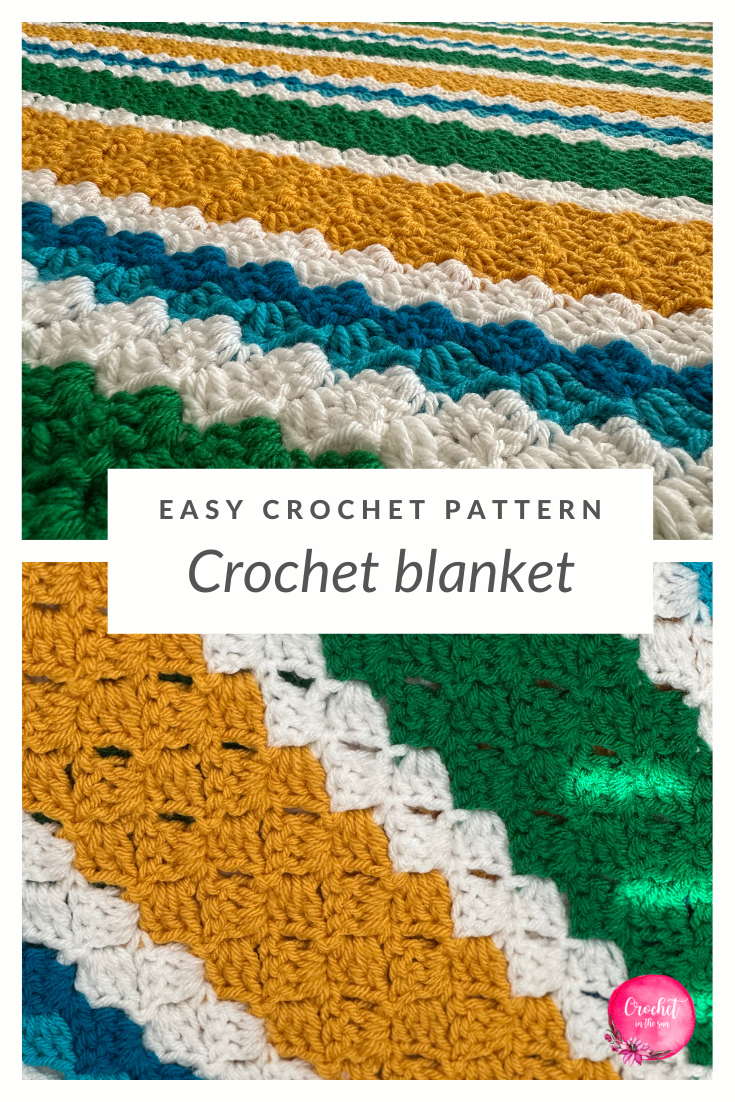
Looking for the perfect game day crochet blanket project? Meet the Sideline Snuggles Corner-to-Corner (C2C) Blanket Pattern — a cozy, customizable design that blends crochet creativity with game-day excitement. Whether you’re cheering from the stands or curled up on the couch, this blanket will keep you warm and show off your team colors in style.
Perfect crochet pattern for sports fans
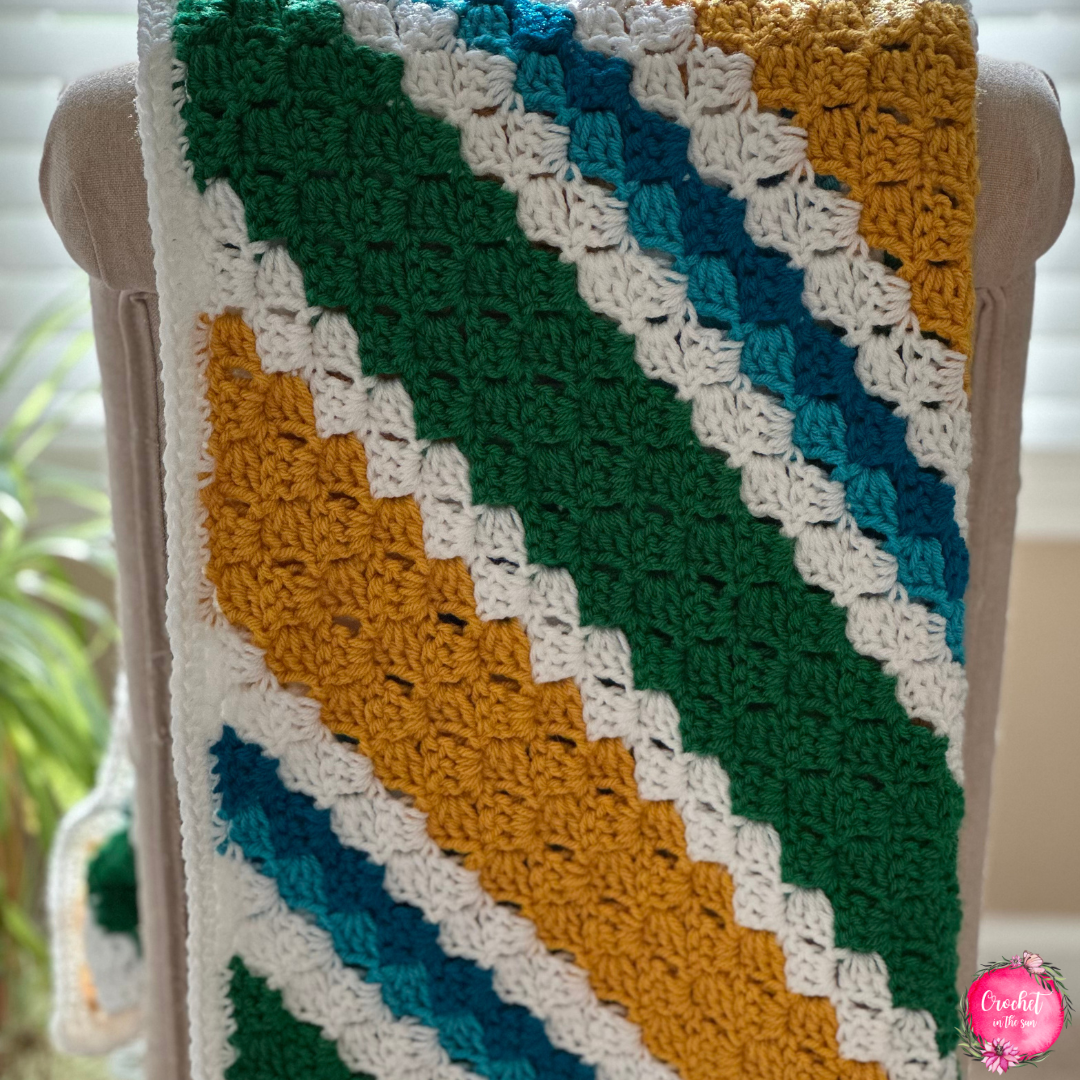
This corner to corner blanket is all about showing off your team spirit.
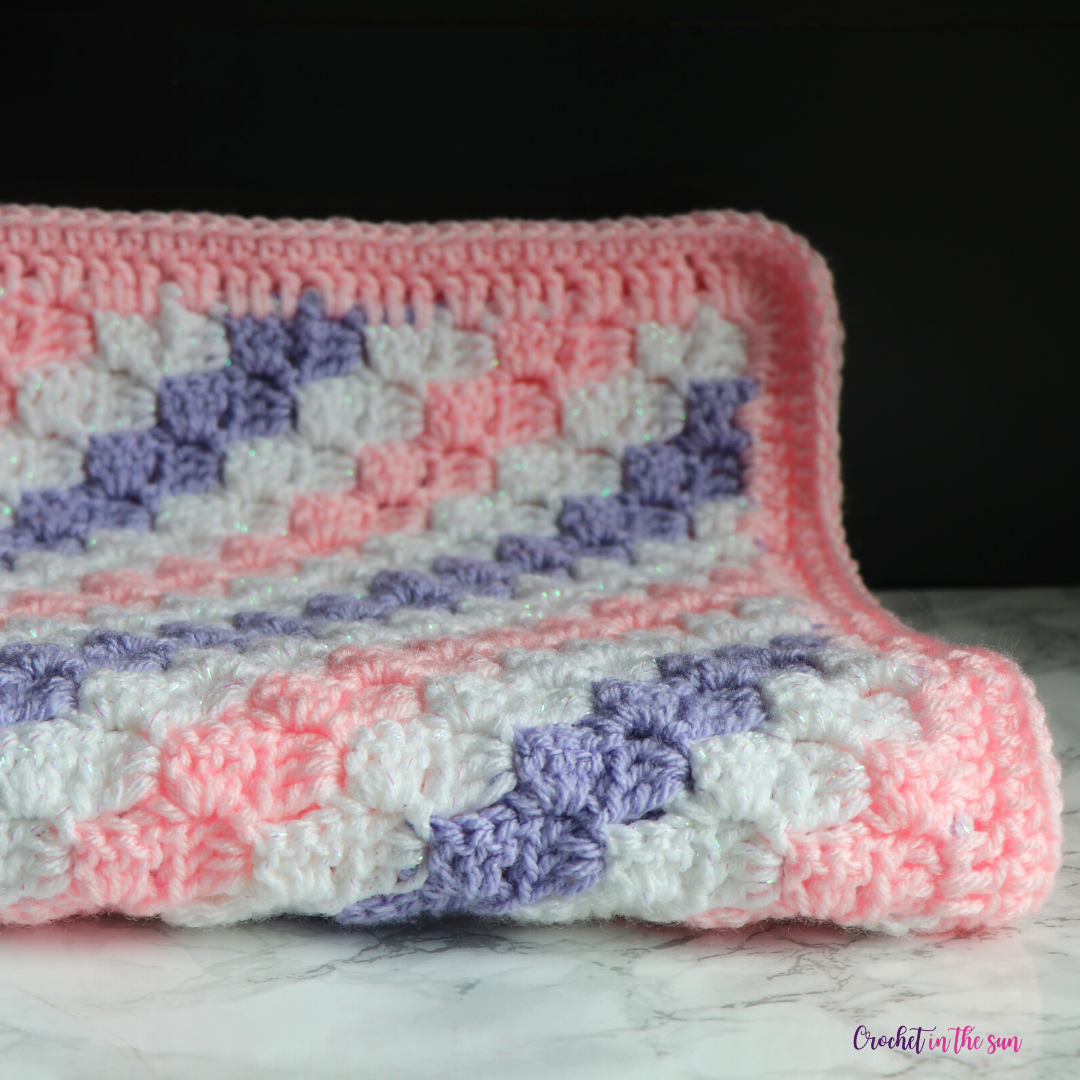
You can customize the colors to match any team — soccer, football, basketball, hockey, or any other favorite team/school. It’s a great way to stay cozy while cheering them on all season long.
Why you’ll love this pattern
- Customizable design – Easily choose the yarn colors based on your school or team’s home & away colors.
- Beginner-friendly – Includes step-by-step instructions and photos, perfect for learning corner-to-corner crochet.
- Game-day ready – Lightweight enough to bring to the stadium, warm enough for chilly nights at home.
- Great gift idea – Handmade blankets are always a win for sports fans.
Color choices
If you know me, you know it’s impossible for me to make a project with less than 3 colors.
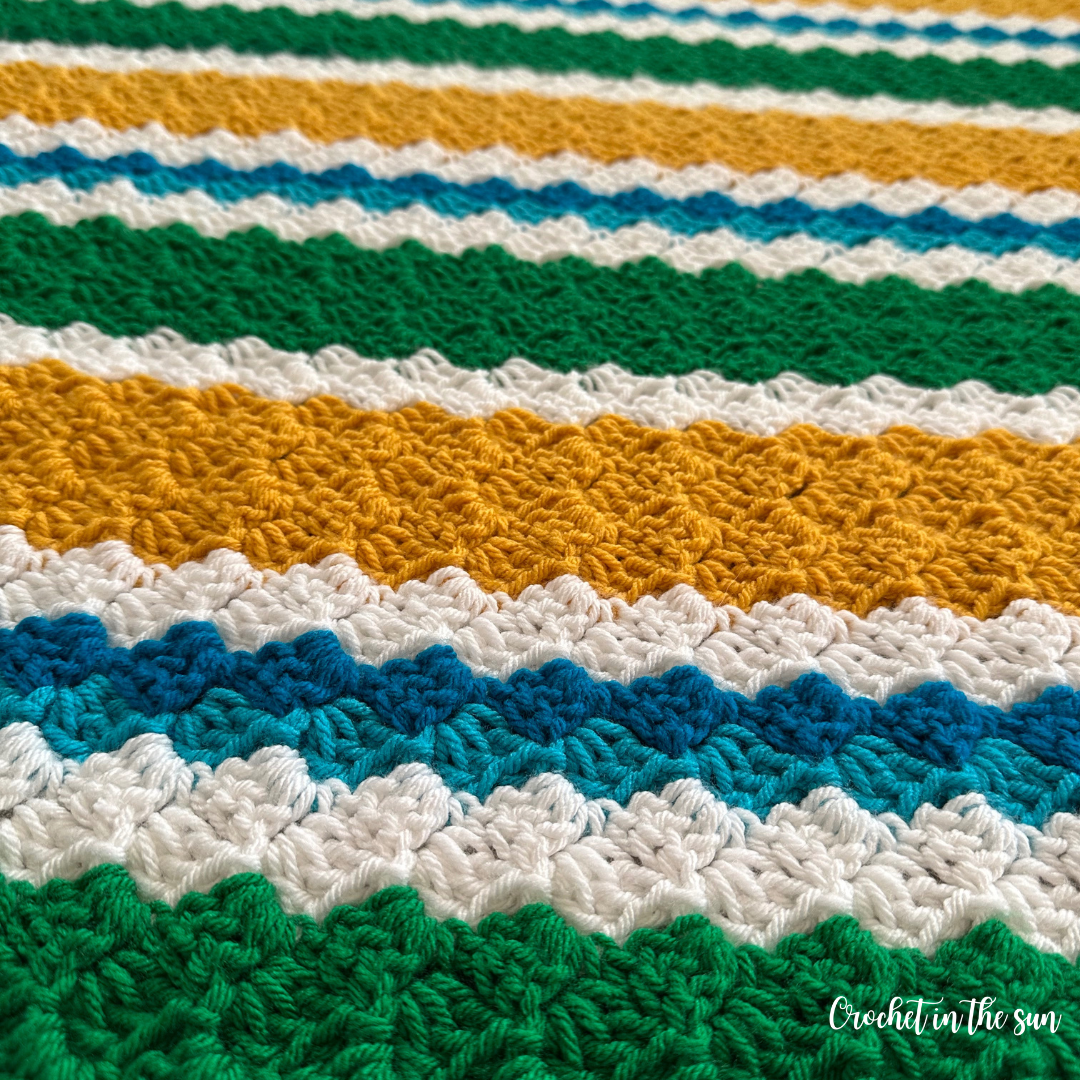
My family and I are huge fans of the Australian Women’s soccer team—go Matildas! When I decided to make a supporters blanket, I initially planned to use their main colors: green and gold.
But I knew I’d get bored working with just two colors.
So, I decided to include the two beautiful shades of blue from their away jerseys. Then, to make the colors really pop, I added a coordinating color to break up the stripes. This makes the blanket even more vibrant while staying true to their team colors.”
Fun for all Skill Levels
Even if you’re new to C2C crochet, this pattern is easy to follow.
The design works up quickly and is repetitive enough to enjoy while watching your favorite show (or the game!)
Get the pattern & start crocheting today
Sports season is just around the corner, so now’s the perfect time to grab your yarn and hook!
Skill Level
Easy
If you don’t know how to crochet, or maybe just want to brush up on the basics, we have a great resource for you!
Hop over to the Ultimate Beginner’s Guide to Crochet. This breaks down the basics of what you need to learn, in what order, and link you directly to some great resources! And best of all, it’s free! Enjoy 🙂
Yarn & Materials
- 6mm hook (US J-10) – I highly recommend the Clover Hook set (I use these in every single project!)
- Paintbox Simply Chunky – Grass Green (4 skeins) – on Amazon or Lovecrafts
- Paintbox Simply Chunky – Mustard Yellow (4 skeins) – on Amazon or Lovecrafts
- Paintbox Simply Chunky – Marine Blue (2 skeins) – on Amazon or Lovecrafts
- Stylecraft Special Chunky – Empire (2 skeins) – on Lovecrafts
- Stylecraft Special Chunky – White (4 skeins) – on Lovecrafts
- Yarn needle and scissors
Head over to Lovecrafts to pick up the Paintbox yarn and Stylecraft yarn! It’s my favorite way to get these brands easily shipped to the US 🙂

Yarn substitutions: Look for yarn that’s categorized as chunky or bulky (weight 5).
Stitches (US Terms)
- chain (ch)
- single crochet (sc)
- double crochet (dc)
- half double crochet (hdc)
- slip stitch (sl st)
If needed, refer to the Beginner’s Guide to crochet. Those stitch tutorials will walk you through how to complete the above stitches.
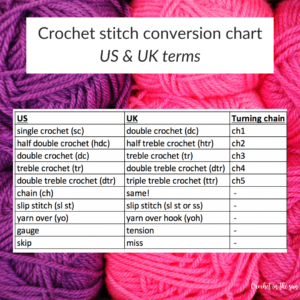
If you need to convert from US to UK terms, have a look at this chart.
Abbreviations
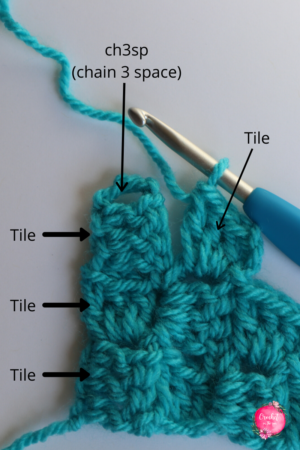
- A “tile” or block is a set of <ch3+3dc>
- ch3sp: In this pattern, the ch3sp (or chain 3 space) refers to the space between the ch3 and 1st dc of the tile you’re working into.
Gauge
4 inches = 4 tiles x 4 tiles
Finished measurement
Roughly 55.5 x 56.5 inches, not blocked. (Each tile is ~1 inch + border)
Pattern notes
- The yarn tail from your initial slip knot is like an “anchor” for you in this project. It should always be on the bottom right when you’re working on the “right side” of the project.
- Once you get to row 2, it’s a simple repeat. However, rows 3 and 4 are explained as well though. Why? They’re all the same, but it’s worded slightly differently. You’ll see more abbreviations and less explanations as you approach row 4 just to simplify the wording. Row 4 is the instructions to follow for a normal (increase) row.
- At the end of each row, you turn your work.
- Refer to “Corner to Corner color change directions” section for the tutorial on how and where to change colors in this blanket.
- This pattern includes a Chart as well as written instructions (Rows 1-110)
Carrying yarn vs. fastening off during color changes
In general, when you change colors in a crochet project, you can either:
a) fasten off (i.e. cut your yarn) & weave in your ends at each color change, or b) carry your yarn
We change colors quite often in this blanket, but since entire rows are different colors (as opposed to color changes within the same row), it’s quite easy to change rows at the end of each. Therefore, I recommend fastening off and weaving in your ends, as opposed to carrying your yarn up the side for this blanket.
If you’re not sure….
In case you’re not sure, here are some considerations when deciding:
- Option 1: If you fasten off: You will have many ends to weave in, however this does provide for a cleaner look as you can easily weave in the yarn end into the same color tile, so you can’t see the yarn peeking through the different color tiles. To follow this method, you will always change colors by attaching a new color each at the end/beginning of the row. The finished product won’t look any different, you will just have more ends to weave in – that’s all!
- Option 2: If you carry yarn: You will have to carry your yarn over quite a few stitches each time, so you will have to be sure to work over the carried yarn when working your border. One downside is that you may be able to see the yarn peeking through just a bit, especially when you’re working over a dark yarn color with a light yarn color, or vice versa.
If you prefer a 100% clean look, you may prefer option #1 so you can weave the ends into the same color tiles.
Also, if you do carry your yarn, make sure you’re not pulling the carried yarn too tight, else it may cause the blanket to pucker in a bit. Simply keep the carried yarn as part of the project and work your stitches over it. Not only will the border provide a neat finish, but it also covers up the yarn you carried along the side since you’re literally stitching over that yarn. Your border is functional and pretty!
Pattern colors
Not sure how to map your team’s colors to the blanket?
This is how these colors can be chosen for the Sideline Snuggles blanket:
- Pick 2 home colors. These are the main colors used. (Main Color or ‘MC’)
- Pick 2 away colors. These are used less often. (Alternate Color or ‘AC’)
- Pick 1 coordinating/complimentary color. This is used to split up the colors. White or black might work great here.
If you’re using different colors than green and yellow, use the key below:
- Yellow = MC1 (Main Color 1)
- Green = MC2 (Main Color 2)
- Empire = AC1 (Alternate Color 1)
- Marine blue = AC2 (Alternate Color 2)
- White = CC1 (Complimentary Color 1)
If your team has the same 2 colors in their home and away jerseys, follow the above but use the same colors for both the home (MC) and away (AC).
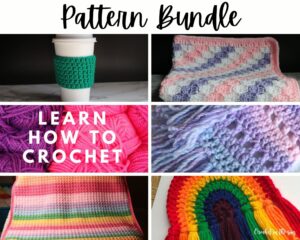
If you love this crochet blanket pattern, have a look at my Crochet Pattern Bundle on Etsy. It includes some of my best sellers along with other new patterns!
Pattern – Blanket (chart)
- Get the inexpensive ad-free PDF printable from my Etsy Shop
- Pin this pattern to your Pinterest Boards
- Add this pattern to your Ravelry queue
- Buy directly below using Shopify
Or, you can find the free pattern here!
IMPORTANT: Please refer to the C2C Photo Tutorial for a step-by-step photo tutorial for Corner to Corner, in general. You will follow those instructions but use the chart directly below to determine when to change colors and when to start decreasing.
The C2C chart is below. The way it is written, you start from the bottom right corner and end at the top left corner.

Pattern – Blanket (written)
Below shows the number of tiles in each row.
- Row 1: 1 Yellow (or MC1) – odd rows go ‘down’ the chart
- Row 2: 2 Yellow (or MC1) – even rows go ‘up’ the chart
- Row 3: 3 Yellow (or MC1)
- Row 4: 4 Yellow (or MC1)
- Row 5: 5 White (or CC1)
- Row 6: 6 White (or CC1)
- Row 7: 7 Empire (or AC1) (dark blue)
- Row 8: 8 Marine blue (or AC2) (lighter blue)
- Row 9: 9 White (or CC1)
- Row 10: 10 White (or CC1)
- Row 11: 11 Green (or MC2)
- Row 12: 12 Green (or MC2)
- Row 13: 13 Green (or MC2)
- Row 14: 14 Green (or MC2)
- Row 15: 15 Green (or MC2)
- Row 16: 16 White (or CC1)
- Row 17: 17 White (or CC1)
- Row 18: 18 Yellow (or MC1)
- Row 19: 19 Yellow (or MC1)
- Row 20: 20 Yellow (or MC1)
- Row 21: 21 Yellow (or MC1)
- Row 22: 22 Yellow (or MC1)
- Row 23: 23 White (or CC1)
- Row 24: 24 White (or CC1)
- Row 25: 25 Empire (or AC1)
- Row 26: 26 Marine blue (or AC2)
- Row 27: 27 White (or CC1)
- Row 28: 28 White (or CC1)
- Row 29: 29 Green (or MC2)
- Row 30: 30 Green (or MC2)
- Row 31: 31 Green (or MC2)
- Row 32: 32 Green (or MC2)
- Row 33: 33 Green (or MC2)
- Row 34: 34 White (or CC1)
- Row 35: 35 White (or CC1)
- Row 36: 36 Yellow (or MC1)
- Row 37: 37 Yellow (or MC1)
- Row 38: 38 Yellow (or MC1)
- Row 39: 39 Yellow (or MC1)
- Row 40: 40 Yellow (or MC1)
- Row 41: 41 White (or CC1)
- Row 42: 42 White (or CC1)
- Row 43: 43 Empire (or AC1)
- Row 44: 44 Marine blue (or AC2)
- Row 45: 45 White (or CC1)
- Row 46: 46 White (or CC1)
- Row 47: 47 Green (or MC2)
- Row 48: 48 Green (or MC2)
- Row 49: 49 Green (or MC2)
- Row 50: 50 Green (or MC2)
- Row 51: 51 Green (or MC2)
- Row 52: 52 White (or CC1)
- Row 53: 53 White (or CC1)
- Row 54: 54 Yellow (or MC1)
- Row 55: 55 Yellow (or MC1). Start decreasing after you finish row 55 (bottom left of chart). Refer to directions on how to DECREASE.
- Row 56: 55 Yellow (or MC1). Start decreasing after you finish row 56 (top right of chart). Refer to directions on how to DECREASE.
- Row 57: 54 Yellow (or MC1)
- Row 58: 53 Yellow (or MC1)
- Row 59: 52 White (or CC1)
- Row 60: 51 White (or CC1)
- Row 61: 50 Empire (or AC1)
- Row 62: 49 Marine blue (or AC2)
- Row 63: 48 White (or CC1)
- Row 64: 47 White (or CC1)
- Row 65: 46 Green (or MC2)
- Row 66: 45 Green (or MC2)
- Row 67: 44 Green (or MC2)
- Row 68: 43 Green (or MC2)
- Row 69: 42 Green (or MC2)
- Row 70: 41 White (or CC1)
- Row 71: 40 White (or CC1)
- Row 72: 39 Yellow (or MC1)
- Row 73: 38 Yellow (or MC1)
- Row 74: 37 Yellow (or MC1)
- Row 75: 36 Yellow (or MC1)
- Row 76: 35 Yellow (or MC1)
- Row 77: 34 White (or CC1)
- Row 78: 33 White (or CC1)
- Row 79: 32 Empire (or AC1)
- Row 80: 31 Marine blue (or AC2)
- Row 81: 30 White (or CC1)
- Row 82: 29 White (or CC1)
- Row 83: 28 Green (or MC2)
- Row 84: 27 Green (or MC2)
- Row 85: 26 Green (or MC2)
- Row 86: 25 Green (or MC2)
- Row 87: 24 Green (or MC2)
- Row 88: 23 White (or CC1)
- Row 89: 22 White (or CC1)
- Row 90: 21 Yellow (or MC1)
- Row 91: 20 Yellow (or MC1)
- Row 92: 19 Yellow (or MC1)
- Row 93: 18 Yellow (or MC1)
- Row 94: 17 Yellow (or MC1)
- Row 95: 16 White (or CC1)
- Row 96: 15 White (or CC1)
- Row 97: 14 Empire (or AC1)
- Row 98: 13 Marine blue (or AC2)
- Row 99: 12 White (or CC1)
- Row 100: 11 White (or CC1)
- Row 101: 10 Green (or MC2)
- Row 102: 9 Green (or MC2)
- Row 103: 8 Green (or MC2)
- Row 104: 7 Green (or MC2)
- Row 105: 6 Green (or MC2)
- Row 106: 5 White (or CC1)
- Row 107: 4 White (or CC1)
- Row 108: 3 Yellow (or MC1)
- Row 109: 2 Yellow (or MC1)
- Row 110: 1 Yellow (or MC1)
Pattern – Border
Fasten off your Yellow (or MC1) yarn and attach White (or CC1) yarn to any corner.
Row 1
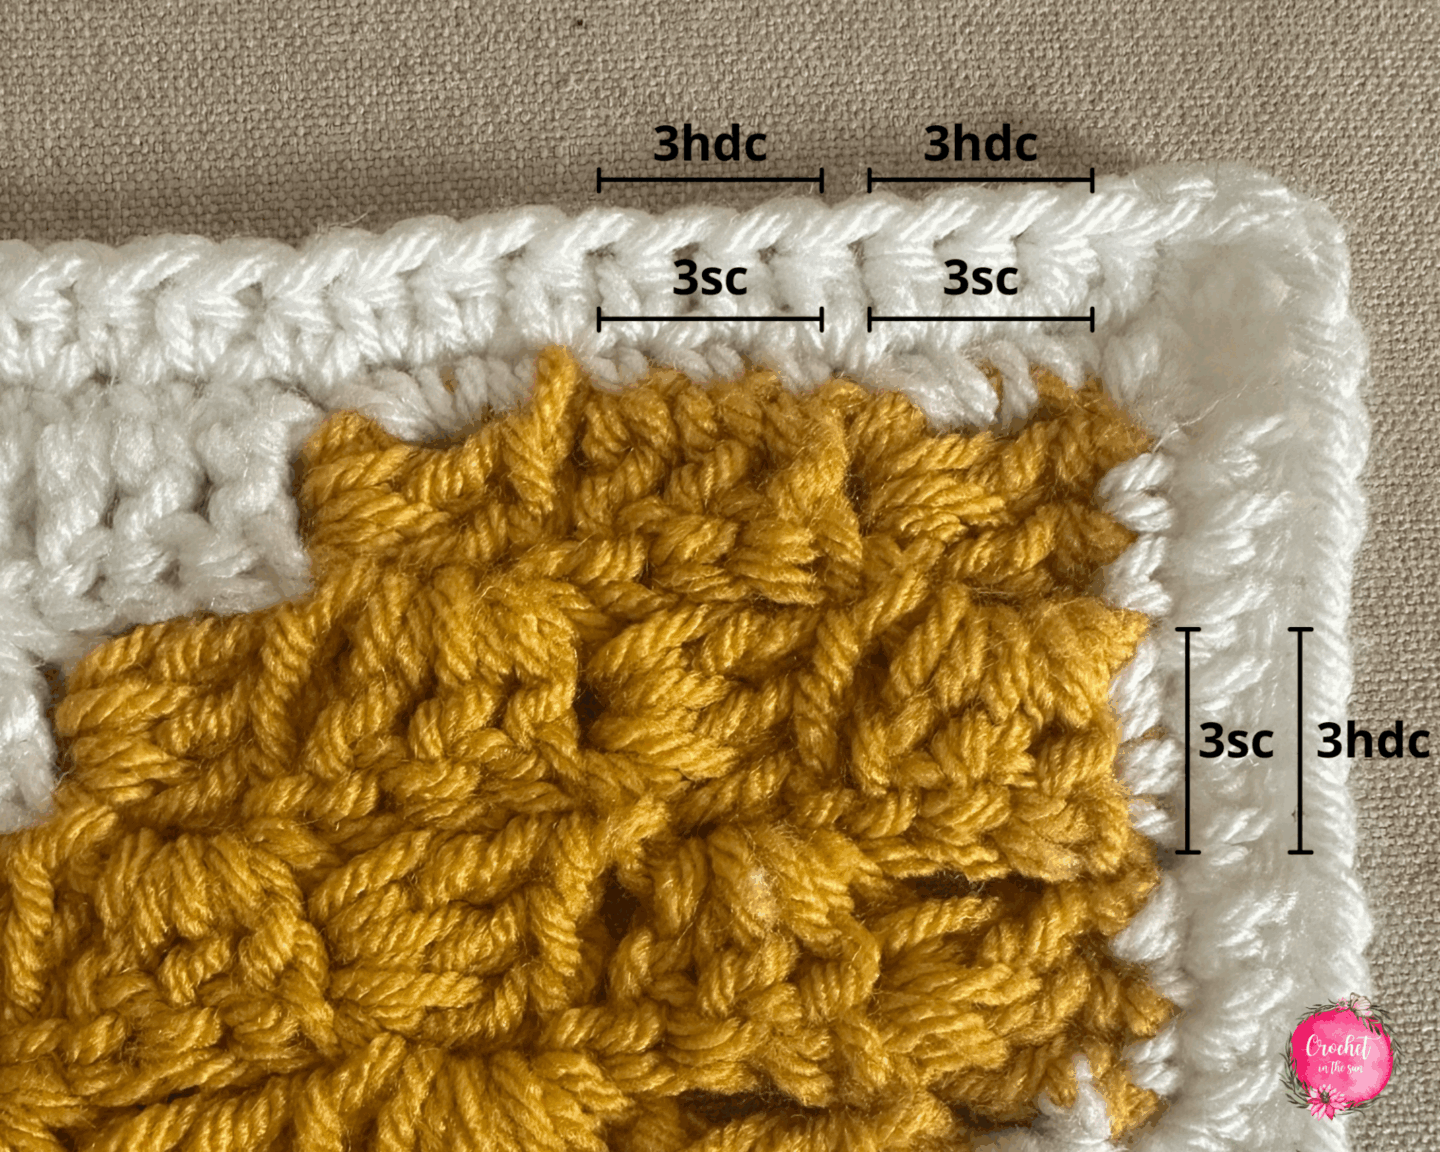
Row 1: In the corner to start, <ch2, sc, sc>. Then repeat *3sc, 3sc* across the row.
As you see above, you are working 3sc into each horizontal tile (where the dc’s appear horizontal, going left to right), and work 3sc into each vertical tile (where the dc’s appear vertical, going up to down). Note that some sides will be more obvious where to work the sc, while others might not be as obvious.
Tip: When working the border into the horizontal tiles, rather than work all 3 sc’s into the gap between the 3 dc’s and the ch3, instead work 2 sc’s where you normally would & work the 3rd sc into the space between that tile & the next tile.
As always, you can adjust the number of sc’s you work in each tile, if needed. For example, you can always work 2sc in a tile if 3 sc in a tile look too squished.
Row 1 corners: Work <sc, dc, sc> into each corner. The dc gives it a bit more height.
To end row 1, slip stitch into the first stitch of the row.
Row 2
Row 2: In the corner to start, <ch3, hdc, hdc>. Then continue to hdc in each sc across the row.
Row 2 corners: Work <hdc, 2dc, hdc> into each corner.
You are working into a <sc, dc, sc> from the previous corner. So you will hdc into the sc, work 2 dc into the dc, then hdc into the sc.
Similar to the previous row, the dc adds a bit of height, and working 2 dc into that corner stitch ensures the corners don’t fold in.
To end row 2, slip stitch into the ch2 that started this row.
Lastly, fasten off and weave in your ends.
Optional finishes
Optionally, add tassels to the 4 corners, or add fringe along the borders!
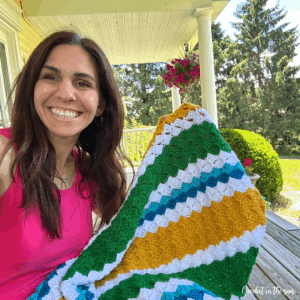
All done!! Now you have a beautiful blanket you can snuggle with on the sidelines of the next game!
Thanks for following along, and I hope you enjoy making this beautiful blanket!
If you make one and share on social media, go ahead and tag @crochetinthesun. I would love to see them! Also, please link back to my pattern/blog and provide credit for the pattern.
Plus, I would love to share your creation with the crochet community so we can see these pretty blankets come to life. 🙂
Happy crocheting,
Jennifer
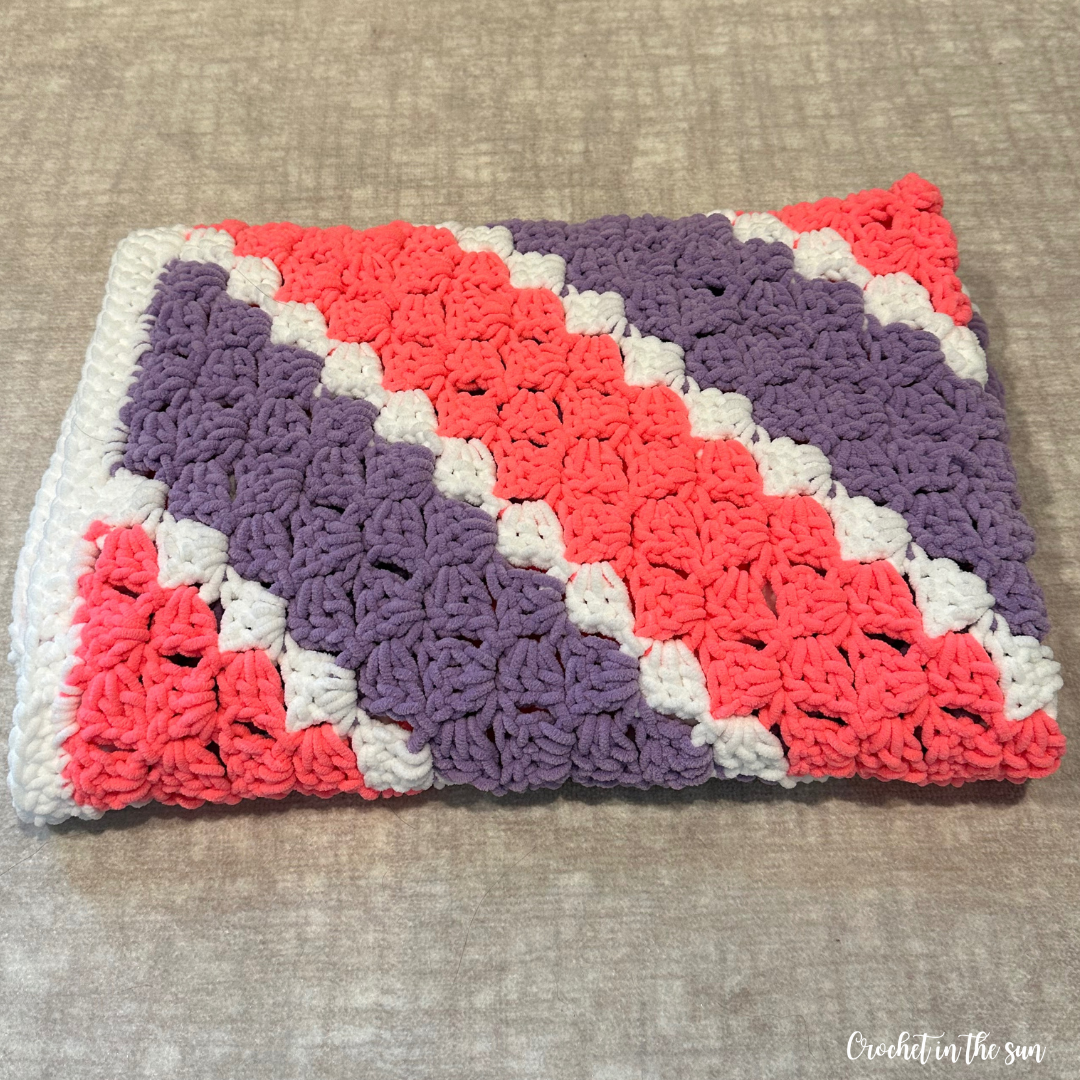
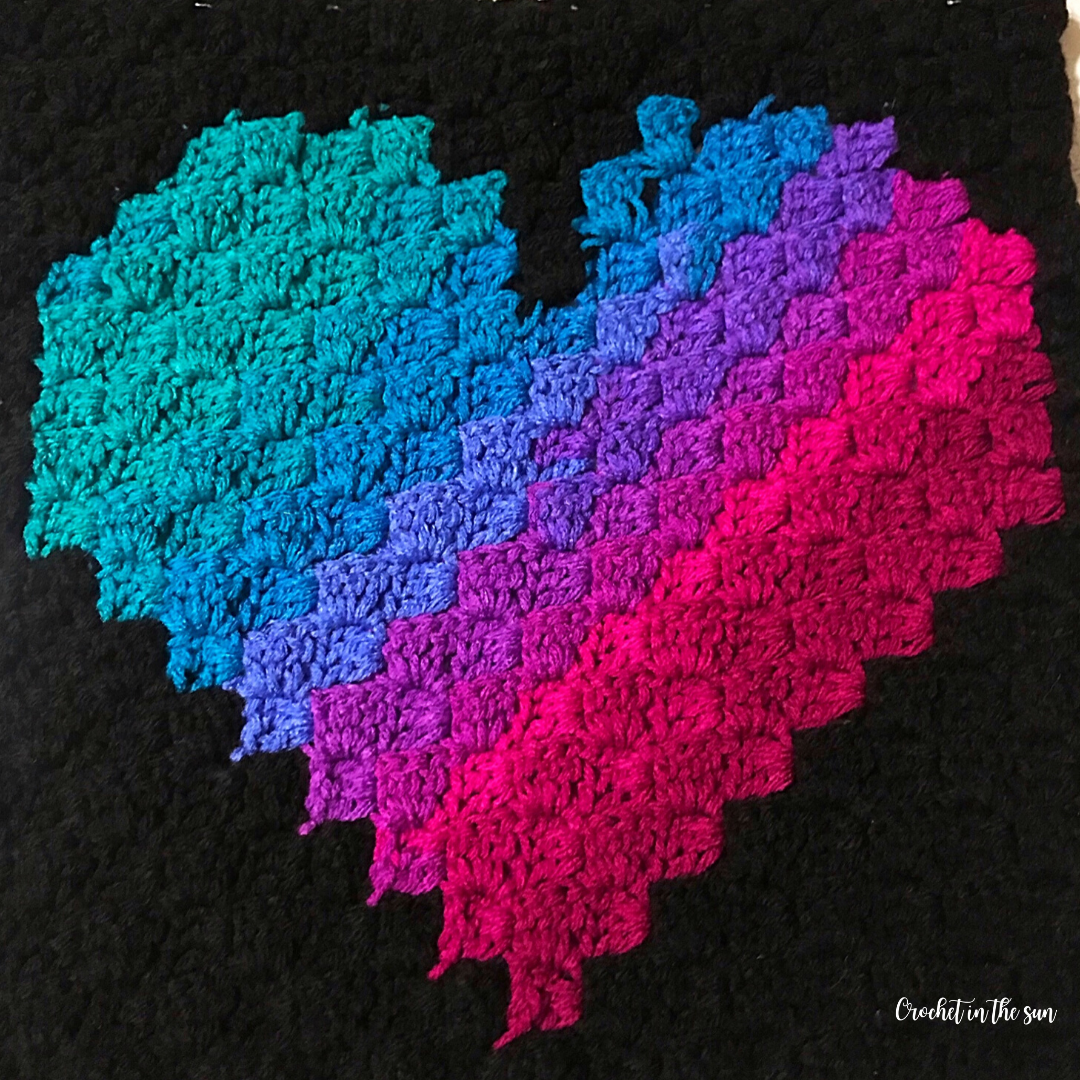
Love C2C? Check out other corner to corner blanket patterns & wall hangings
Sugar Plum Snuggles C2C blanket
Corner to corner Heart Wall Hanging Crochet
Other useful crochet references
- Crochet hook size conversion chart
- Yarn weight conversion chart
- Stitch conversation chart (US vs UK)
- Ultimate Beginner’s Guide to Crochet