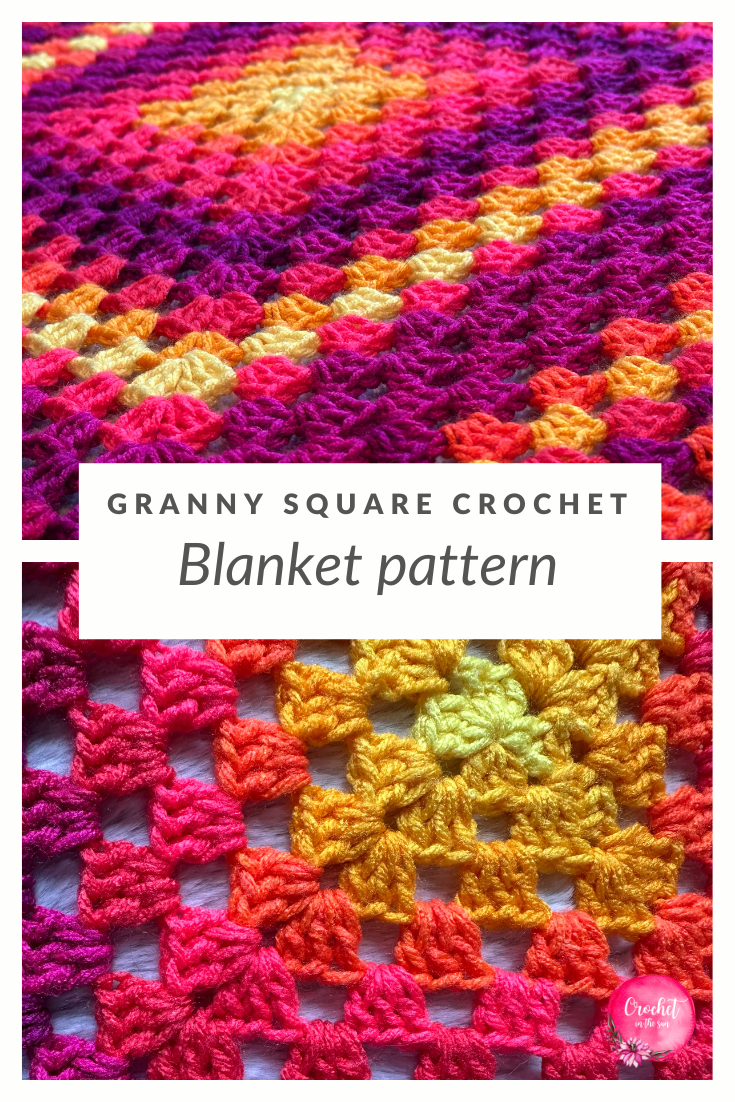
Let’s be honest: sometimes you just want a crochet project that looks impressive without needing to count, recount, and second-guess every stitch. Right? If you’ve been searching for that magical sweet spot – a pattern you can work on while binge-watching your favorite shows and still end up with a gorgeous finished blanket – then you’re in the right place. I designed this granny square crochet pattern to be that comforting, go-to project you can pick up anytime. It’s simple, relaxing, and beginner friendly. Before you know it, you’ll find yourself saying, “Just one more row…” and actually meaning it.
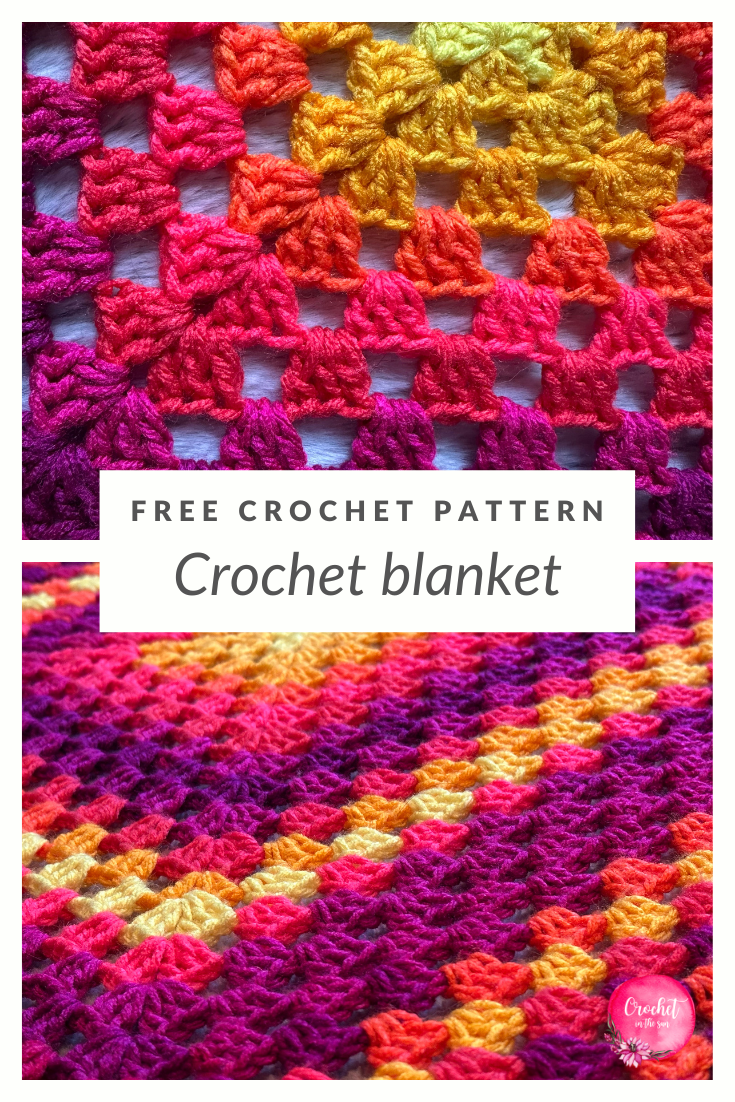
One of my favorite things about this pattern is how versatile it is. You can use a single color for a clean, classic look. Mix and match multiple colors for a bold, personalized vibe. Or let self-striping yarn do the work for you (that’s what I used!). No matter your style – or your yarn stash – this granny square crochet blanket turns out beautifully every time.
It’s a wonderful project for gifting, too. Christmas, baby showers, birthdays, or “just because” moments – everyone loves a handmade blanket. And of course, it’s perfect to keep for yourself when you want something cozy, colorful, and made with love.
Let’s dive in and start creating a blanket you’ll be proud of!
Yarn color
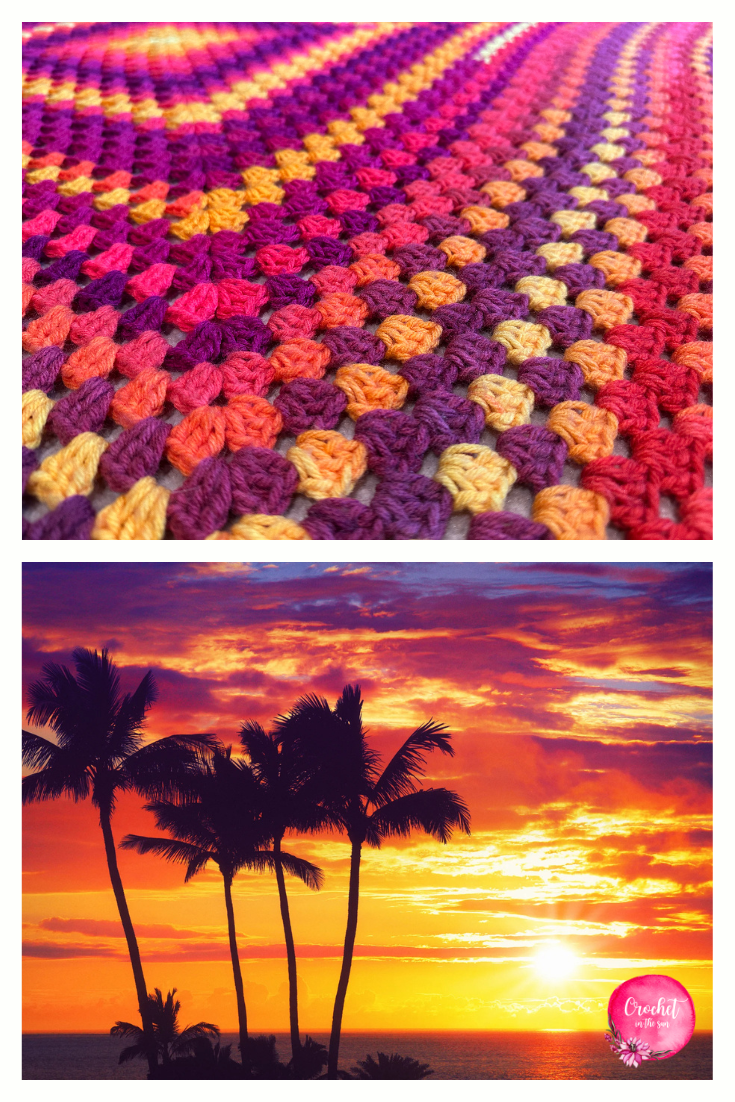
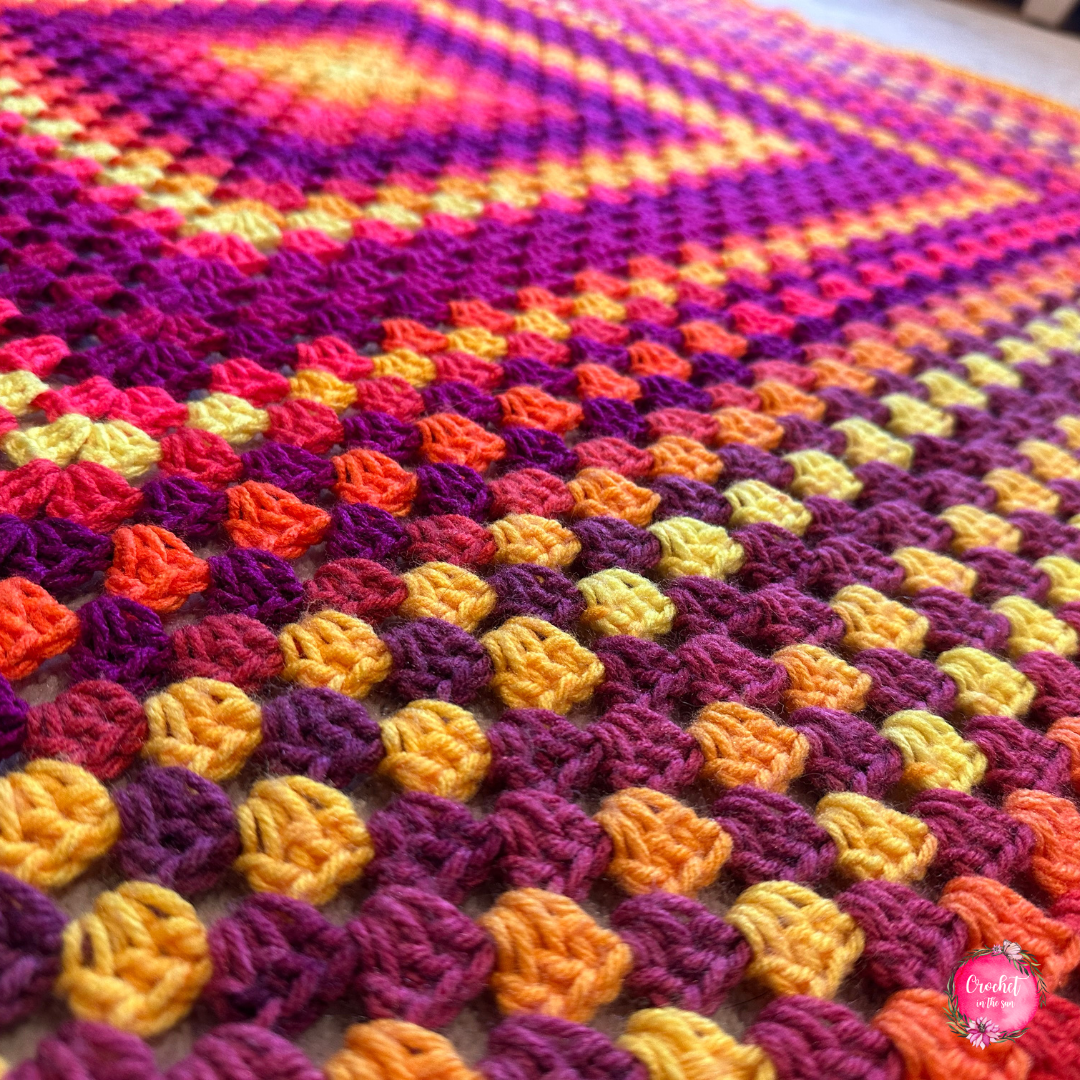
I knew the Red Heart Fruity Stripe had so much potential to make an absolutely crochet project. After starting 2 other projects with this yarn that didn’t do it justice, I have to say, I LOVE how this granny square crochet blanket turned out!
I did notice that the yarn dye and vibrancy varied a lot across this blanket. But to be fair, I ordered the first 3 skeins years before the I ordered the remaining ones! I had initially picked up the first couple skeins of yarn around 2020, with no project in mind. The colors were rich and vibrant.
By the time I started this project and needed more skeins, I noticed that this color way was more muted and not as bright. I even ordered from 2 separate places in case it was specific to one seller, but noticed that both were that softer vibe.
For purposes of this blanket, that’s totally fine. It actually created a neat pattern due to the colors changing a bit. But yes, note to self, if you need all skeins to match perfectly in your projects, order all skeins at once! (Even then, there may be some variances across dye lots).
Skill level
Easy
If you don’t know how to crochet, or maybe just want to brush up on the basics, we have a great resource for you!
Hop over to the Ultimate Beginner’s Guide to Crochet. This breaks down the basics of what you need to learn, in what order, and link you directly to some great resources! And best of all, it’s free! Enjoy 🙂
Stitches (US Terms)
- chain (ch)
- slip stitch (sl st)
- double crochet (dc)
Abbreviations
- MC = magic circle, also known as magic ring.
- dc cluster = work 3dc in the same stitch. You will work 3dc clusters the majority of this blanket!
- ch1sp = chain1 space (the space that is created when you chained 1 in the previous row.)
- ch2sp = chain2 space (the space that is created when you worked 2 chains in the previous row.) For this pattern, you will see ch2sp in each corner.
- st = stitch (generic term referring to any stitch or chain space)
If needed, refer to my Beginner’s Guide to crochet. Those stitch tutorials will walk you through how to complete the above stitches.
If you need to convert from US to UK terms, have a look at this chart.
Yarn and materials
- Red Heart Stripes in Fruity Stripe (I used 6 skeins for this size, but you can use more / less depending on desired size.)
- 5mm crochet hook (US H-8). Highly recommend using Clover hooks – that’s all I ever use! Here is the 5mm hook and the larger Clover hook set.
- Craft scissors
- Tapestry needle (a blunt needle)
Note: Red Heart Stripes is a self-striping yarn and each skein varies slightly.
Feel free to substitute with your favorite yarn, as this pattern can accommodate any yarn!
Gauge
4 x 4 inches = 3 dc clusters across x 6 rows up (not blocked)
Finished measurement
47 inches x 47 inches (not blocked)
Pattern Notes
- The beginning ch3 of each row counts as a dc.
- You do not need to turn your work at any point.
- You’ll start with a Magic Circle. Alternatively, if you don’t want to do use a magic circle, you can chain 4, sl st into 1st chain. From there, follow from the 1st bullet point (e.g. ch3, 2dc, ch2, etc).
Pattern
- Get the inexpensive ad-free PDF printable on Etsy
- Pin this pattern to your Pinterest Boards
- Add this pattern to your Ravelry queue
- Video tutorials: The written tutorial and photo tutorials are below, but we also have the video tutorials on YouTube:
- Repeat rows: https://youtu.be/XV6qGQU8tDM
- Border row: https://www.youtube.com/shorts/O15lYispuPw
- Buy directly below using Shopify
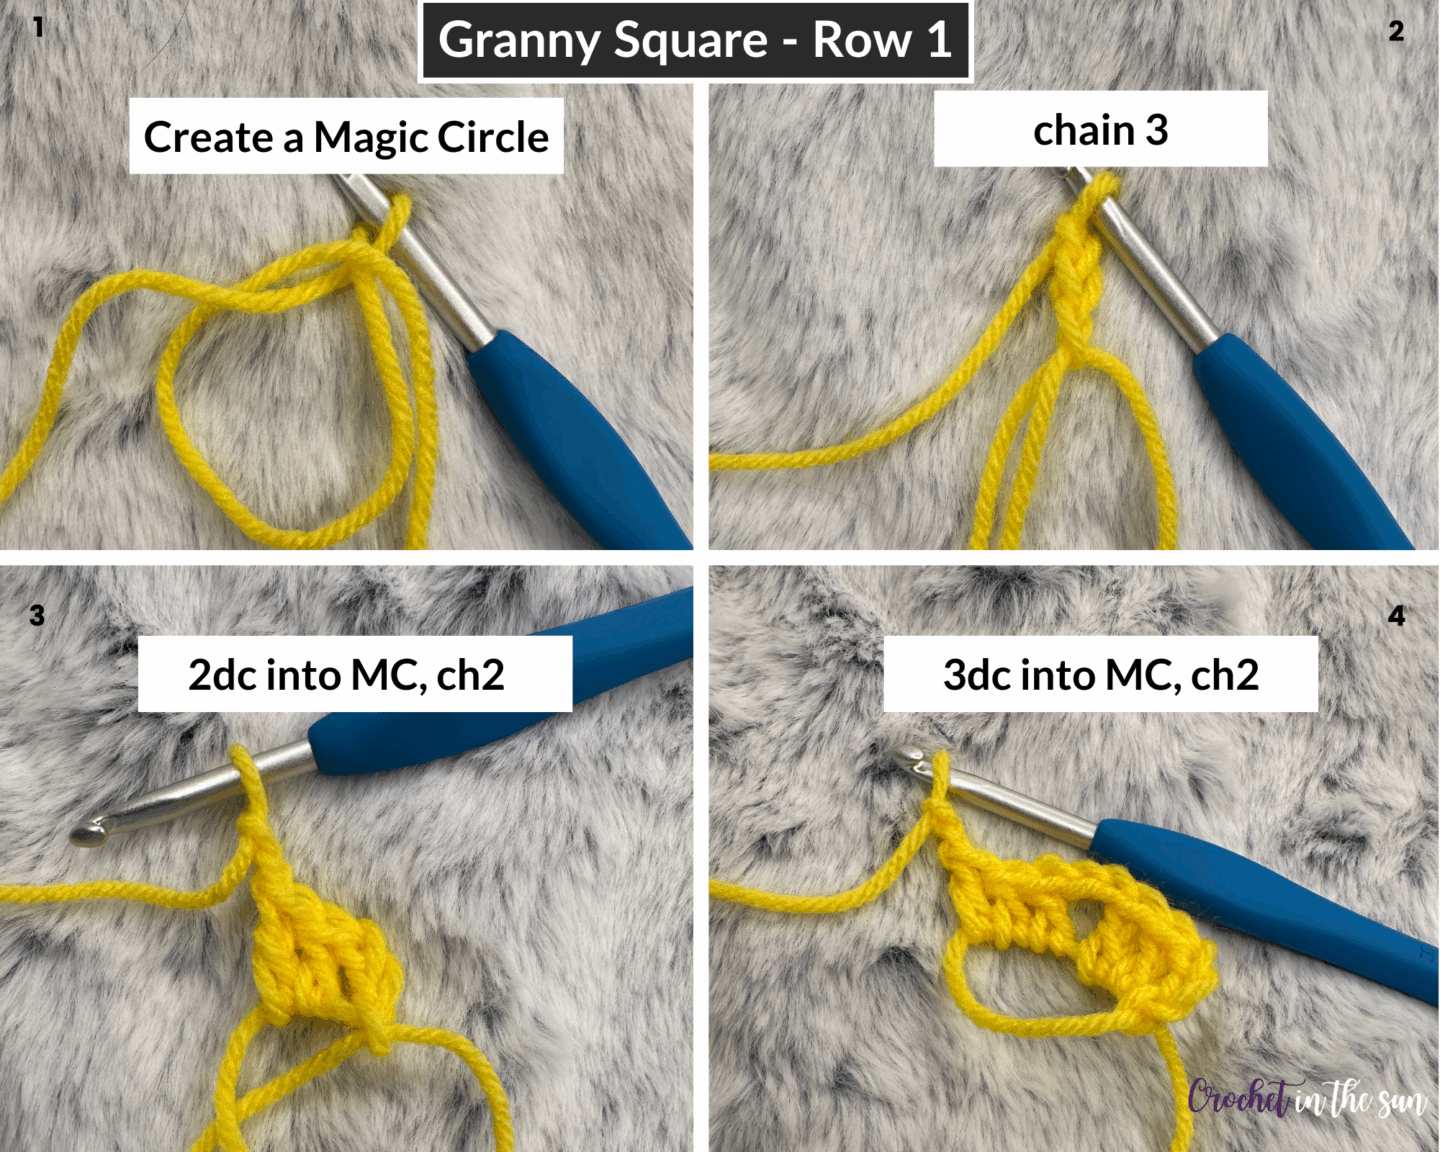
To start: Create a Magic Circle, or Magic Ring.
Row 1: Into the MC, work:
- Ch3 (counts as dc), work 2dc into the MC, ch2. (1 corner made)
- Work 3dc into MC, ch2 (2nd corner made)
- Work 3dc into MC, ch2 (3rd corner made)
- Work 3dc into MC, ch2 (4th corner made)
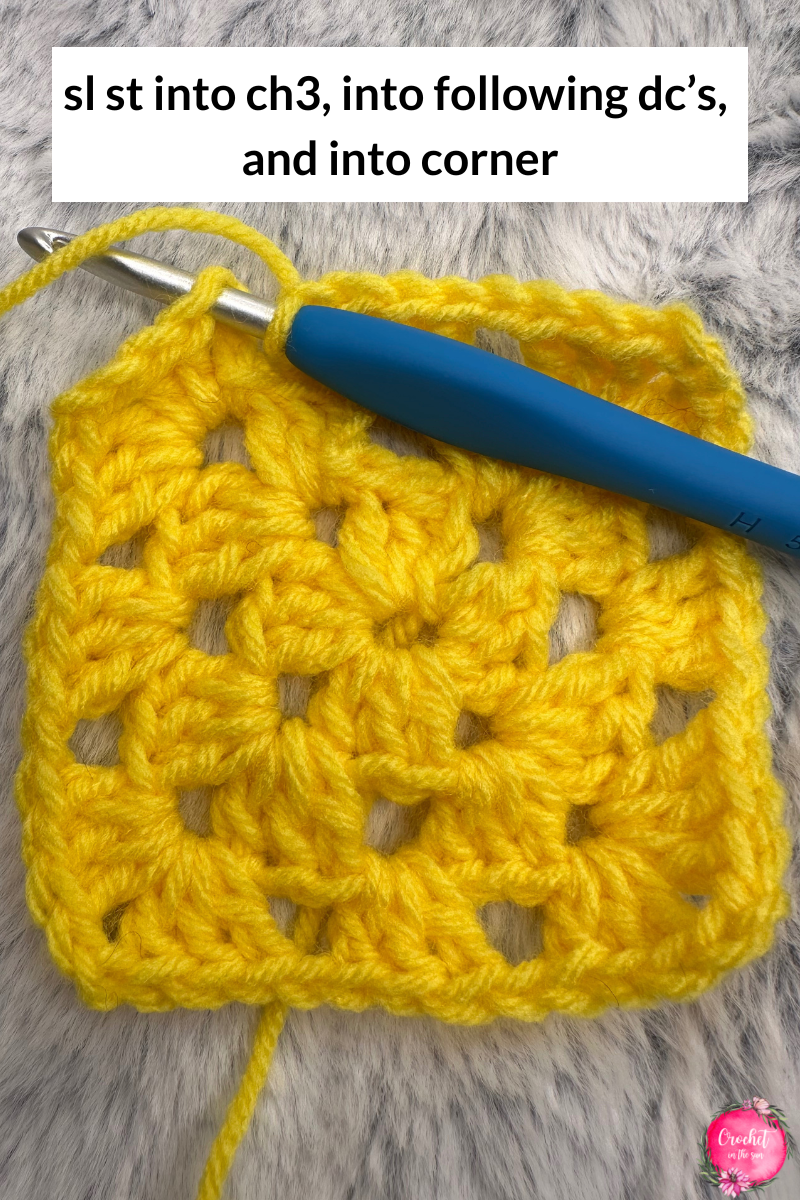
- Slip stitch (sl st) into ch 3, sl st into following 2 dc’s, sl st into corner. (Fully written out, this means: slip stitch into the top chain of the ch3; then sl st into the following 2 dc’s, then sl st into the corner space.)

You will have 12 dc’s and 4 ch2sp’s.
Pull the tail on your MC to tighten it up. You can weave your tail now or at the end of your project.
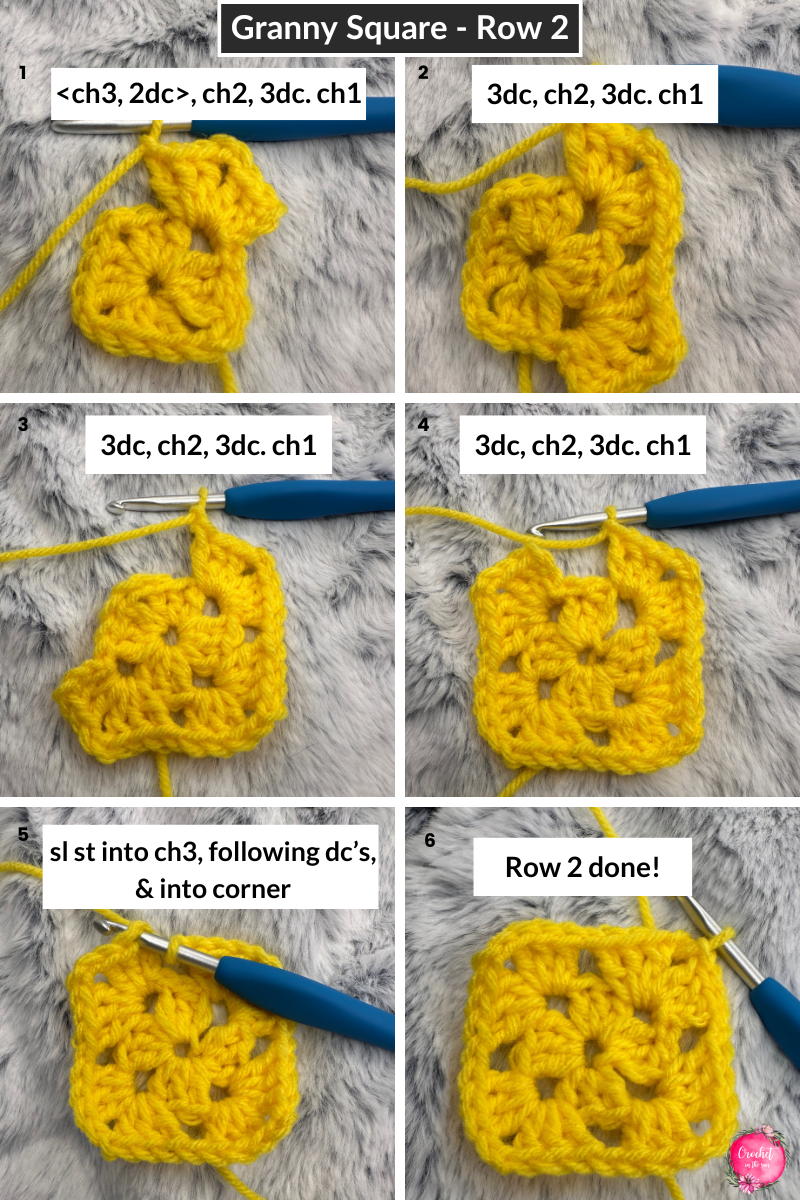
Row 2:
- In the first corner, < ch3, 2dc >, ch2, 3dc
- Ch1
- In 2nd corner, < 3dc, ch2, 3dc >
- Ch1
- In 3rd corner, < 3dc, ch2, 3dc >
- Ch1
- In 4th corner, < 3dc, ch2, 3dc >
- Ch1
- To end the row: sl st to ch3, sl st into following 2 dcs, sl st into the corner. (You’re slip-stitching your way to the corner, to ensure you’re starting the next row from the corner)
Row 3:
- Side 1:
- In the first corner, < ch3, 2dc >, ch2, 3dc.
- Across the row, repeat *ch1, 3dc into ch1sp*.
- When you reach the corner, ch1, then work < 3dc, ch2, 3dc > into the corner ch2sp from the previous row.
- Side 2 and 3:
- Across the rows, repeat *ch1, 3dc into ch1sp*.
- When you reach each corner, ch1, then work < 3dc, ch2, 3dc > into the corner ch2sp from the previous row.
- Side 4
- Across the row, repeat *ch1, 3dc into ch1sp*.
- When you reach the last corner, ch1, sl st to the top loop of the ch3, sl st into the following 2dc’s, sl st into the corner.
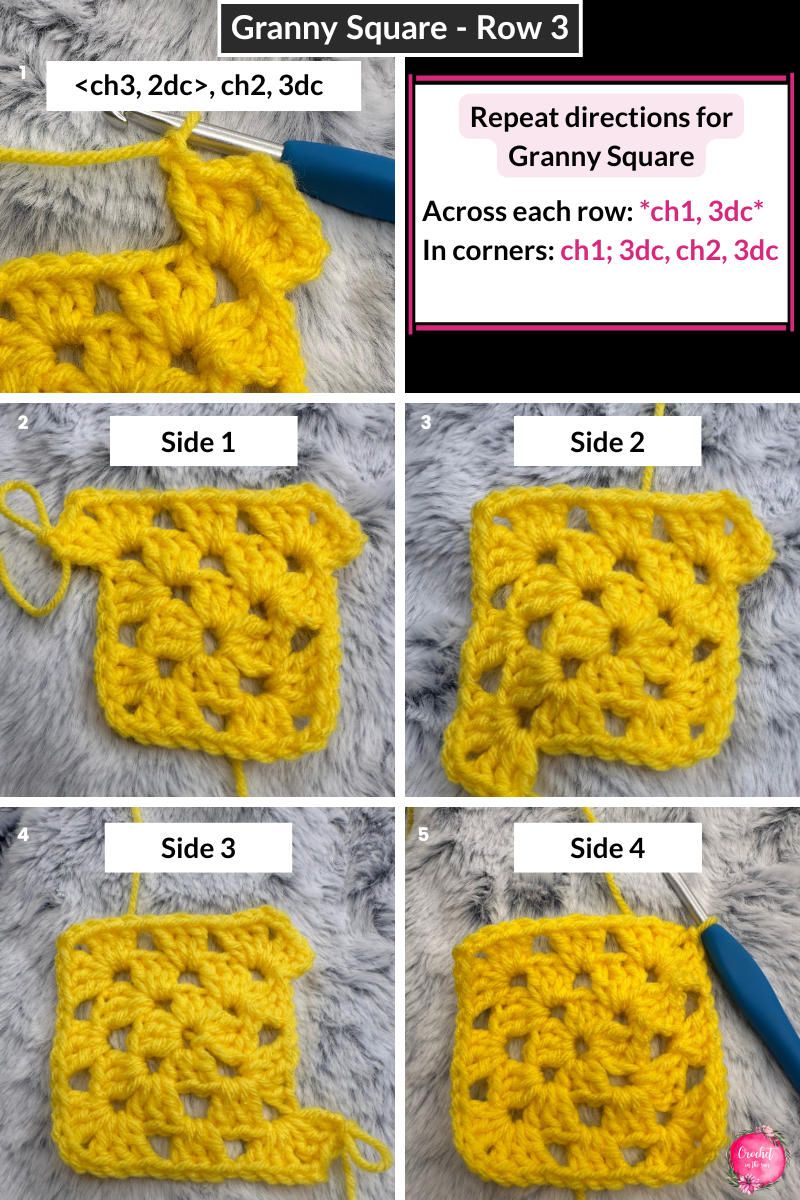
In short, the directions for all rows from here are as follows:
- In the first corner of each row: < ch3, 2dc >, ch2, 3dc. This is slightly different from the next 3 corners because you need to start with a ch3. This ch3 brings you up to the height of the next row. That starting ch3 counts as a dc.
- In the 2nd, 3rd, and 4th corners of each row: 3dc, ch2, 3dc.
- Across each row, repeat *ch1, 3dc into ch1sp*.
- To end each row: ch1, sl st into top loop of the ch3, sl st into the following 2 dcs, and then sl st into the corner
The above will be true for all following rows, as it’s a simple repeat – regardless of the yarn weight you use.
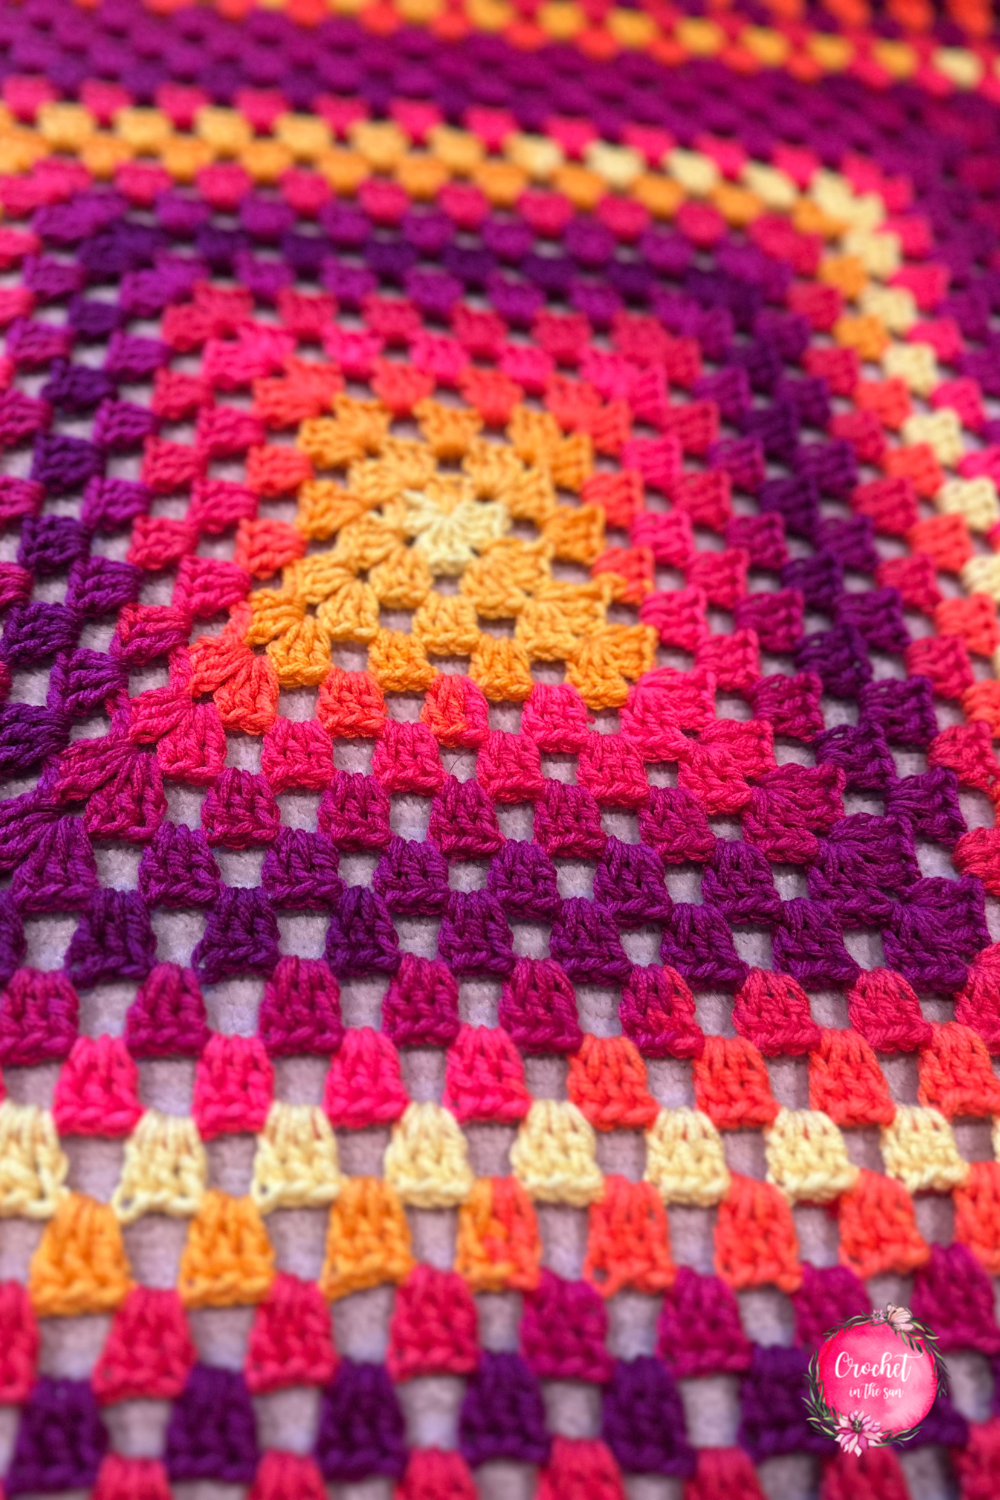
Rows 4 to 39
Repeat row 3 until you reach the desired size of your blanket. Remember this is a square pattern, so all sides will be the same measurement.
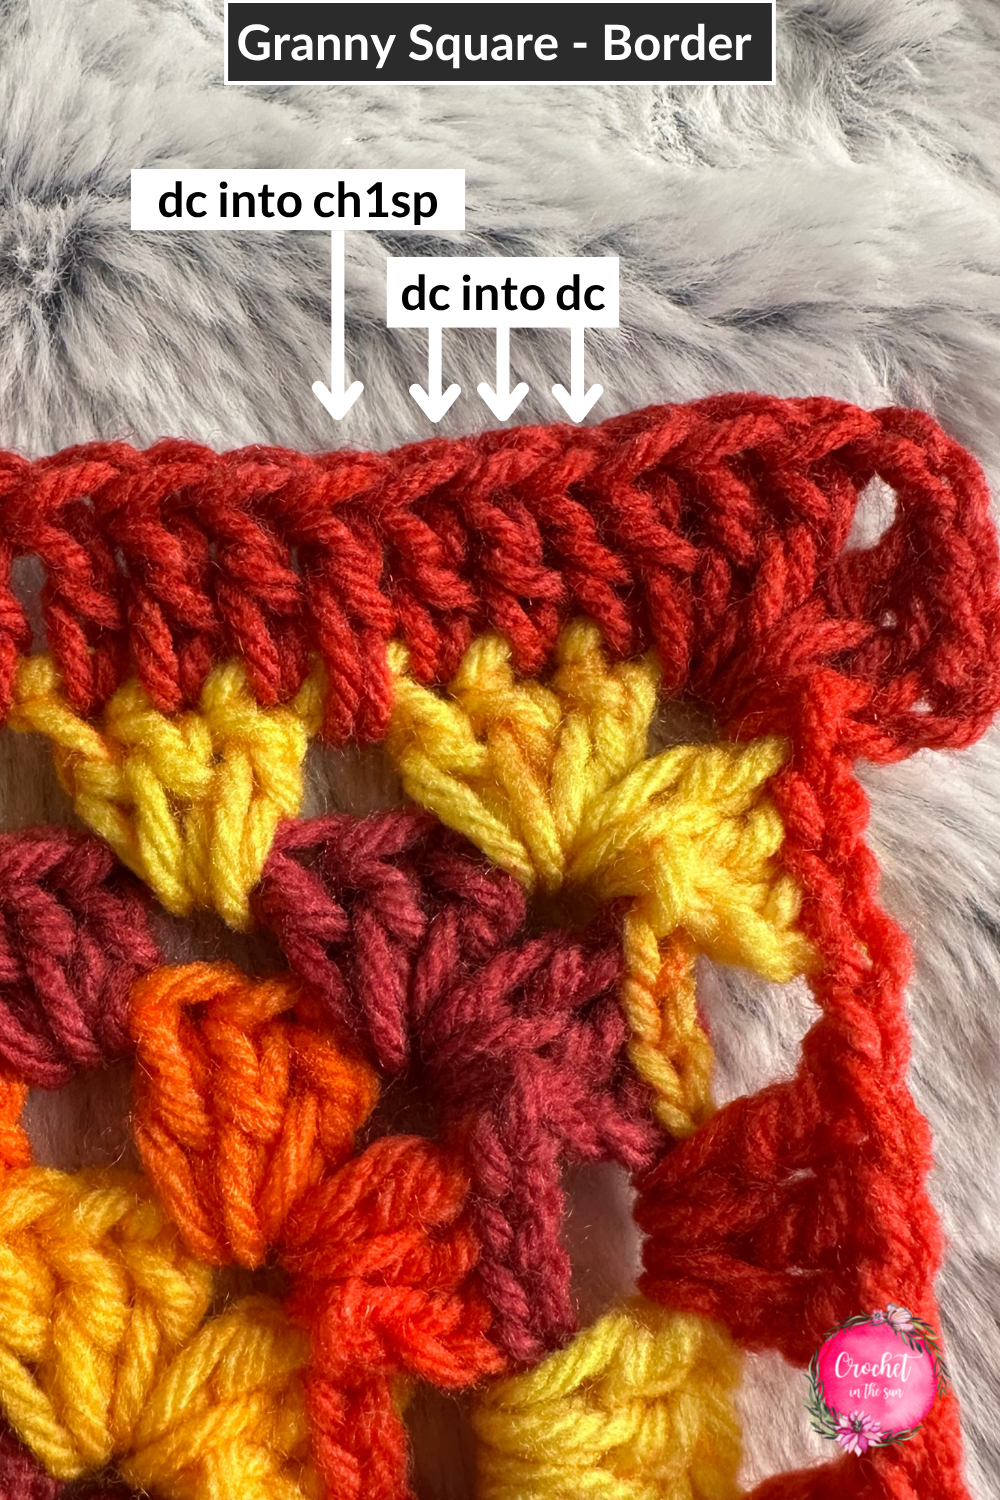
Border
- In the first corner: < ch3, 2dc >, ch2, 3dc.
- Repeat *dc in each stitch* across all sides. This means, work a dc into each dc of the cluster (3 of them), then dc in the ch1sp from the previous row.
- In the remaining corners, < 3dc, ch2, 3dc >.
- To end the row, sl st into top loop of the ch3, into the following 2 dcs, and into the corner. Fasten off (cut your yarn).
Lastly, weave in all your ends if you haven’t already.
Optional Finishes
Add a tassel to each corner or add a fringe to the sides of the blanket.
All done! Now you have a beautiful granny square crochet blanket.
If you loved this crochet scarf pattern, have a look at my Crochet Pattern Bundle on Etsy. It includes some of my best sellers along with other new patterns!
Pin for later
Thanks for following along, and I hope you enjoy making this beautiful granny square crochet blanket! If you make one and share on social media, please tag @crochetinthesun. I would love to see them! Also, please link back to my pattern/blog and provide credit for the pattern.
Plus, I would love to share your creation with the crochet community so we can see these pretty blankets come to life. 🙂
Happy crocheting,
Jennifer
Useful crochet references
- Crochet hook size conversion chart
- Yarn weight conversion chart
- Stitch conversation chart (US vs UK)
- Ultimate Beginner’s Guide to Crochet