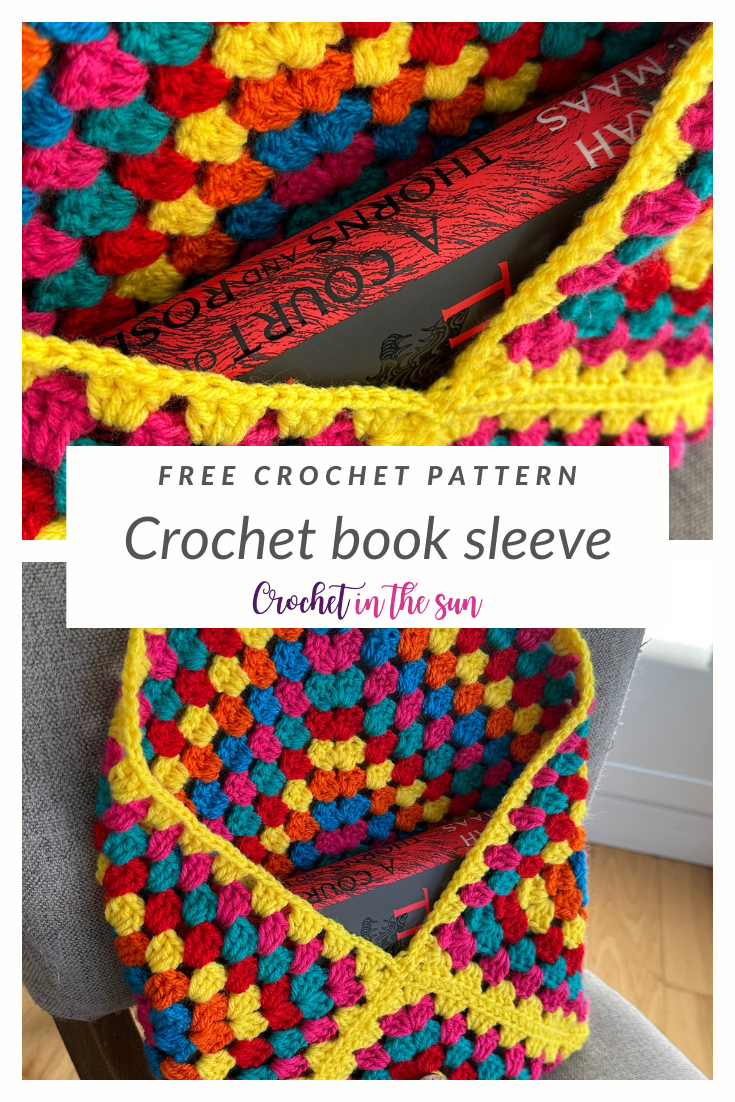
Do you love to bring your book with you on the go? Only problem is, you often have to throw your book in your bag, your purse, or maybe leave it loose in your car. That’s great, except the book cover gets creased or the pages get bent at the corners. Not cool. Problem solved! Crochet a book sleeve to store your book so the cover, corners, and pages are protected!
Even better? Crochet this book sleeve in colors that match your favorite book or book series!
I feel like if you make a Venn diagram of people who read and people who crochet, there is a massive crossover. In that case: bookTok, welcome to crochetTok 🙂
Choose your book theme and colors
There are so many fantastic books out there, and you can use the colors from the book cover(s) or simply pick colors that match the vibe/scenery of the book.
For this book, I used the book series ‘A Court of Thorns and Roses’ by Sarah J. Maas.
There are 5 books in this series, so I picked 1 color per book plus the title color, to come up with a 6 color repeat.
Now, you can also choose one book, or even a theme across the books for your book sleeve. For example, you can choose a couple colors that vibe with the Spring Court (I won’t say anything here, no spoilers!) or the Night Court.
Creative and functional
You can really have fun with this idea. This is a great way to spark some creativity but also keep your books protected from wear and tear of reading on the go. Win-win!
What will you make?
I can’t wait to see what books or book series you choose! So if you make a crochet book sleeve and share on social media, please tag @crochetinthesun, and mention the book theme too if you’d like!
Also, please link back to my pattern/blog and provide credit for the pattern. Ok, let’s go!
Skill Level
Easy
If you don’t know how to crochet, or maybe just want to brush up on the basics, we have a great resource for you!
Hop over to the Ultimate Beginner’s Guide to Crochet. This breaks down the basics of what you need to learn, in what order, and link you directly to some great resources! And best of all, it’s free! Enjoy 🙂
Materials & Yarn:

- 5mm hook (US H-8)
- Paintbox Yarns Simply Aran in Red Rose
- Big Twist Value in Teal
- Loops & Threads Impeccable in Fuchsia Blooms (colorway found in Michaels)
- Paintbox Yarns Simply Aran in Kingfisher Blue
- Paintbox Yarns Simply Aran in Blood Orange
- Big Twist Value in Varsity Yellow
- Yarn needle and scissors
Pick up Paintbox yarn and more online at Lovecrafts, my personal fav! 🙂

The pattern will hold true if you use different yarn weights, yarn fibers, or colors.
Stitches
- chain (ch)
- slip stitch (sl st)
- double crochet (dc)
If needed, refer to my Beginner’s Guide to crochet. Those stitch tutorials will walk you through how to complete the above stitches.
If you need to convert from US to UK terms, have a look at this chart.
Abbreviations
- ch1sp = chain1 space (the space that is created when you chained 1 in the previous row.)
- ch2sp = chain2 space (the space that is created when you worked 2 chains in the previous row.) For this pattern, you will see ch2sp in each corner.
- dc cluster = work 3dc in the same stitch
Gauge
4 x 4 inches = 4 dc clusters across x 7.5 rows up (not blocked)
Finished measurement
The granny square is 16.5 inches per side (not blocked) laid flat before joining.
Once the project is complete and the top is buttoned, it measures roughly 11 inches wide x 10 inches tall. This was more enough room for a large hardcover book, therefore you could size down if you plan on using this for a smaller book or paperback.
Pattern Notes
- The beginning ch3 of each row counts as a dc.
- You do not need to turn your work at any point.
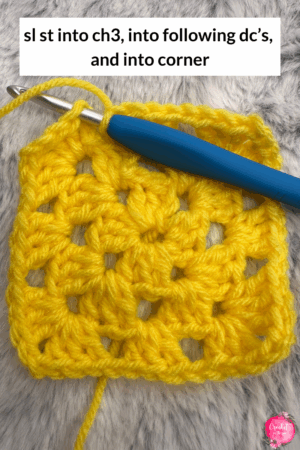
- At the end of each row, you will slip stitch into the top loop of the ch3, then slip stitch into the following 2 dc’s, and then slip stitch into the corner. See photo below:
Video tutorial
The written tutorial and photo tutorials are below, but you can find related videos on YouTube as well: https://www.youtube.com/@crochetinthesun
Written Pattern
- Get the inexpensive ad-free PDF printable from my Etsy Shop
- Pin this pattern to your Pinterest Boards here
- Add this pattern to your Ravelry queue – coming soon!
- Buy directly below using Shopify– coming soon!
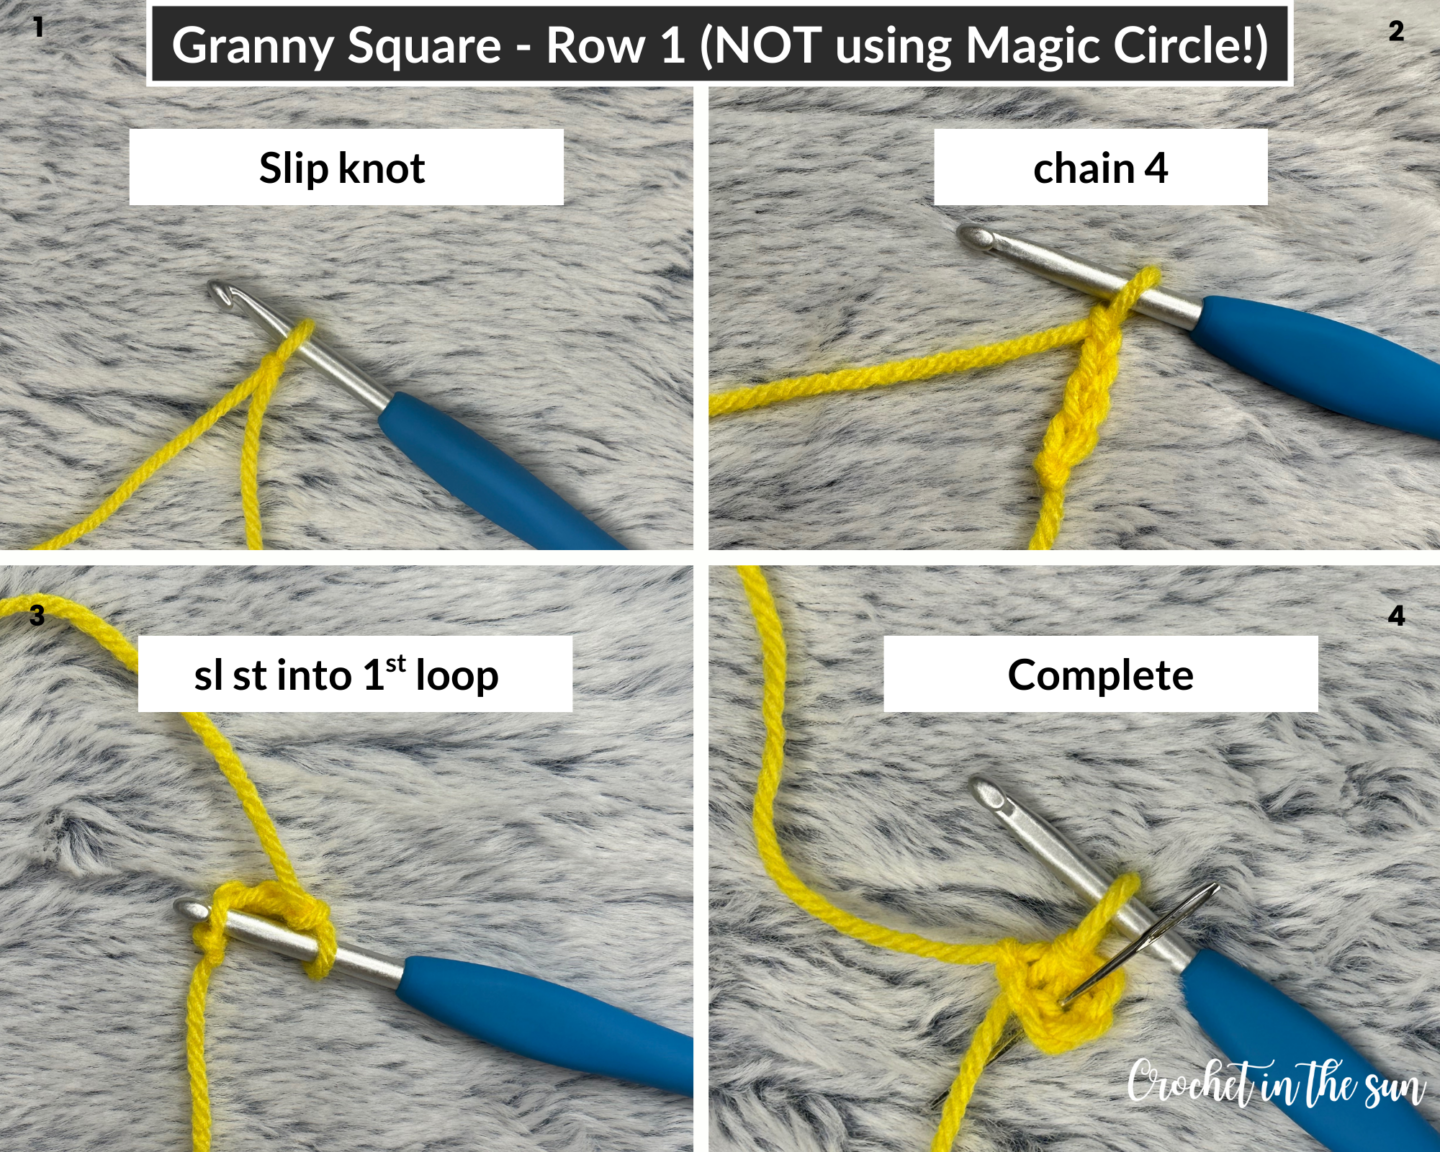
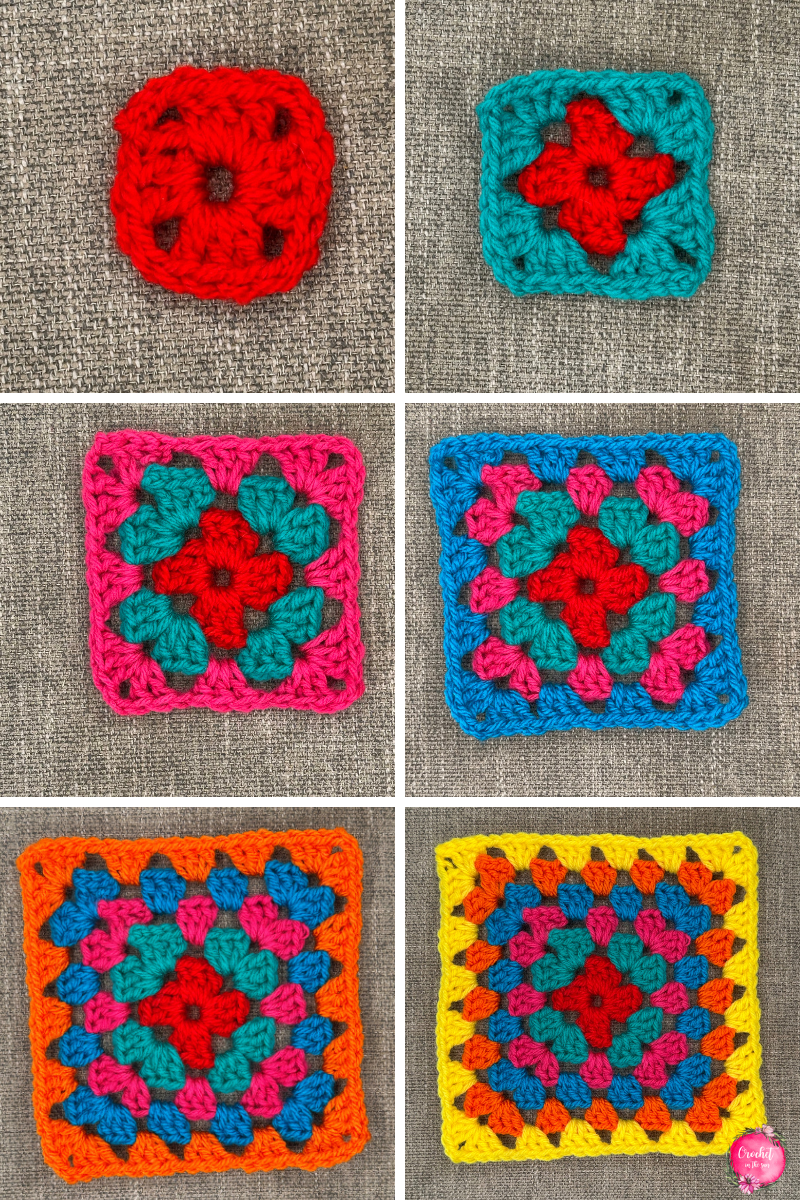
To start: Create a slip knot and chain 4, slip stitch into 1st loop. Ch3 (this ch3 will count as the 1st dc in the corner, then:
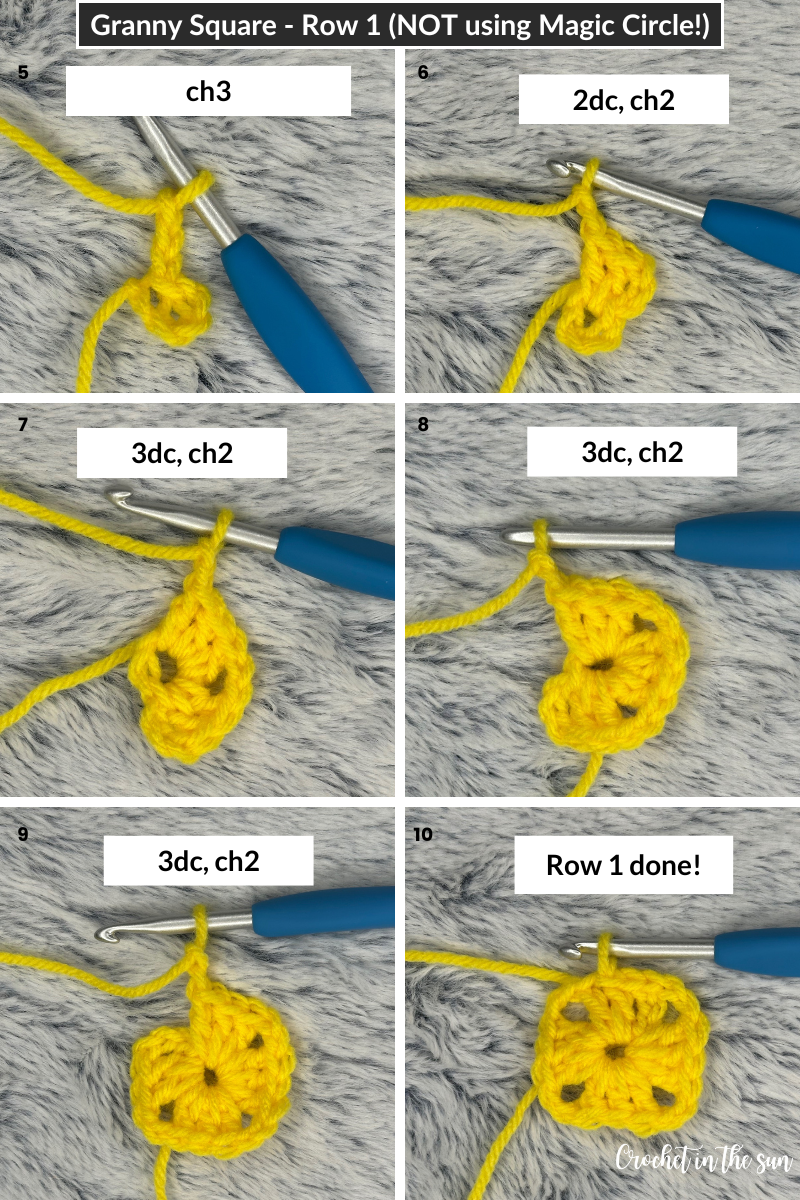
Row 1: Into the center “hole” created by the slip stitch, work:
- 2dc, ch2. (1 corner made, as that first ch3 counted as the first dc for the corner)
- 3dc, ch2 (2nd corner made)
- 3dc, ch2 (3rd corner made)
- 3dc, ch2 (4th corner made)
- Slip stitch (sl st) into ch3, sl st into following 2 dc’s, sl st into corner. Fully written out, that’s: slip stitch into the 3rd chain of the ch3; then sl st into the following 2 dc’s, then sl st into the corner space.
You will have 12 dc’s and 4 ch2sp’s. Fasten off to change colors.
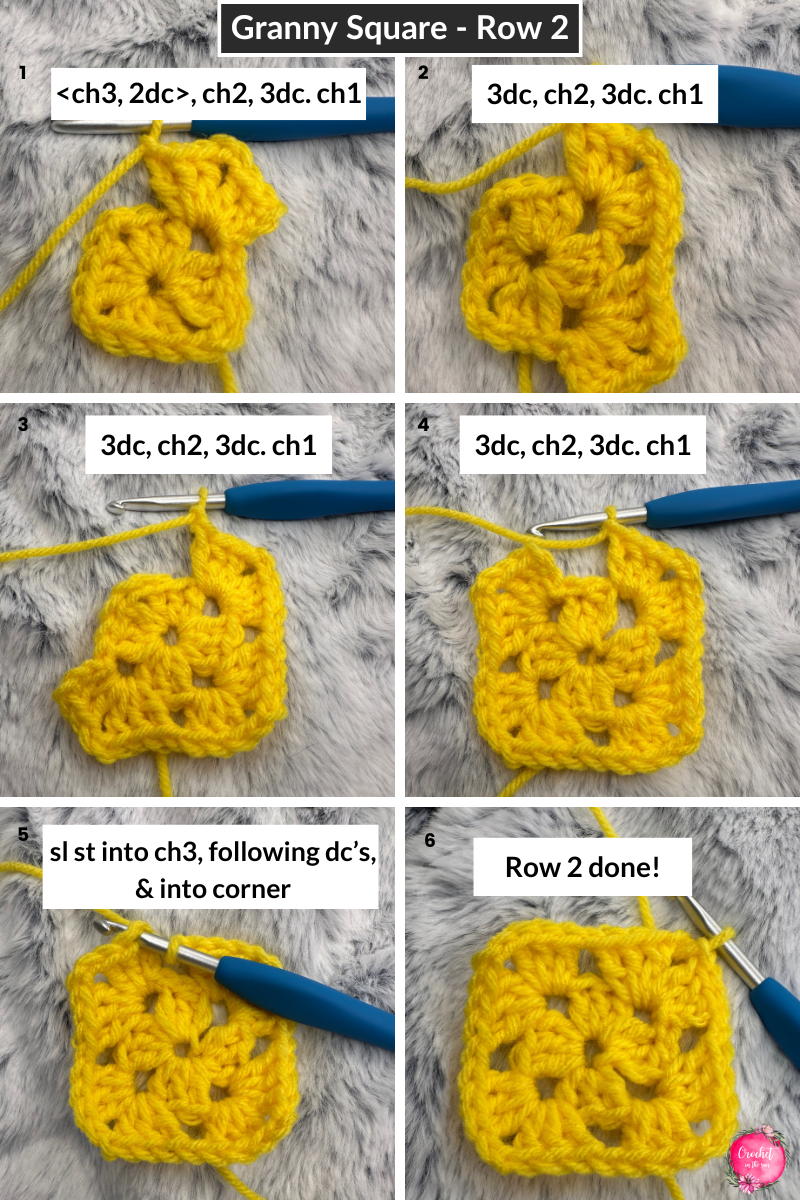
Row 2: Attach new color in the corner & pull up a loop
- In the first corner, < ch3, 2dc >, ch2, 3dc
- Ch1
- In 2nd corner, < 3dc, ch2, 3dc >
- Ch1
- In 3rd corner, < 3dc, ch2, 3dc >
- Ch1
- In 4th corner, < 3dc, ch2, 3dc >
- Ch1
- To end the row: sl st to ch3, sl st into following 2 dc’s, sl st into the corner. (You’re slip-stitching your way to the corner, to ensure you’re starting the next row from the corner)
Need some supplies? Check out my Amazon storefront, which has a consolidated list of my favorite yarns, crochet hooks, and other crochet accessories you’ll need to complete your projects! These are the actual products I personally use and highly recommend.
As an Amazon Influencer, I may earn from qualifying purchases.
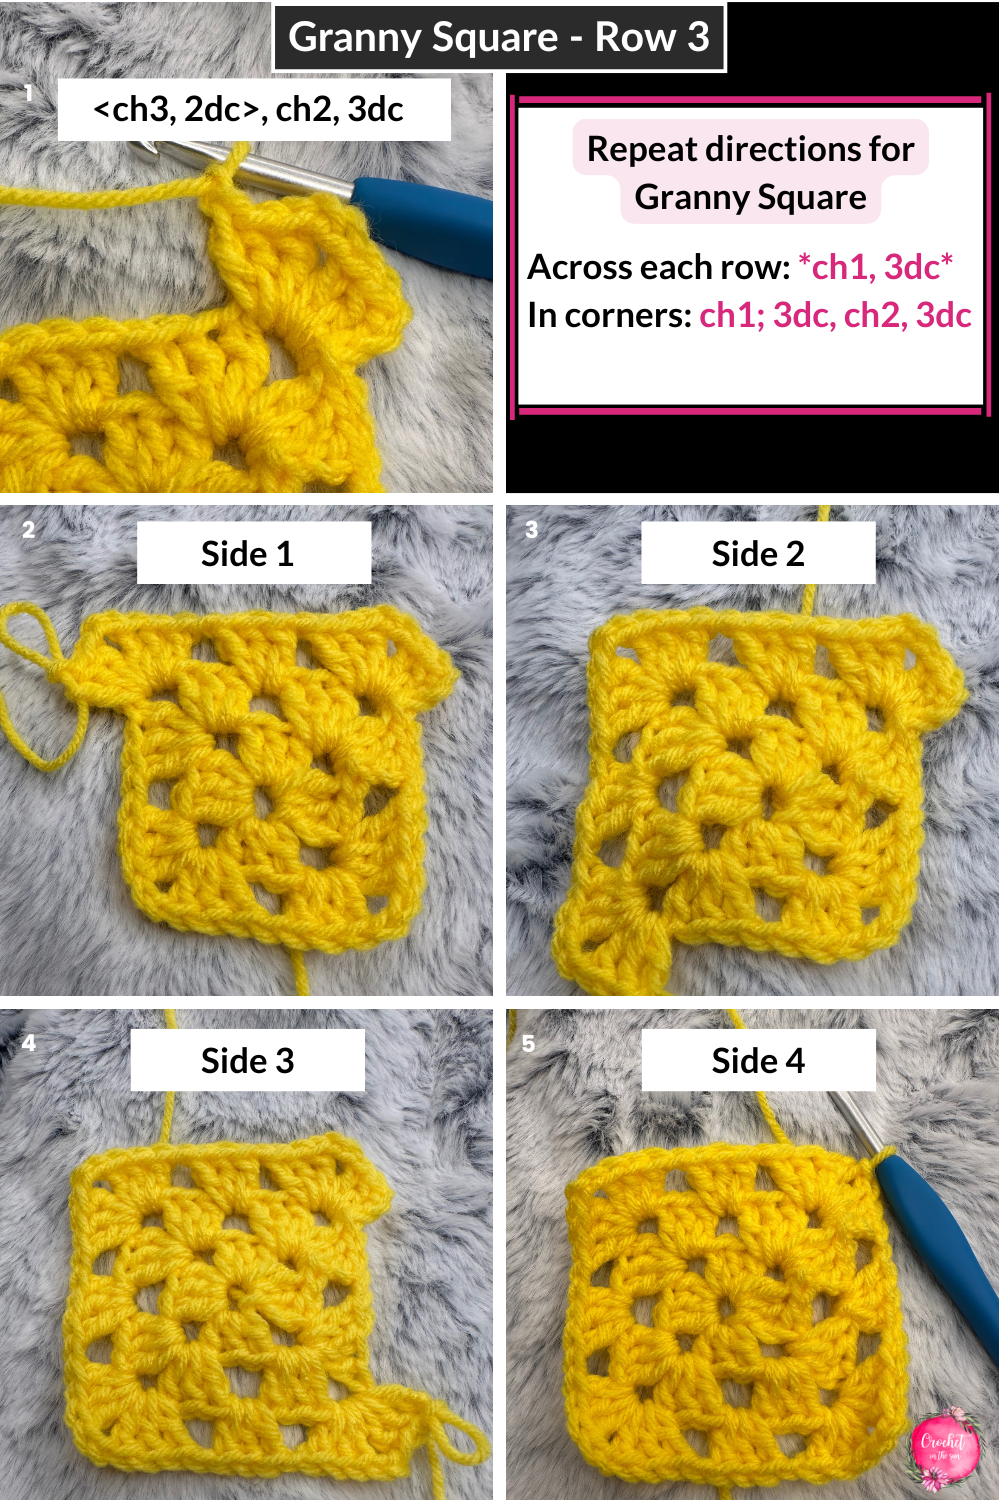
Row 3: Attach new color in the corner & pull up a loop
- Side 1:
- In the first corner, < ch3, 2dc >, ch2, 3dc.
- Across the row, repeat *ch1, 3dc into ch1sp*.
- When you reach the corner, ch1, then work < 3dc, ch2, 3dc > into the corner ch2sp from the previous row.
- Side 2 and 3:
- Across the rows, repeat *ch1, 3dc into ch1sp*.
- When you reach each corner, ch1, then work < 3dc, ch2, 3dc > into the corner ch2sp from the previous row.
- Side 4:
- Across the row, repeat *ch1, 3dc into ch1sp*.
- When you reach the last corner, ch1, sl st to the top loop of the ch3, sl st into the following 2dc’s, sl st into the corner.
Rows 4-16: Repeat Row 3 in the desired color per row.
Or, repeat until desired size if you want to make this smaller or larger.
This square measured roughly 16.5 inches per side (not blocked). This was sized to fit a hardcover book, which is bigger than most paperbacks or devices, so depending on what you plan on using this for, you can size down / size up as needed.
This was more than big enough for this hardcover!
So in short, the directions for all following rows from here are as follows:
- In the first corner of each row: < ch3, 2dc >, ch2, 3dc. This is slightly different from the next 3 corners because you need to start with a ch3. This ch3 brings you up to the height of the next row. That starting ch3 counts as a dc.
- In the 2nd, 3rd, and 4th corners of each row: 3dc, ch2, 3dc.
- Across each row, repeat *ch1, 3dc into ch1sp*.
- To end each row: ch1, sl st into top loop of the ch3, sl st into the following 2 dc’s, and then sl st into the corner. See photo in Pattern notes.
Weave in your ends.
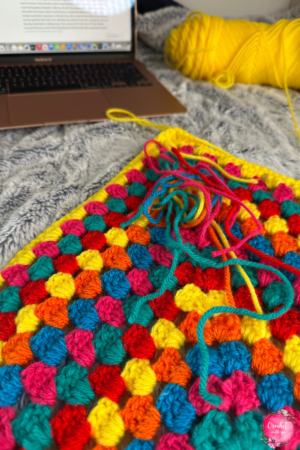
For the ACOTAR themed book sleeve, this is what the first set of rows will look like before I begin the color repeat for this specific book series:
SEAM TOGETHER: Join the sides together to create the “sleeve”
First, choose which side is the ‘right’ side. After weaving in your ends, you may have one side that you chose to be displayed on the outside/back, versus the wrong side that will be mostly covered once you sew 3 sides together over it.
Now this is where it all comes together…. 🙂
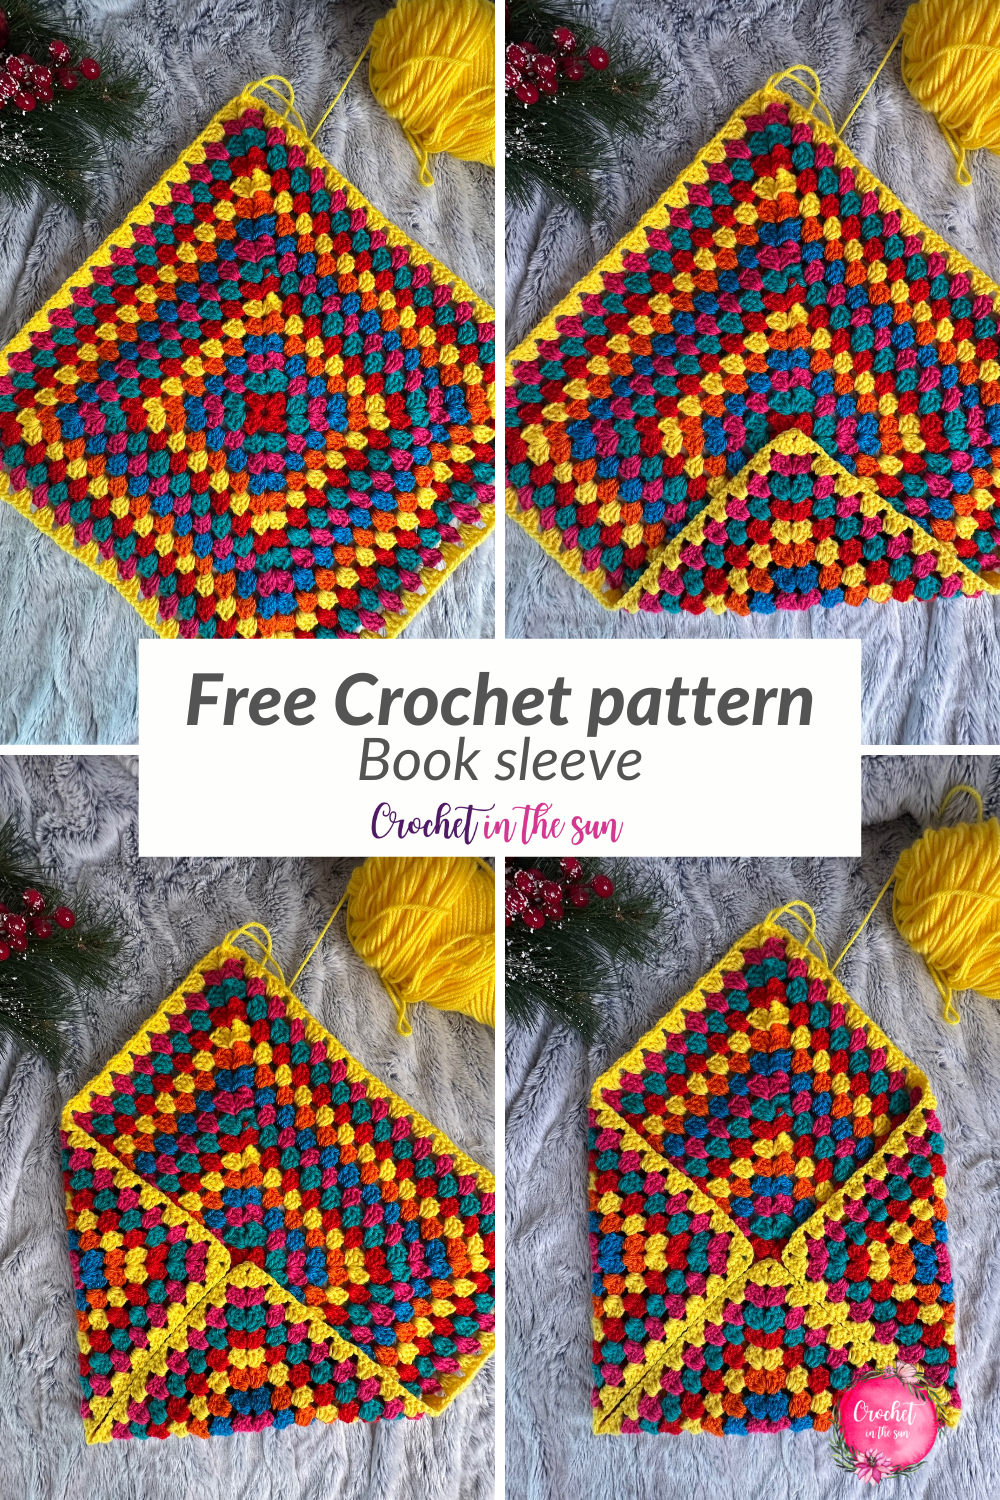
Next, lay your square flat, so it’s like a diamond with one side on pointing to the top. Fold the other 3 sides in, meeting in the middle right over the middle of the first row, like below:
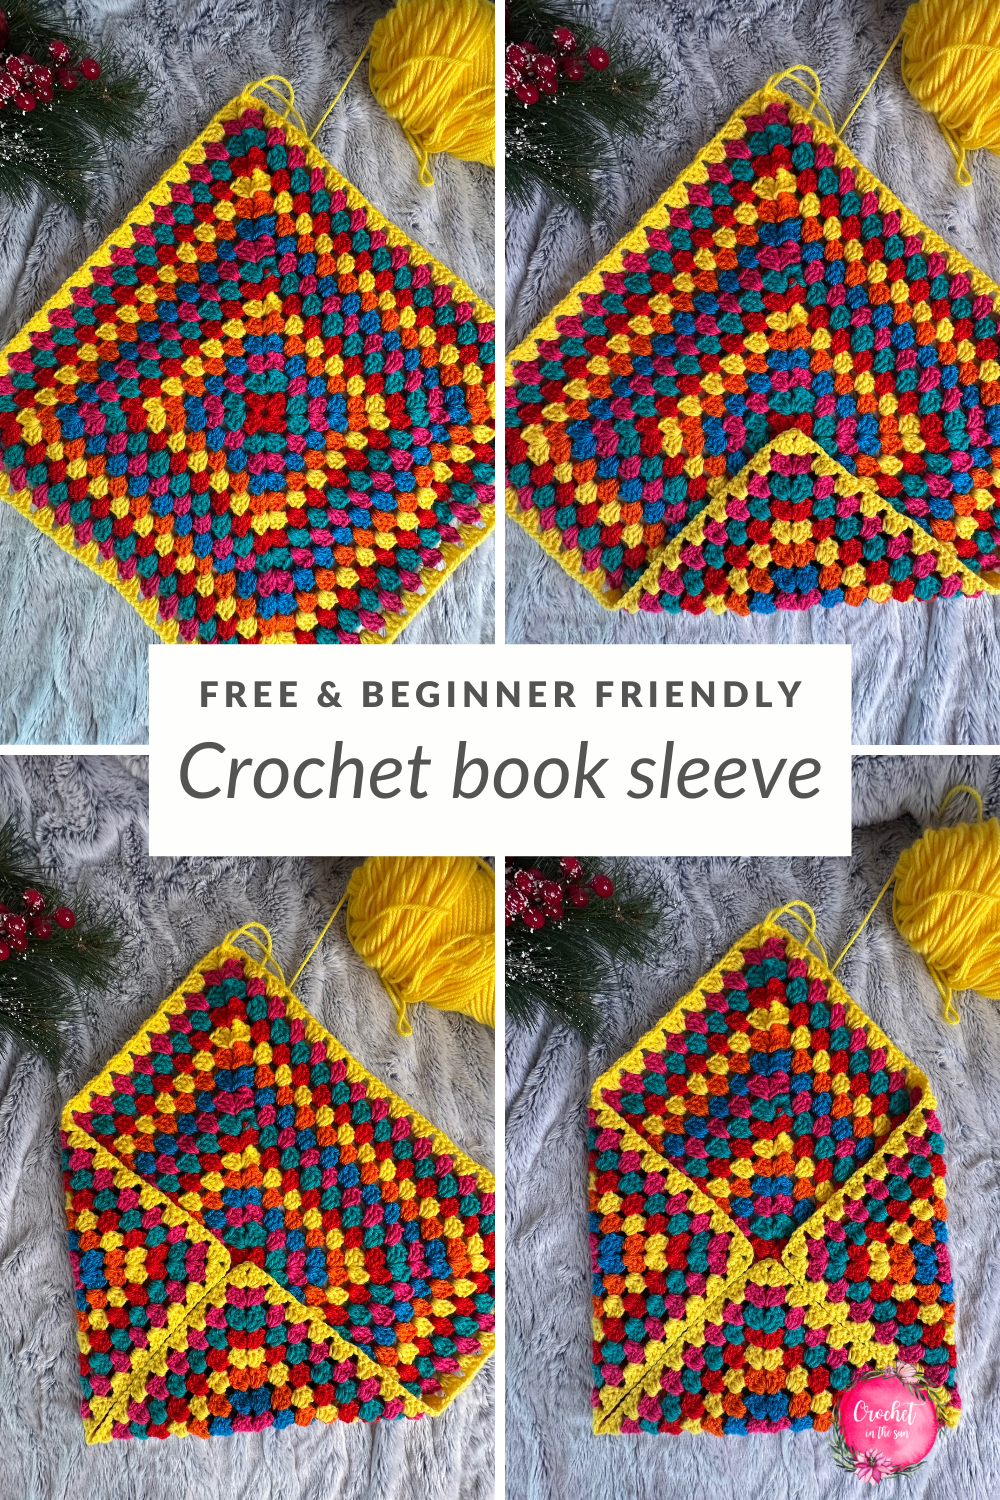
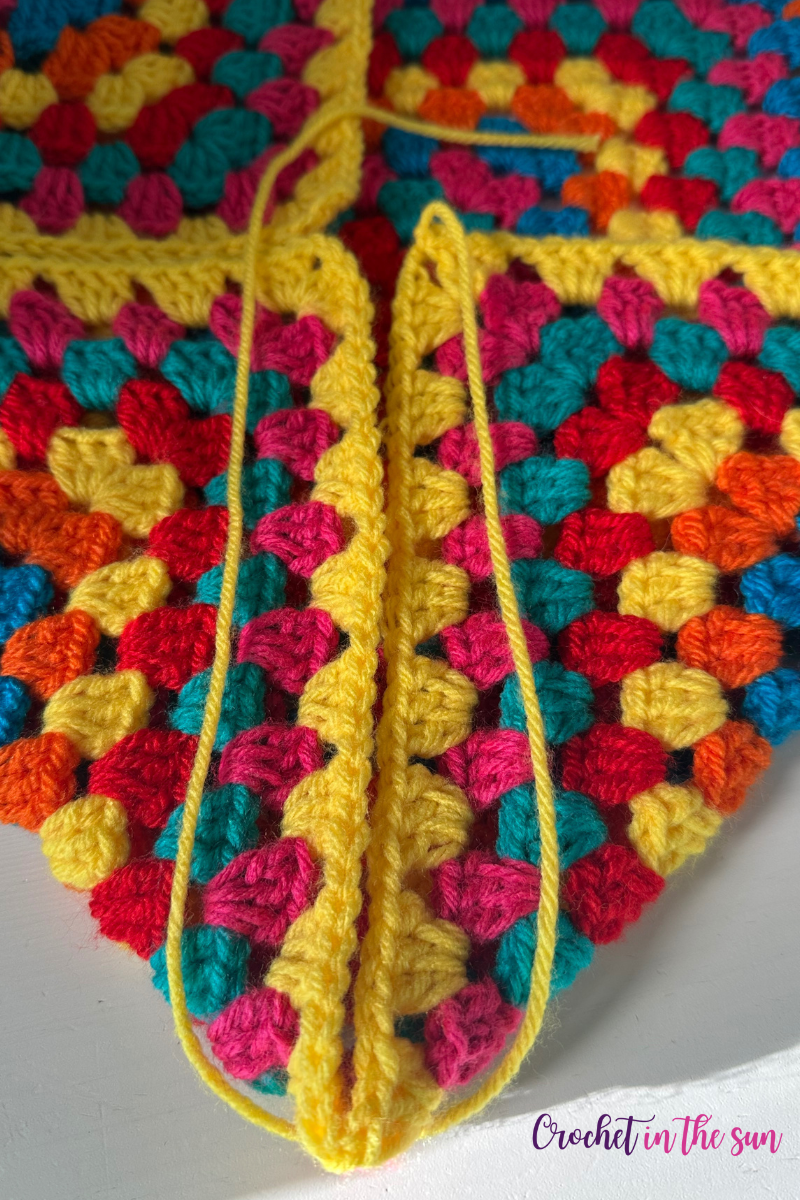
Attach a long piece of yarn to one of the corners that are folded into the middle.
The yarn should be double the length of the area you’re seaming together.
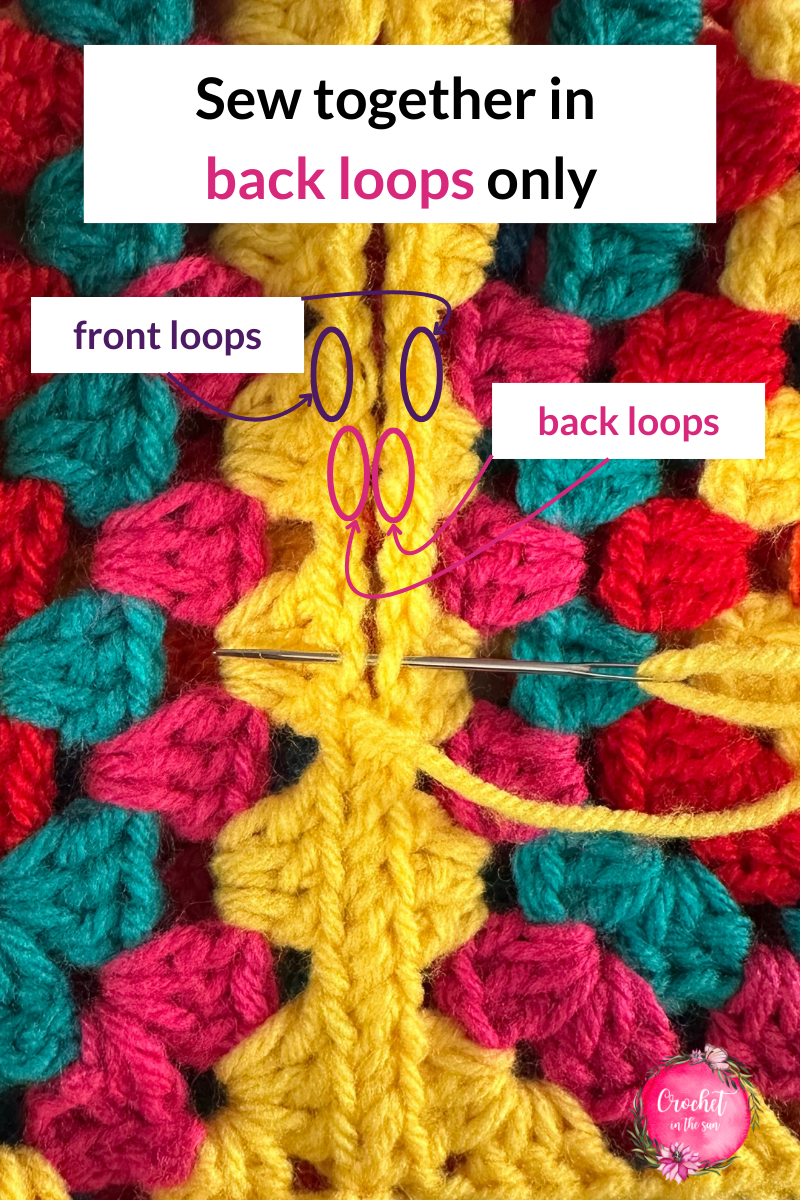
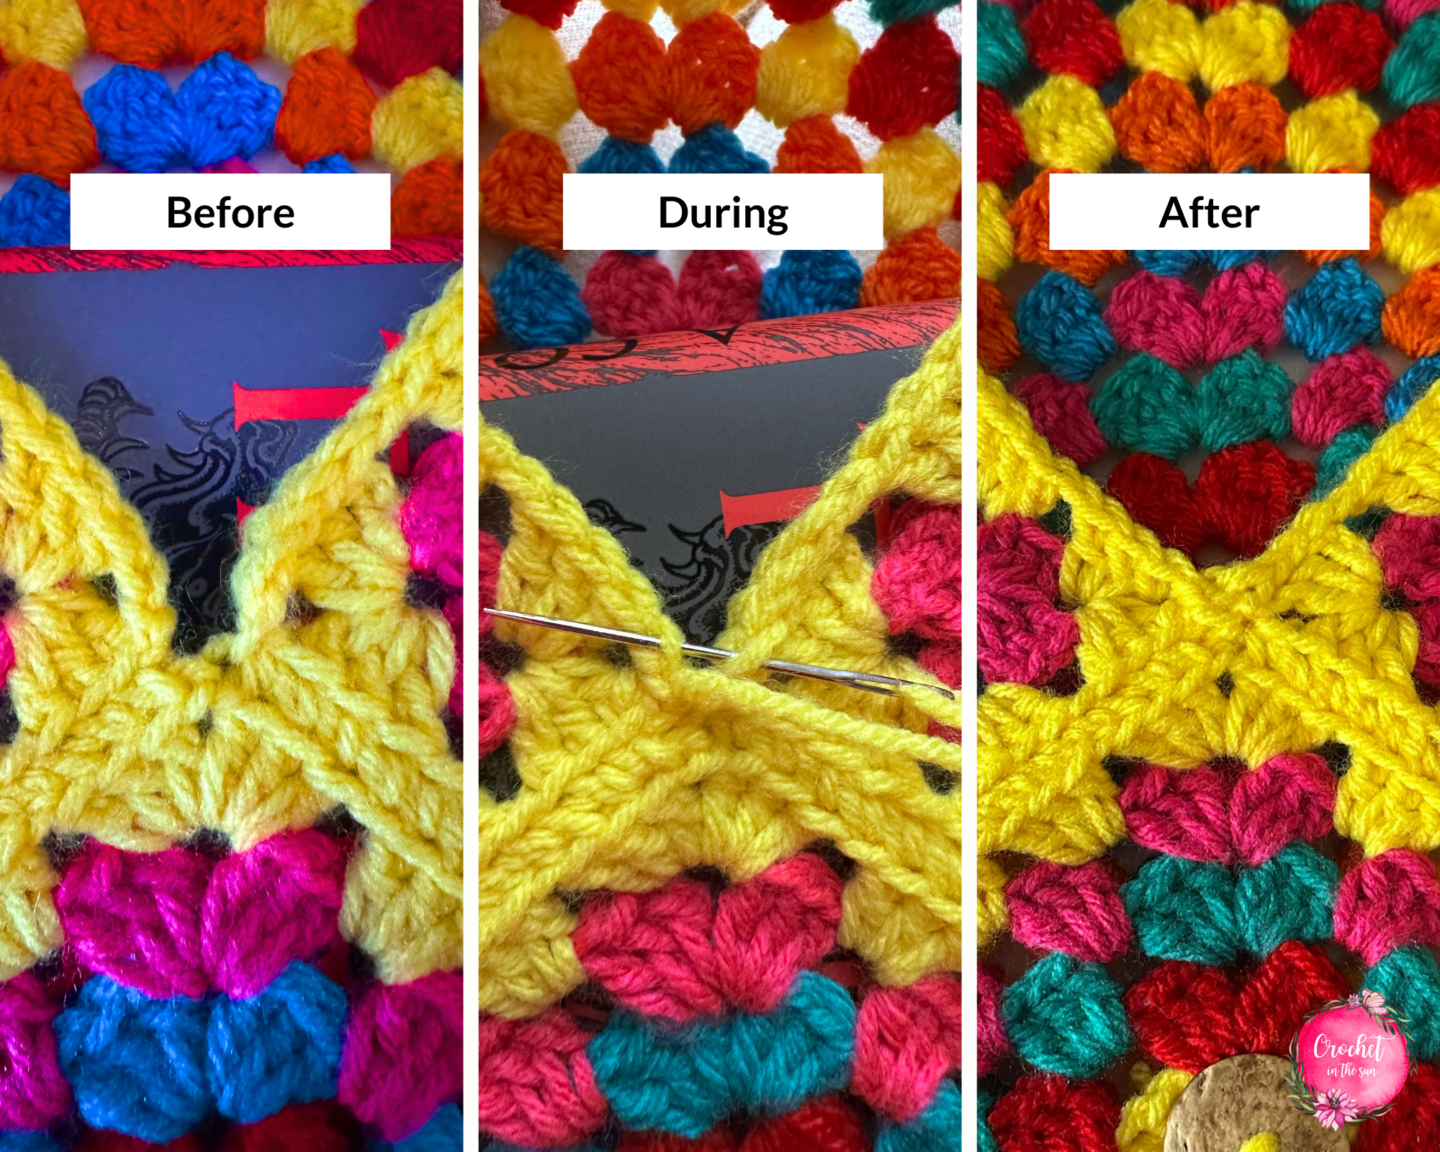
Keep those the 2 sides next to each other and sew together the back loops only (BLO). Pass the needle through from right to left. This will make a gorgeous spiral seam that lays nice and flat. It can help to lift them up a bit, so they are not laying totally flat, allowing you to pass the needle through the back loops easily, without catching the front loops.
Now, attach the other 2 sides by repeating the same process (attach the yarn to the corner and sew the sides together).
To neaten up where the 3 sides joined in the middle, seam together back loops only again, bringing the left and ride sides together for a couple stitches. Fasten off and weave in your ends. This makes it appear that both sides truly meet in the middle.
In the next step, we’ll attach a button and create a loop so you can securely close the sleeve.
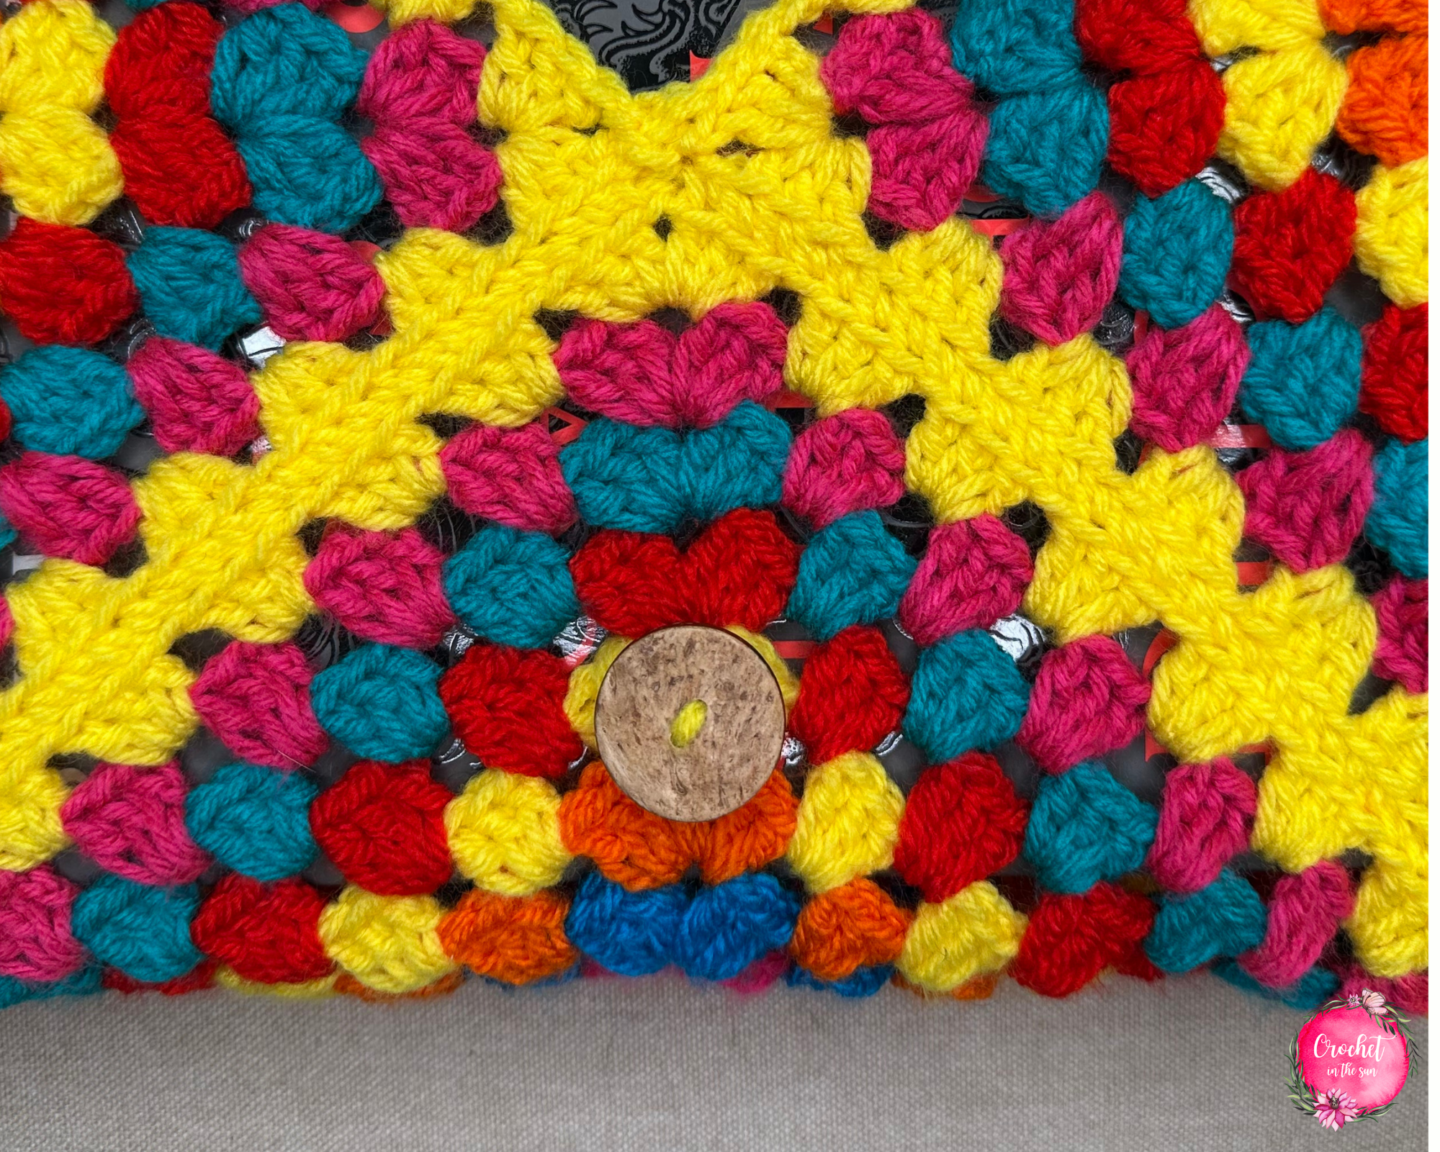
ATTACH A BUTTON
At this point, it’s recommended to put a book in your sleeve to get an idea where you should attach the button. This will give you a feel for how everything will lay, and what it will look like when you fold the top piece down to close it.
Based on this, determine where you want to attach your button. Use your preferred method to attach the button to your sleeve. I used a yarn needle and yarn of the same color used to seam the 3 sides together. However, if you’d like to use needle and thread to attach, that works just as well!
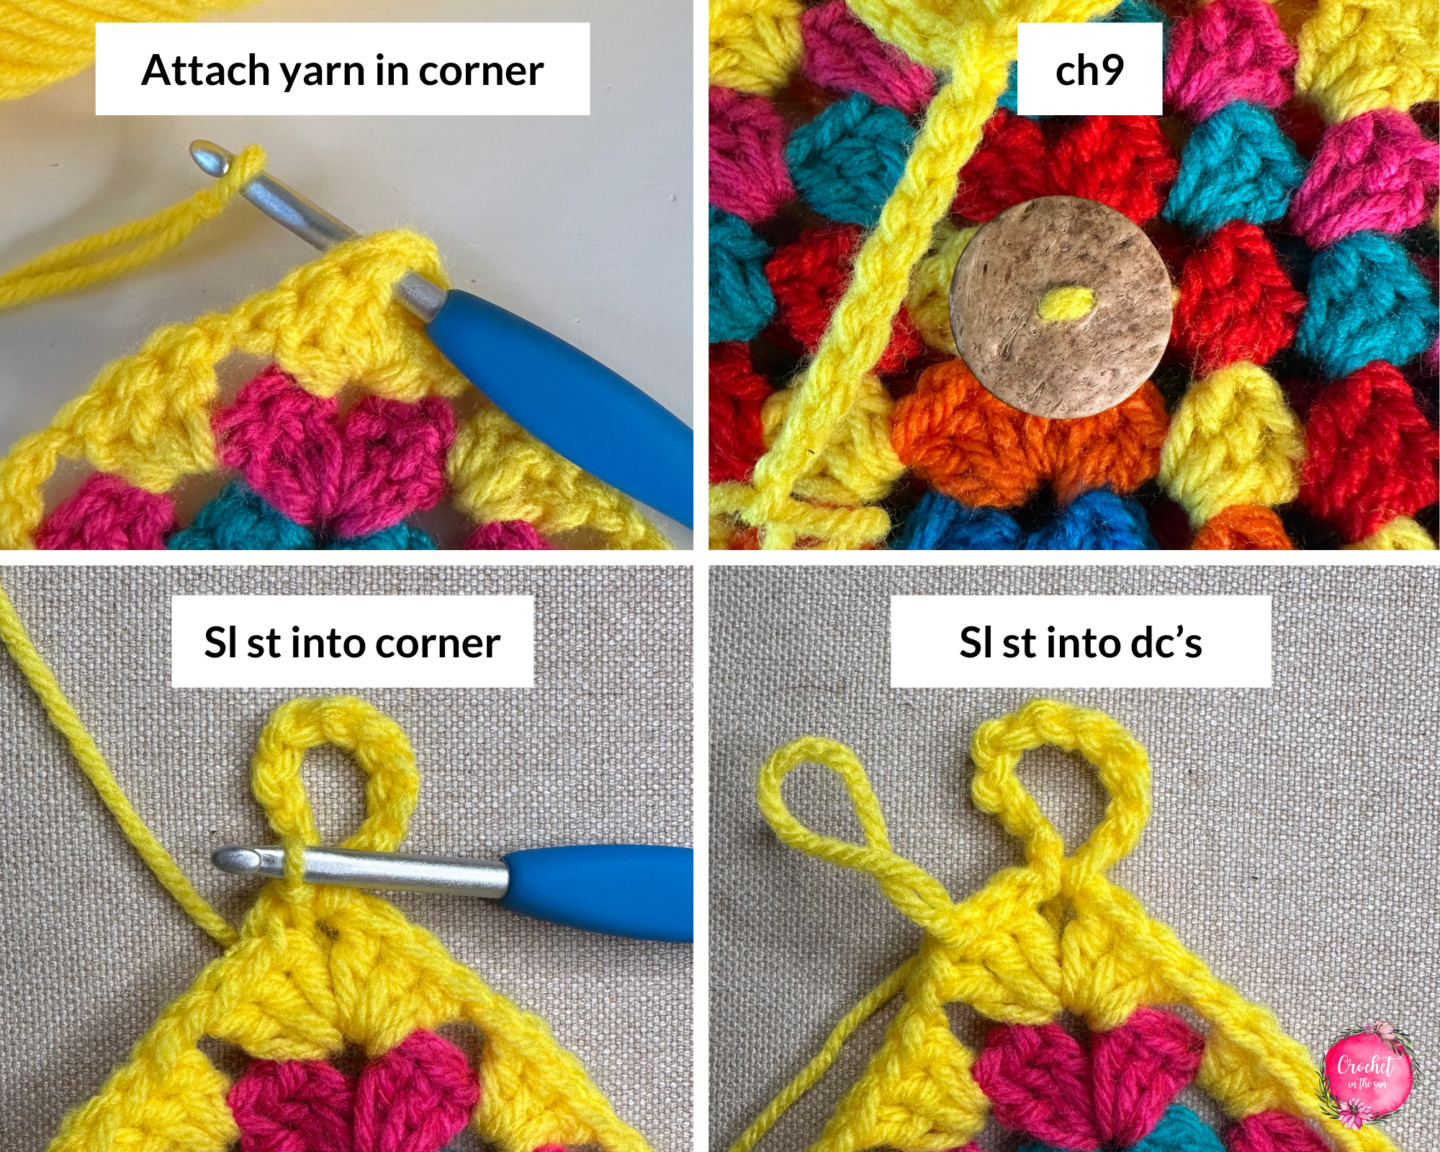
ADD A LOOP
To create the loop, attach your yarn to the top corner (the chain 2 space). When you lay your project flat, this is the top point of the ‘diamond’ that will fold down toward the button.
- Attach your yarn to the corner using a slip knot.
- Ch9, slip stitch into the corner space. You want to make sure this chain loop is long enough so it can fit around the button, but not too large that it won’t become unbuttoned accidentally.
- Slip stitch into the 3dc’s to its side to make it more secure.
- Fasten off and weave in your ends.
Alternatively, instead of using the button + loop closure, you can create a long chain from the top corner to wrap around the book once or twice to ‘sort of’ secure it. If you do this, I suggest you work a long chain, then work a row of sc’s into that chain to make it thicker. This won’t secure it 100% but will help!
Thanks for following along, and I hope you enjoy making this crochet book sleeve!
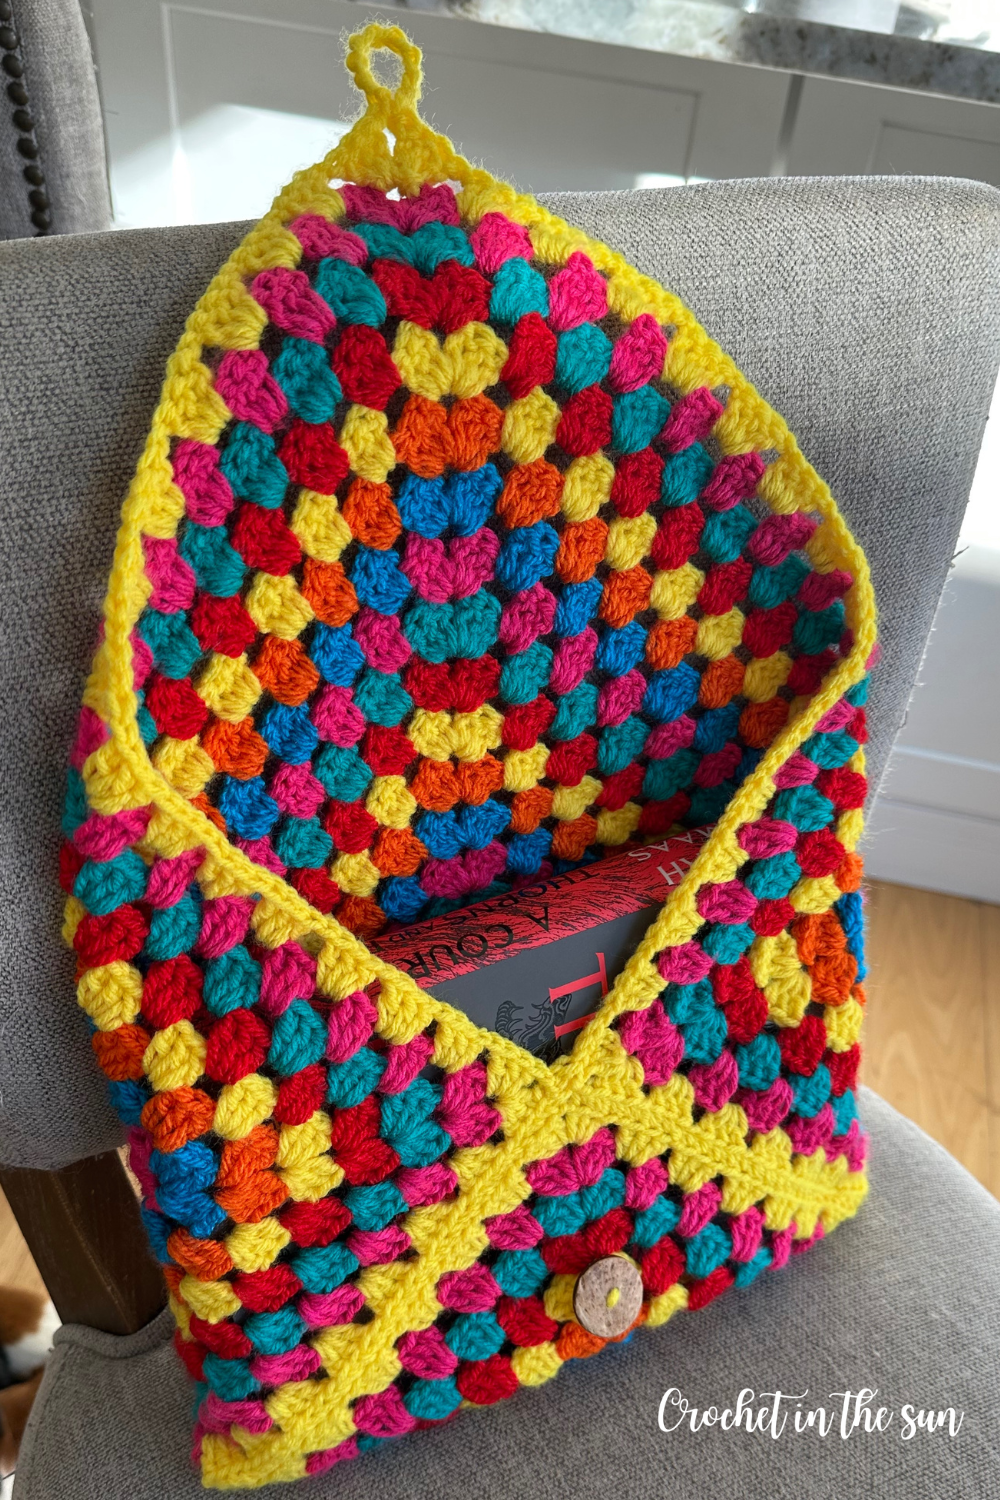
As you know, this sleeve was made in the theme of the ACOTAR (A Court of Thorns and Roses) book series, and I can’t wait to see what you guys come up with!! Tag me and let me know so we can see these crochet book sleeves pop up all around!
Happy crocheting,
Jennifer
Pin for later
Other useful crochet references
- Crochet hook size conversion chart
- Yarn weight conversion chart
- Stitch conversation chart (US vs UK)
- Ultimate Beginner’s Guide to Crochet
Looking for more Granny Square crochet projects? Check this out:
Looking for more crochet patterns? Have a look at my Crochet Pattern Bundle on Etsy. It includes some of my best sellers along with other new patterns!