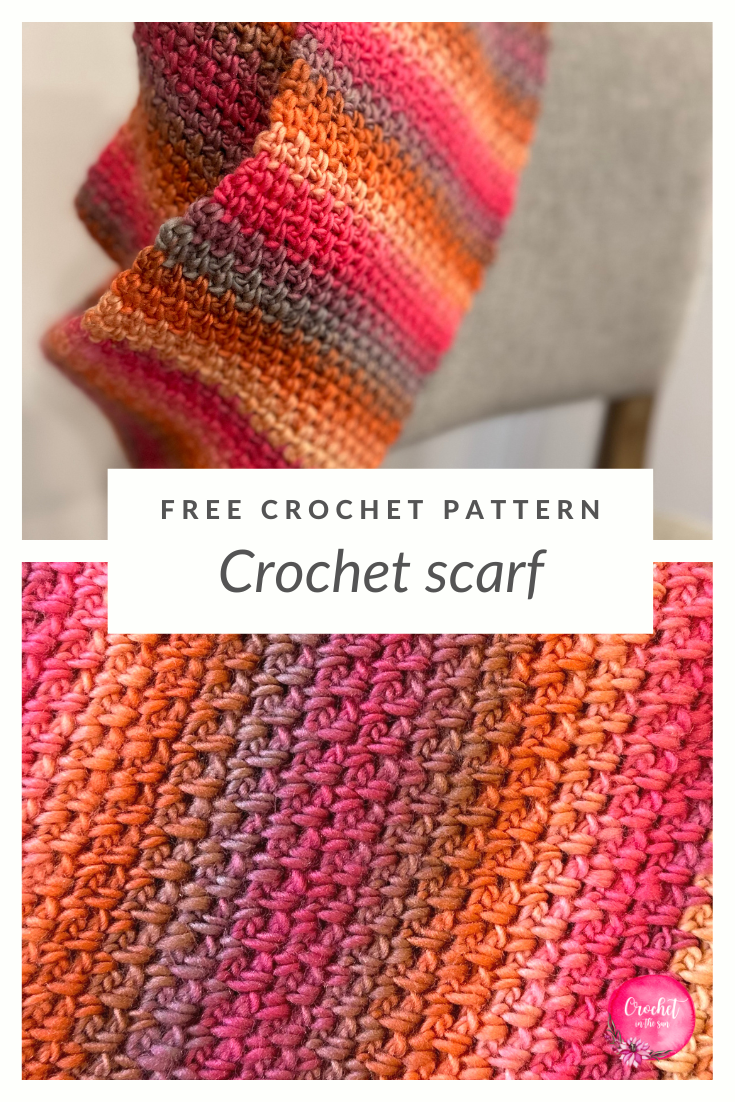
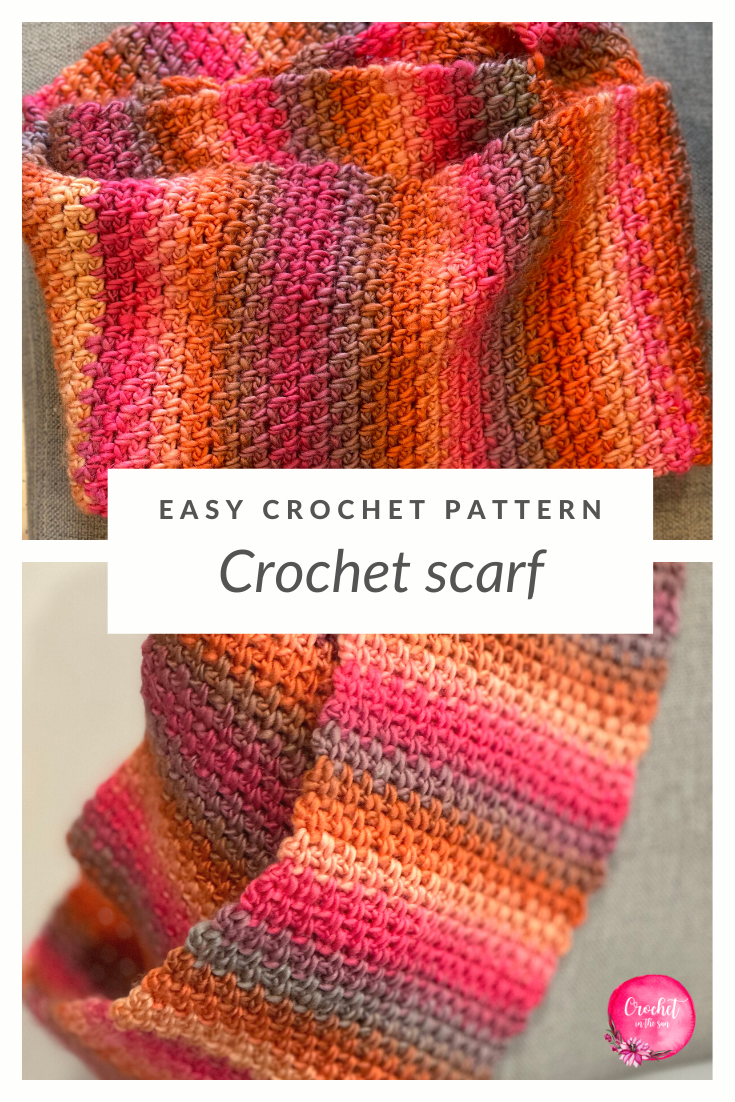
This summer we traveled to Australia to see family and explore some beautiful, breathtaking places. I miss it SO very much, so I had to figure out a way to incorporate the trip into my crochet world. I was looking to make a scarf, but wanted to find yarn colors that vividly reminded me of the trip. So when I saw this yarn, soft and fuzzy in the perfect sunset colors, I knew this was perfect fit for the new crochet scarf pattern!
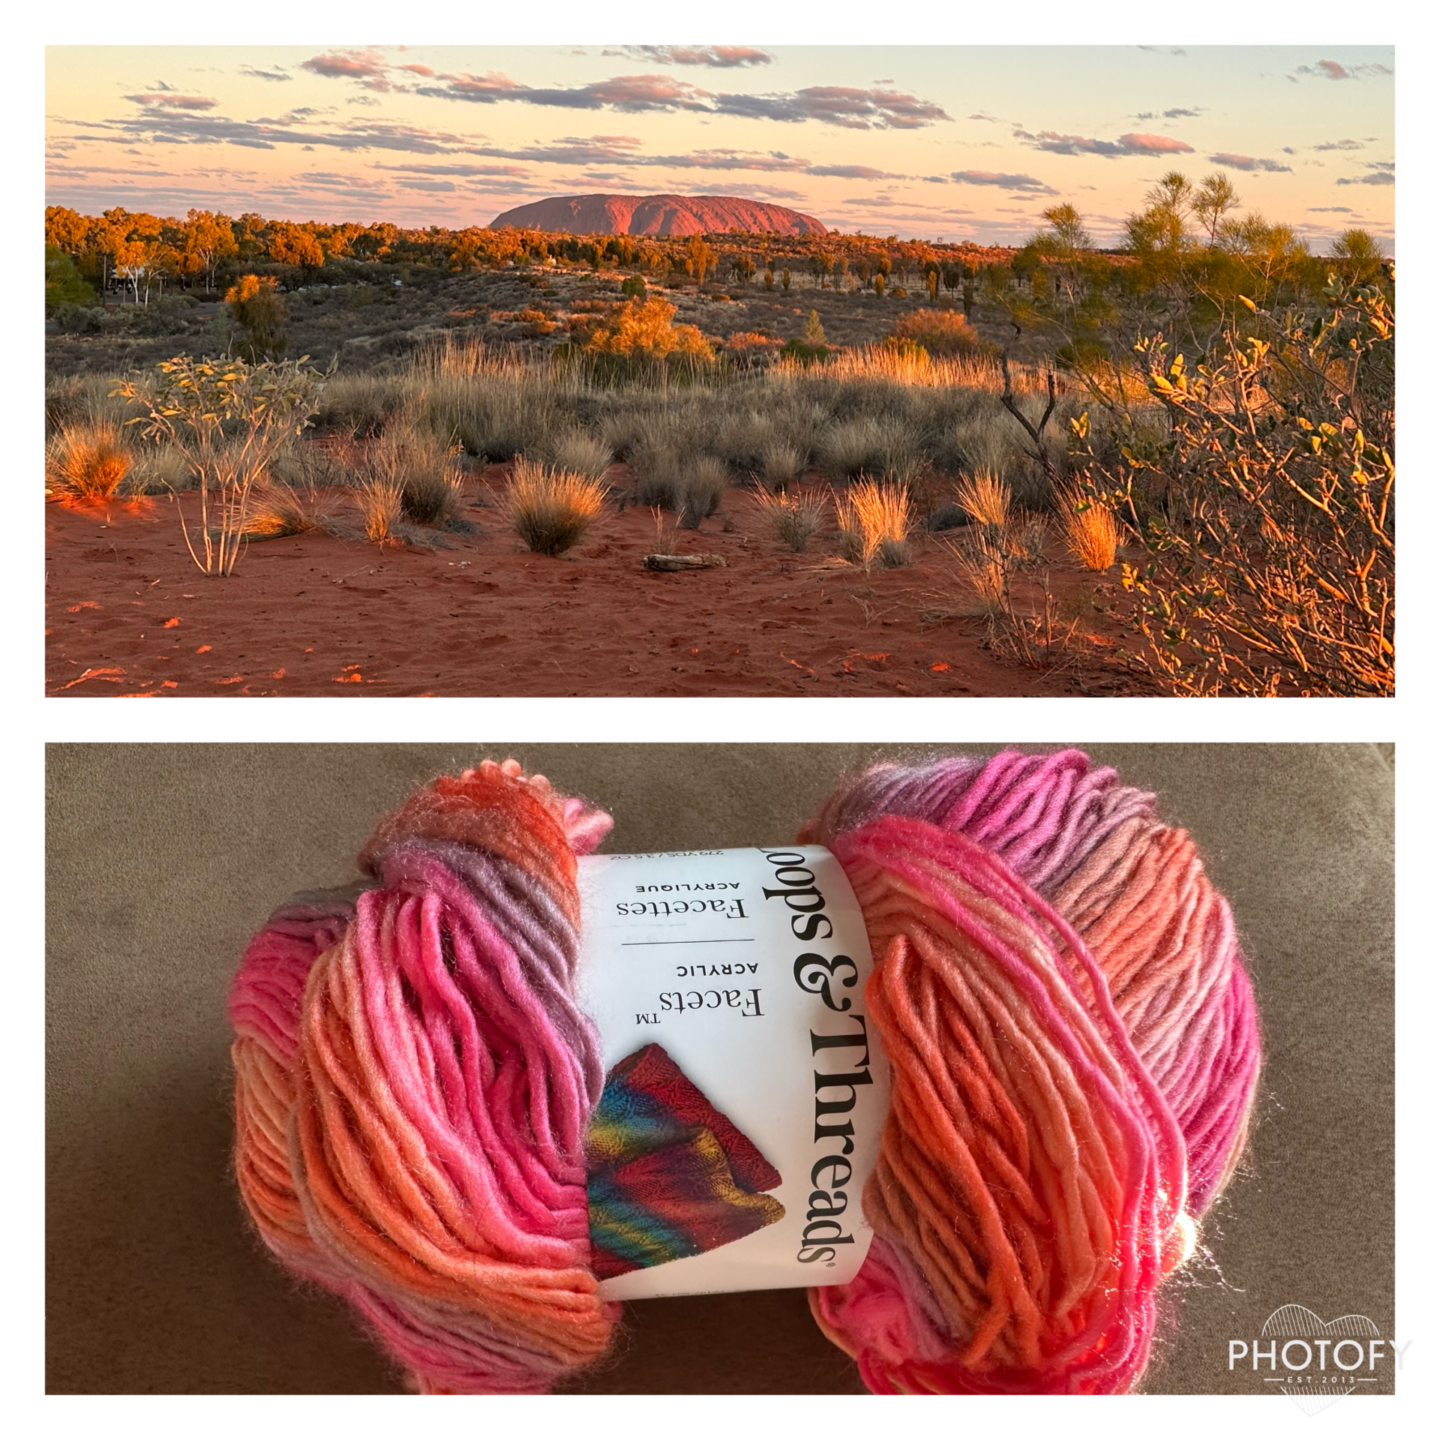
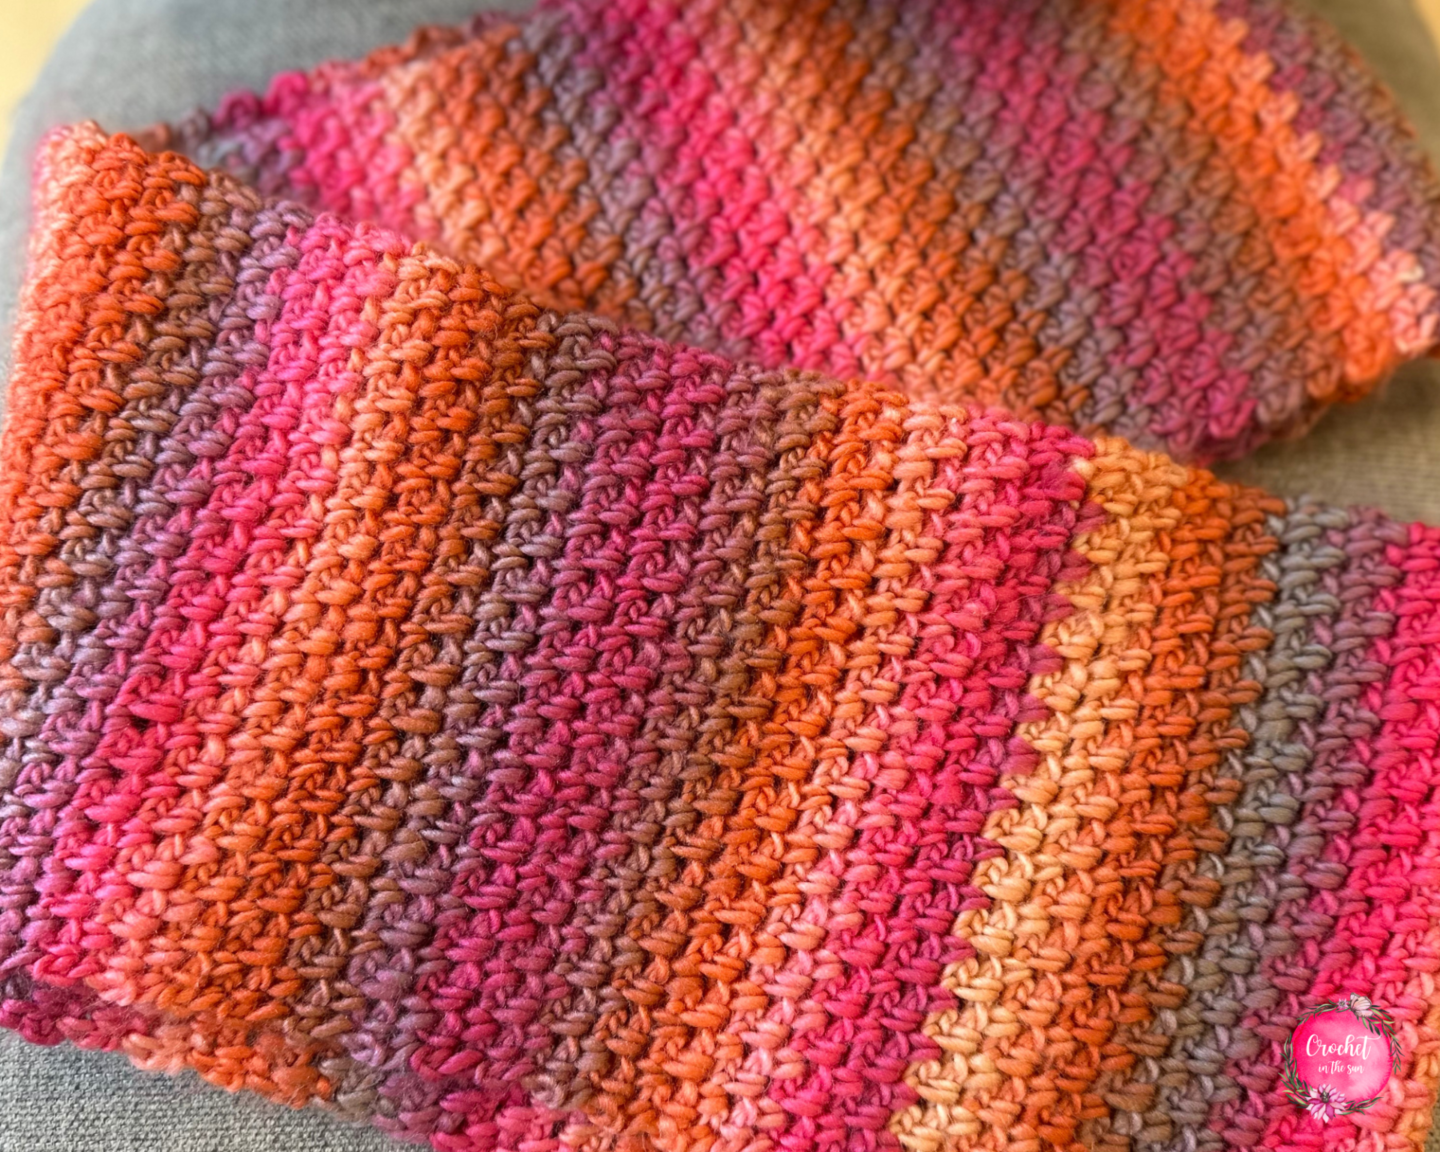
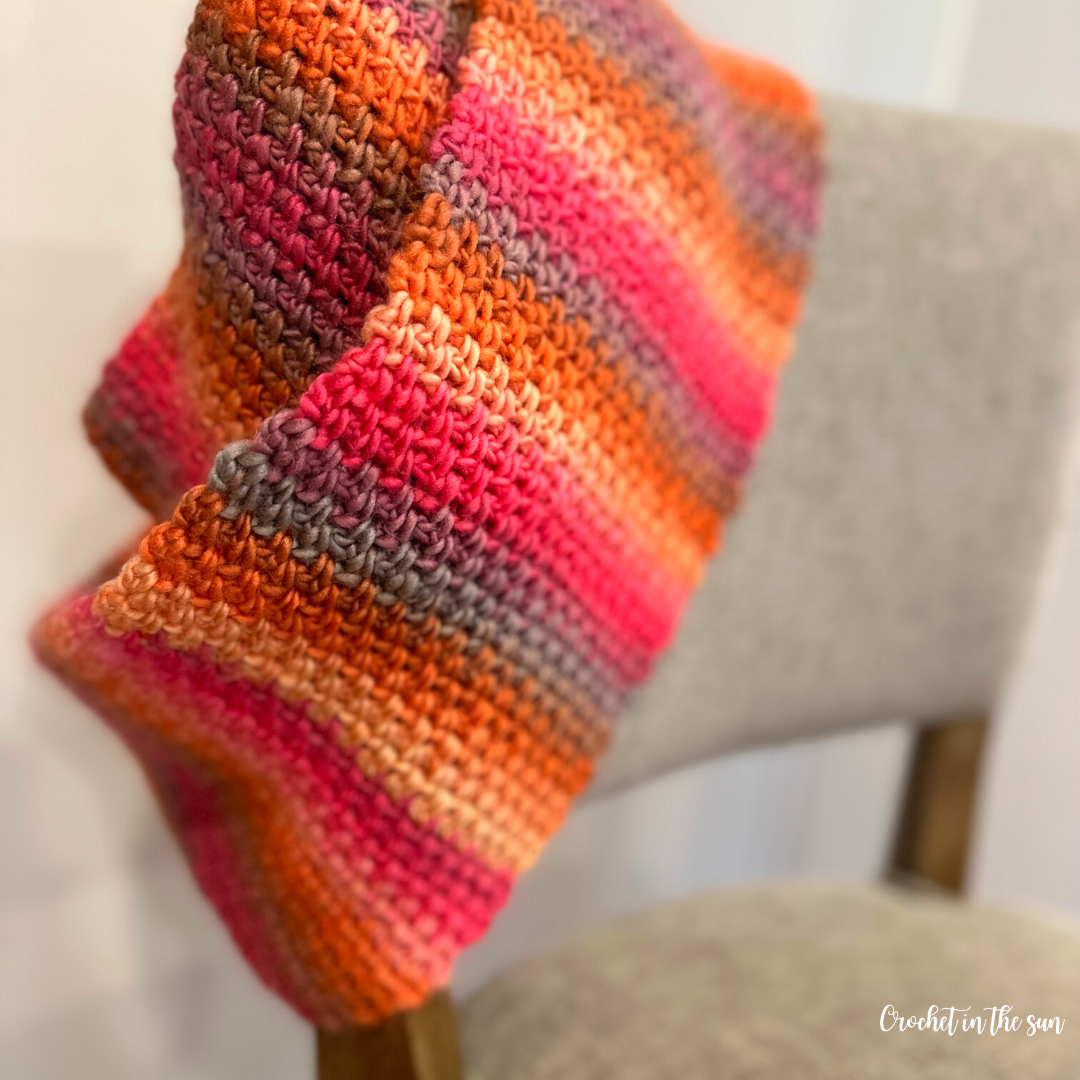
You can clearly see why I named this pattern the “Uluru Sunset scarf”! The yarn colors really look like they’ve pulled from the picture!
Soft and comfortable
This scarf is as comfortable as it is beautiful! This material is perfect for a scarf. It’s soft on your skin, yet thick enough to keep your neck warm. Yet not too bulky where you couldn’t comfortably fit it under your coat.
Plus, the moss stitch provides a gorgeous drape.
Colors and self-striping yarn
This crochet scarf pattern lends itself perfectly to self-striping yarn – this skein in particular!
In the Loops and Threads Facets yarn, the yarn color changes very frequently. And since this is a fairly narrow piece of work, you will often have each row in a different color. Of course it doesn’t always work out like that, but I think that’s the beauty of self-striping yarn!
With its unique color changes, it creates mesmerizing stripes without the need to constantly switch the yarn colors. Plus, it adds an element of surprise as you crochet, watching the colors evolve and create beautiful patterns.
My first crochet project was made using self-striping yarn, so I will forever be drawn to this type of yarn! 😉
Skill level
Easy
If you don’t know how to crochet, or maybe just want to brush up on the basics, we have a great resource for you!
Hop over to the Ultimate Beginner’s Guide to Crochet. This breaks down the basics of what you need to learn, in what order, and link you directly to some great resources! And best of all, it’s free! Enjoy 🙂
Yarn and materials
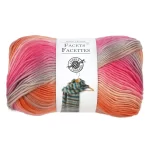
- Loops and Threads Facets yarn – in Lollipop colorway. You will need 2 skeins.
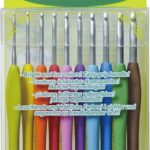
- 6mm crochet hook (US J – 10). Above is the one I used from my Clover hook set
- Craft scissors
- Tapestry needle (a blunt needle)
Note: This is a self-striping yarn and each skein varies slightly, so your project may look slightly different than mine.
Stitches (US Terms)
- chain (ch)
- single crochet (sc)
- slip stitch (sl st)
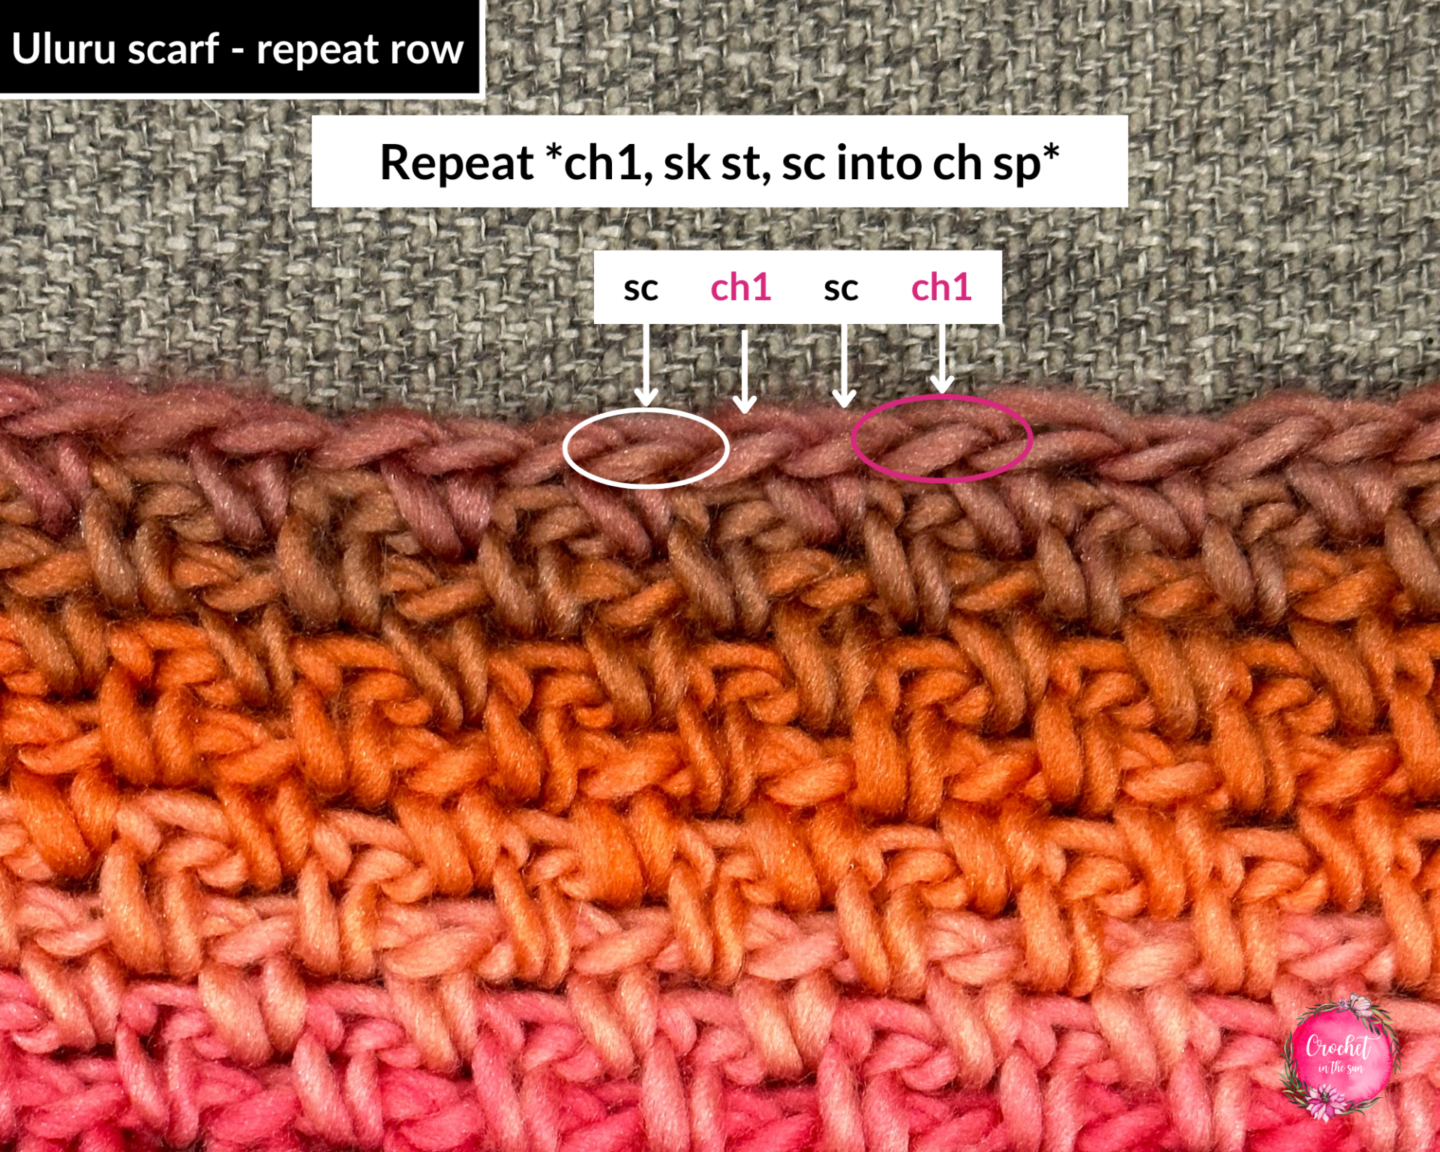
You will use a combination of the sc and ch to create the moss stitch, or linen stitch. That is a simple repeat of <ch1, sk st, sc into ch1sp>. I created a video tutorial as well: https://youtu.be/873ZWFZbljA?si=4_56K7zn756BwkE3
If needed, refer to my Beginner’s Guide to Crochet. Those stitch tutorials will walk you through how to complete the above stitches.
If you need to convert from US to UK terms, have a look at this chart.
Abbreviations
- “st” = stitch (generic term for any stitch in crochet)
- “sk” = skip (often used in ‘skip a stitch’ or ‘skip a chain’)
- “ch1sp” = chain 1 space. The space that is created when you chained 1 (ch1) in a previous row. Also referred to as ‘Ch sp’ or ‘chain 1 space’
Gauge
4 x 4 inches = 9 sc across x 14 rows up (not blocked)
Finished measurement
6.5 inches wide x 29 inches long (when scarf has been joined to form an infinity scarf. Before joining, the length would be ~60 inches long).
Other useful crochet references
- Crochet hook size conversion chart
- Yarn weight conversion chart
- Stitch conversation chart (US vs UK)
- Ultimate Beginner’s Guide to Crochet

Pattern Notes
This scarf is worked in a large number of short rows, then joined at the ends to form an infinity scarf.
Pattern
- Get the inexpensive ad-free PDF printable from my Etsy Shop
- Pin this pattern to your Pinterest Boards
- Add this pattern to your Ravelry queue – Coming soon
Written pattern
- To start: Ch 32 (About 9.5 inches)
- Row 1: sc in 2nd chain from hook. Ch1, skip next chain and sc into following chain. Repeat *ch1, sk ch, sc in following ch* across.
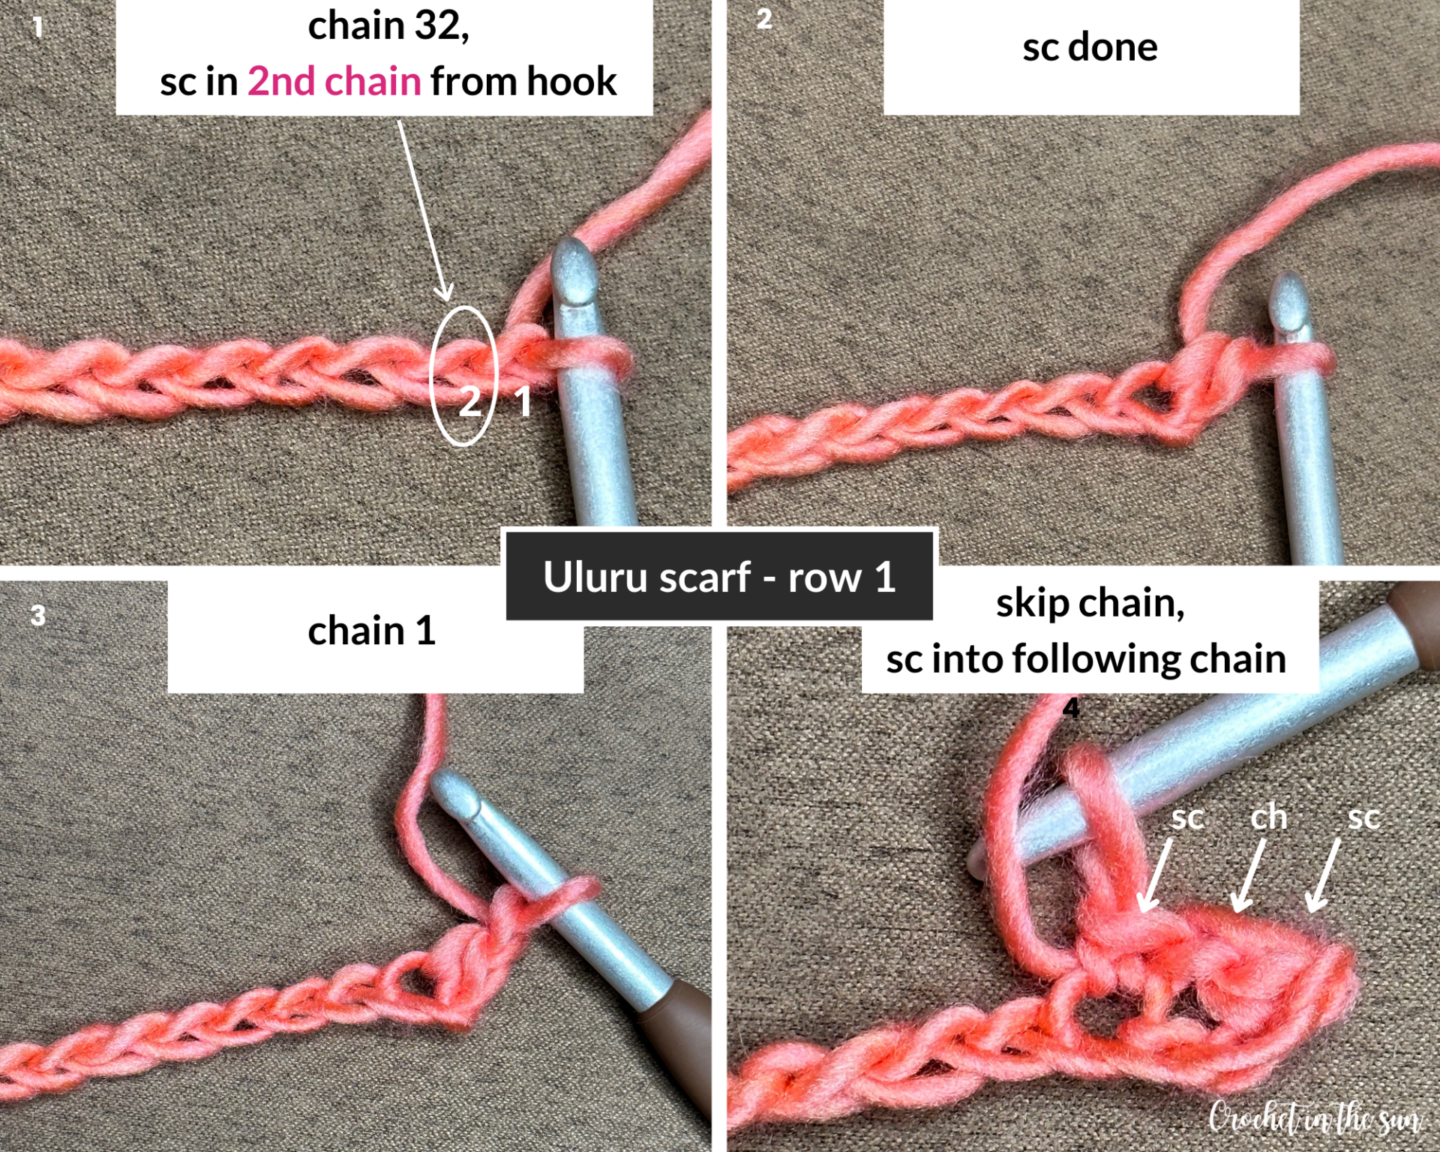
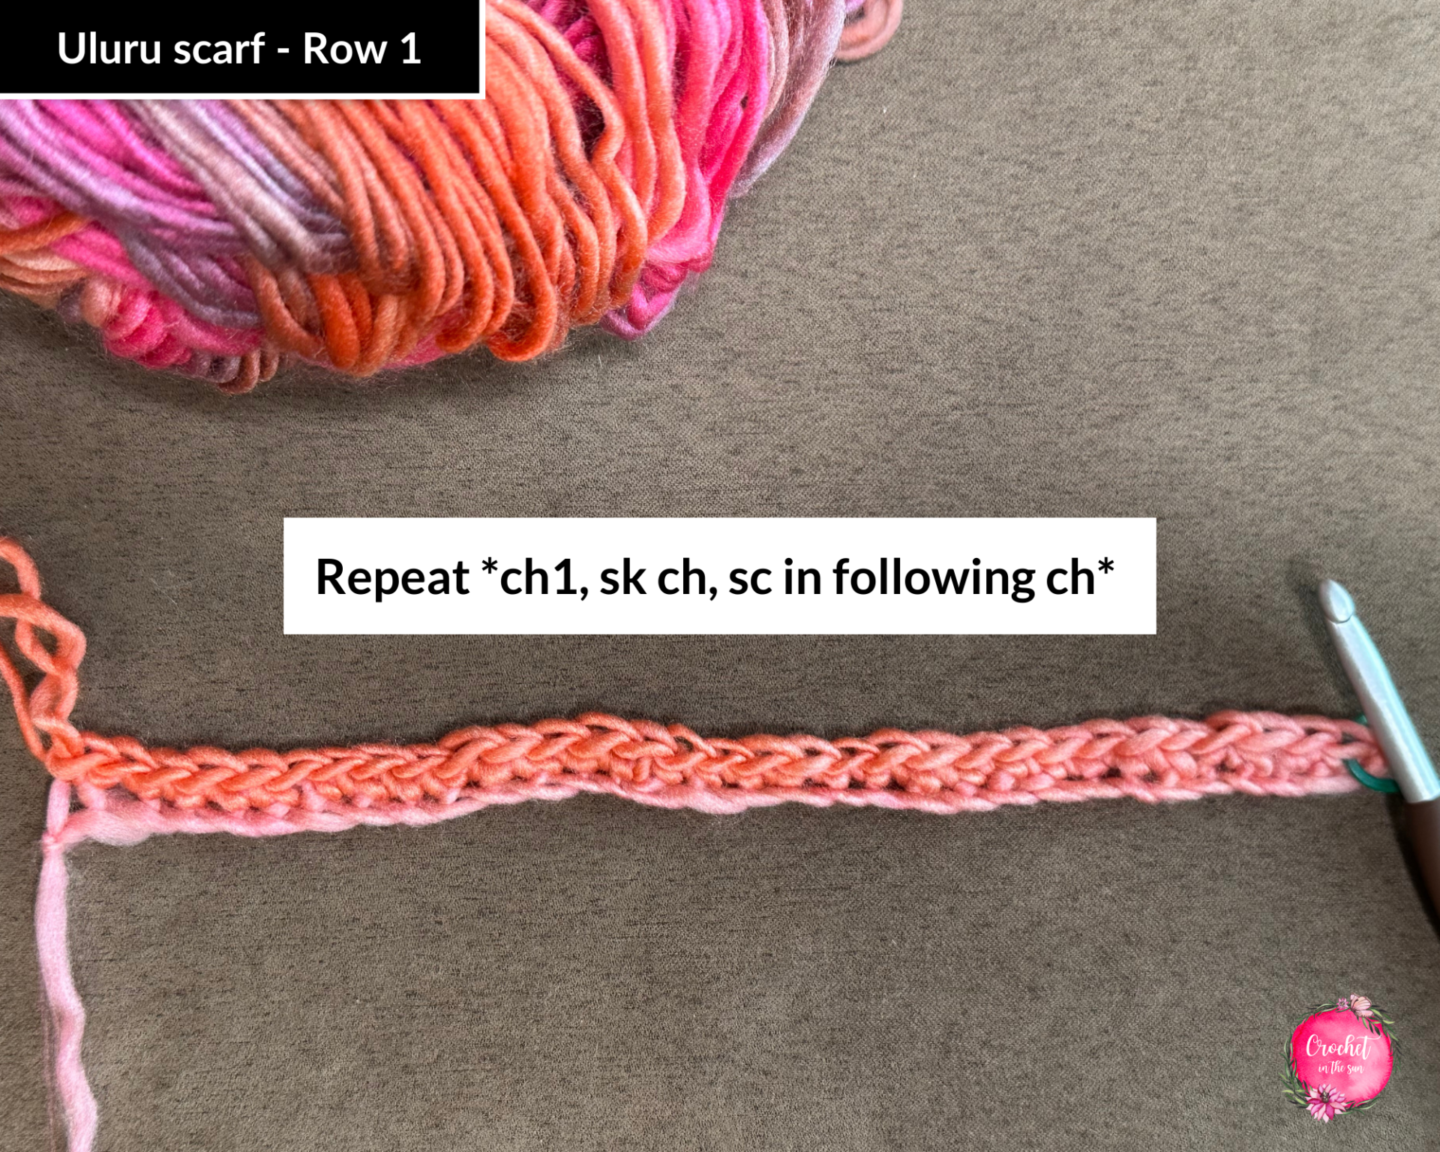
- Row 2 (repeat row): Turn, ch1, sc in ch1sp, repeat *ch1, sk st, sc into ch1sp* across. End with a sc.
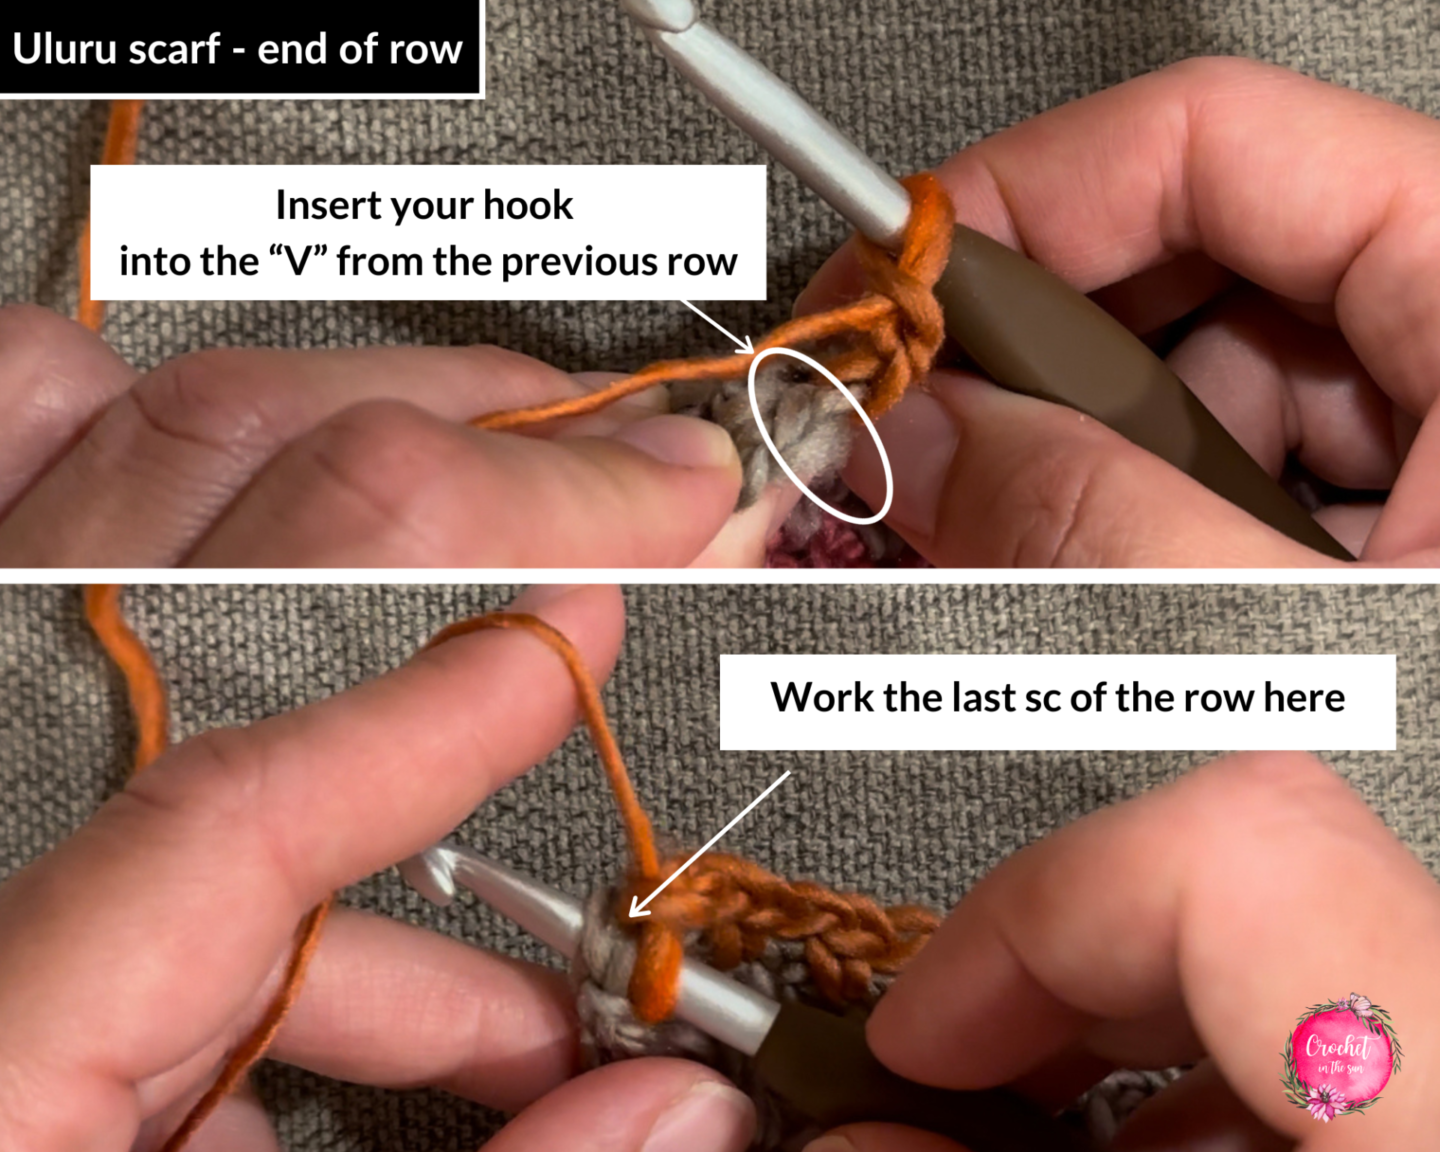
Below gives some extra guidance in terms of where you insert your hook and work the sc. Gently stretch the work apart if needed, and you will see the ch1sp ‘gap’ from the previous row. That is where you will work each sc.
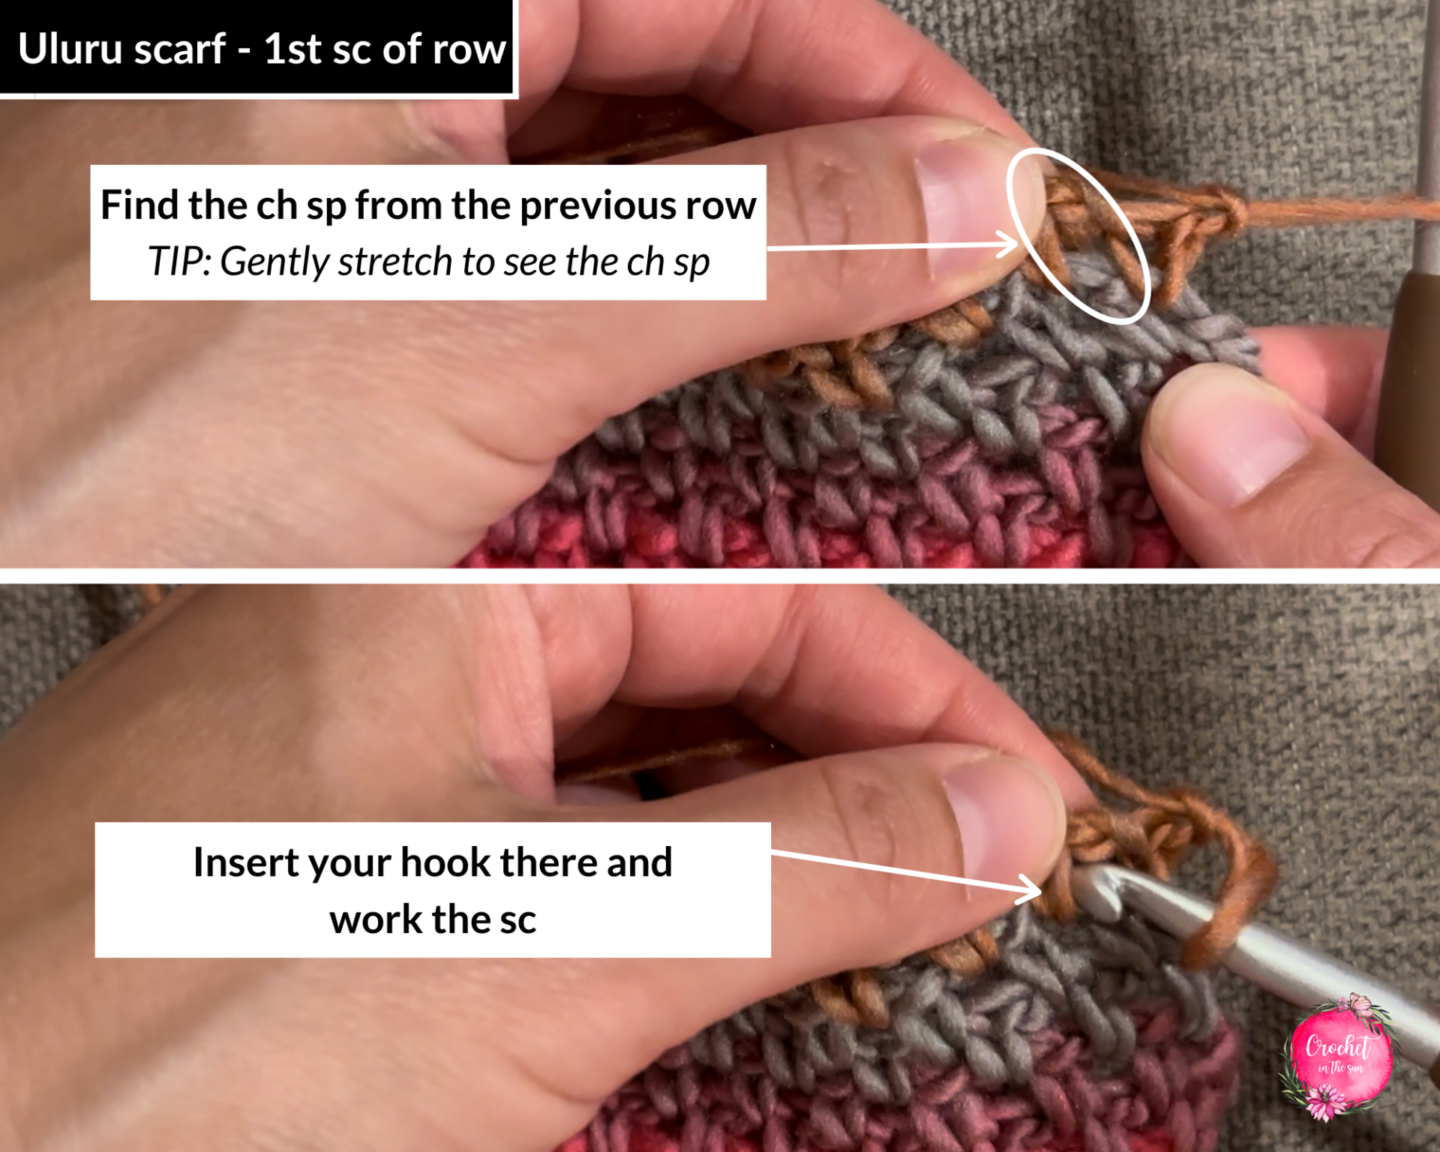
Tip on the last sc of the row: Slightly tilt your work towards you and you will see a “V”. This is where you’ll insert your hook for the last sc. (See photo for guidance)
- Rows 3-215: Repeat row 2. Or repeat until scarf is 60 inches long or desired length.
Before joining, hold the 2 ends together and wrap around you like an infinity scarf to see if it’s too short, too long, or just perfect! That way, you can make any adjustments now before you work the ends together.
- To join:
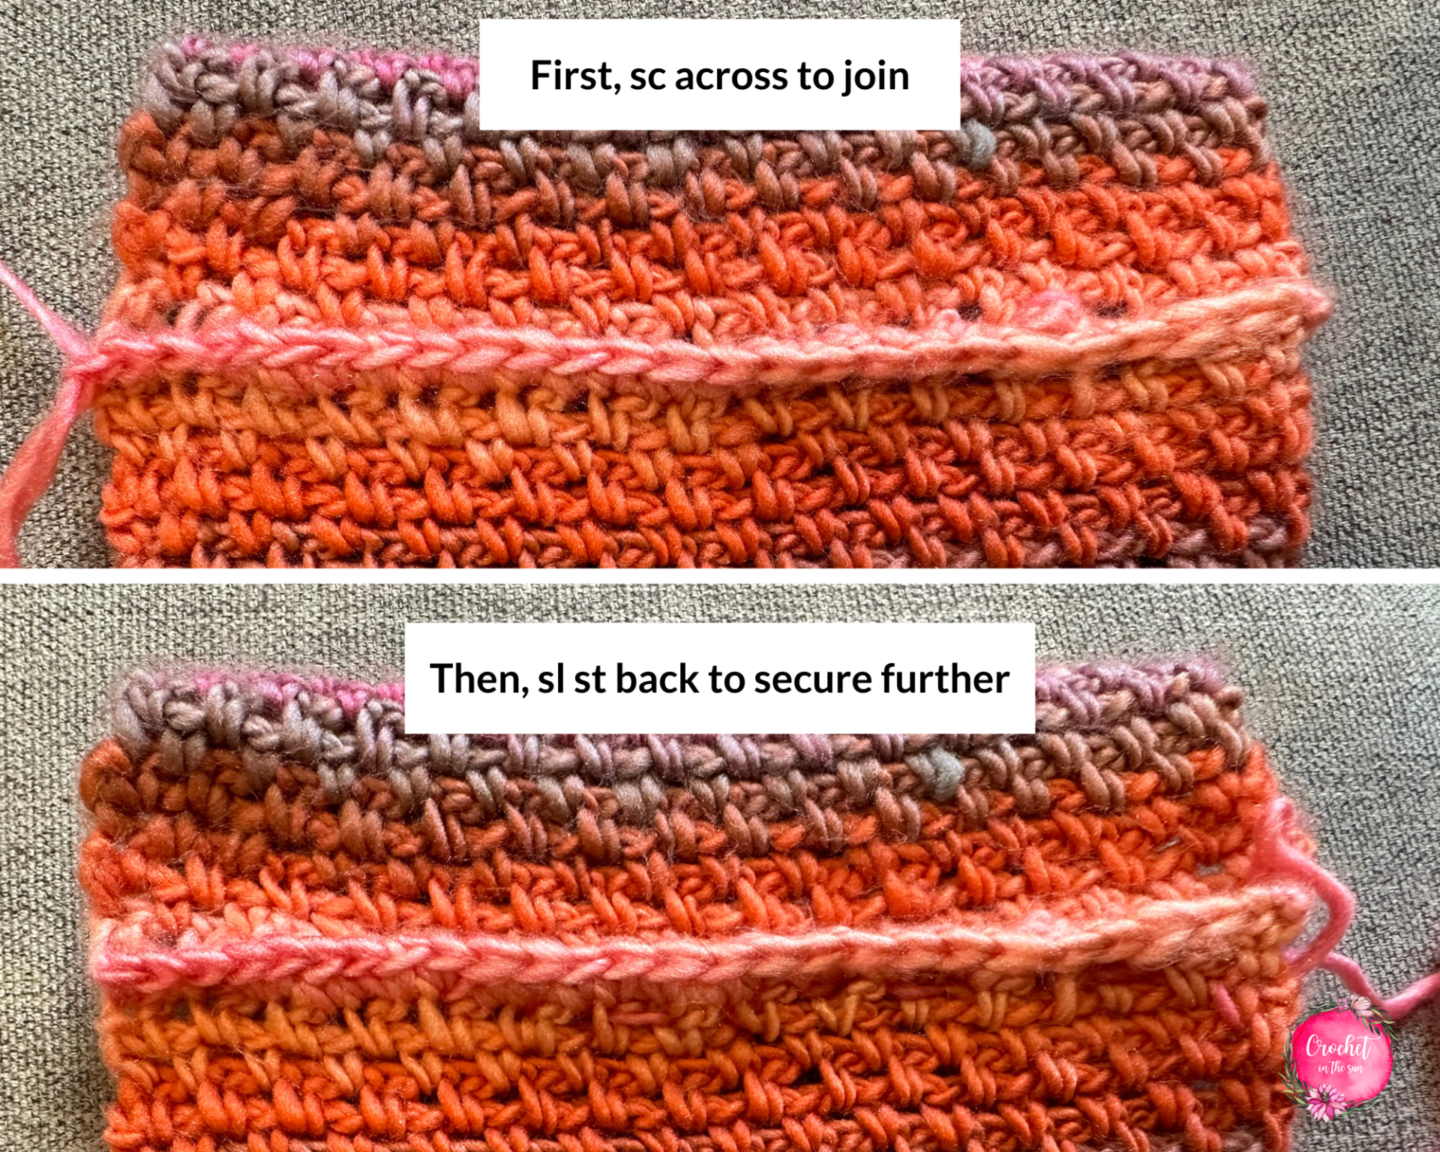
- Line up the first and last rows and sc to join. Make sure the working end is on the right, on the top layer, so you can sc across right to left as you normally would. (See picture) Else, you would be working backwards!
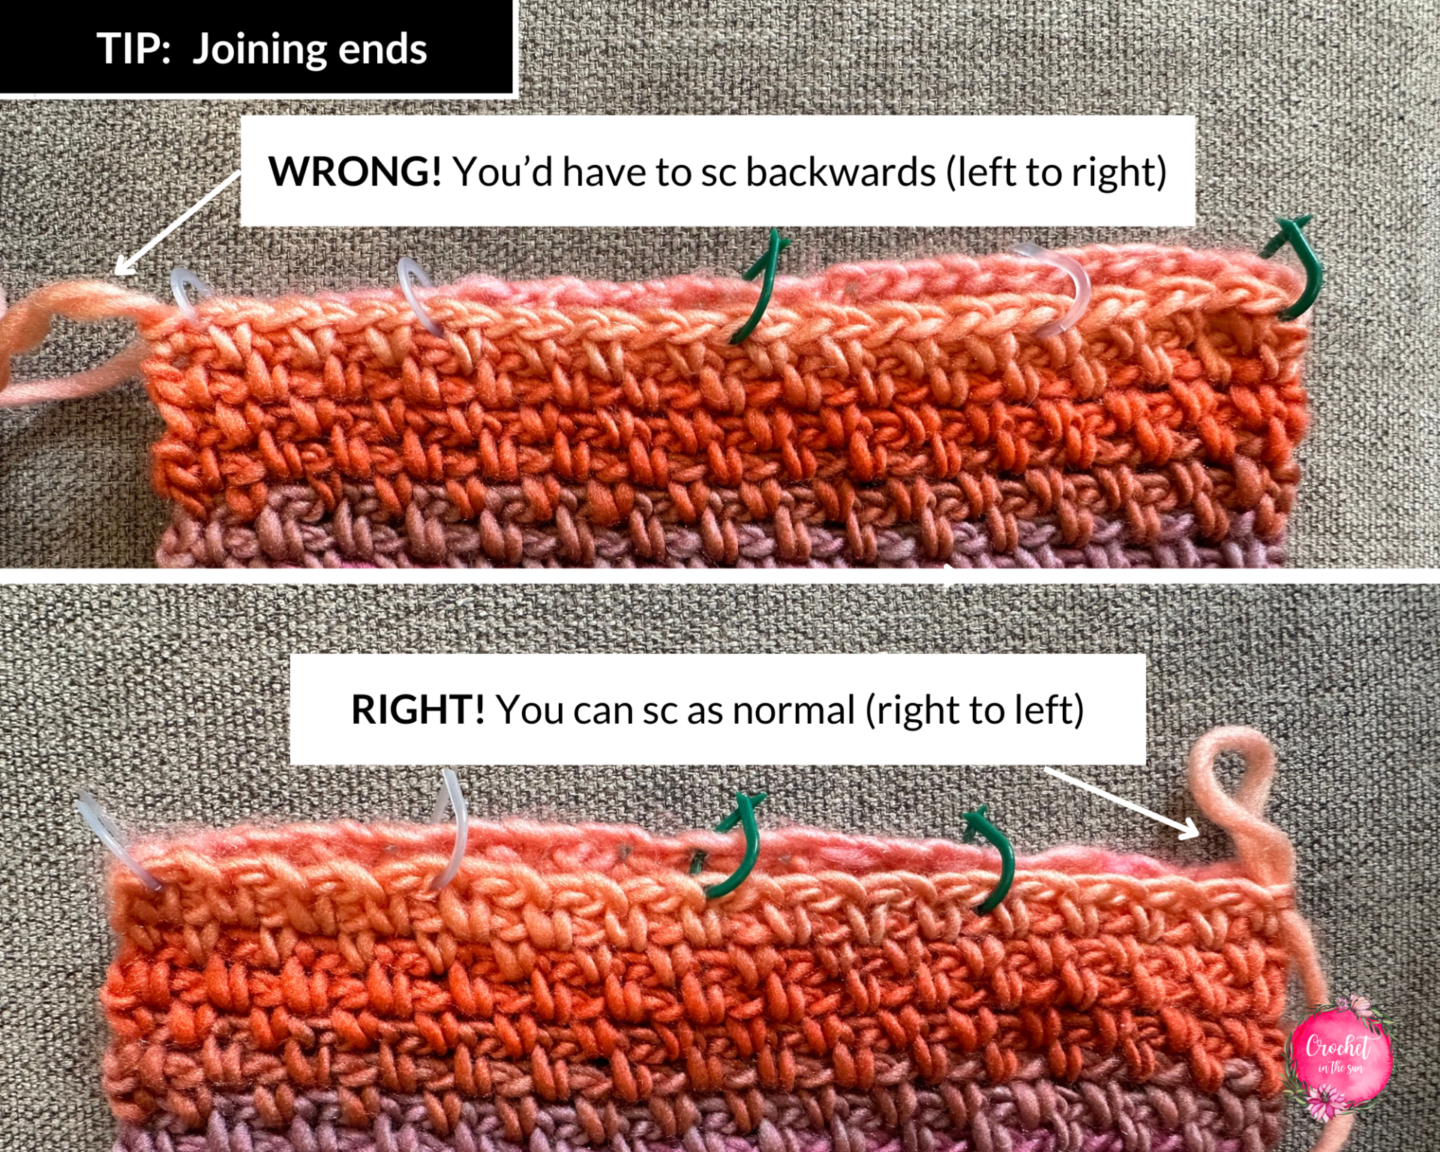
TIP: As you see above, use stitch markers to ensure the ends are lined up evenly
- To add an extra layer of security: ch 1, turn, sl st (slip stitch) in every sc.
- Cut your yarn and weave in the end. You can leave a very long piece of yarn to weave in, as that doubles as yet another way to secure the joining of the 2 ends.
Thanks for following along, I hope you enjoyed making the Uluru Sunset scarf! This crochet scarf pattern is sure to be a new favorite!
If you make one (or more!) and share on social media, go ahead and tag @crochetinthesun. I would love to see them! Also, please link back to my pattern/blog and provide credit for the pattern.
Plus, I would love to share your creation with the crochet community so we can see these pretty scarves come to life. 🙂
Happy crocheting,
Jennifer
If you loved this crochet scarf pattern, have a look at my Crochet Pattern Bundle on Etsy. It includes some of my best sellers along with other new patterns!
