
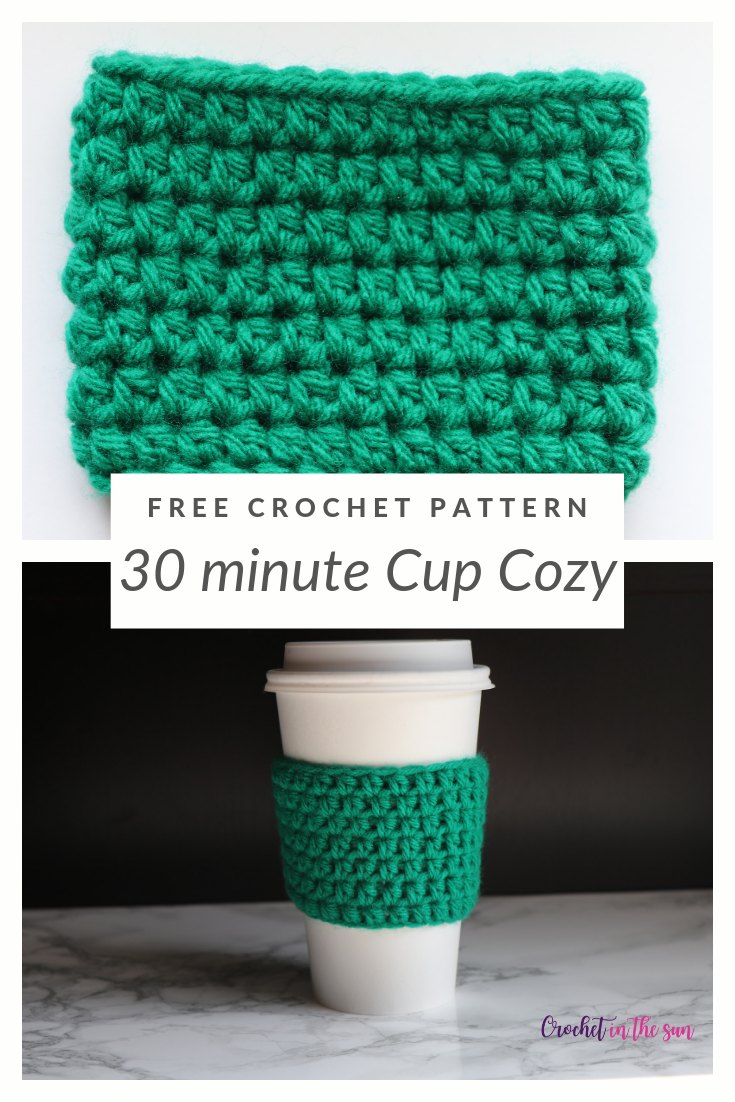
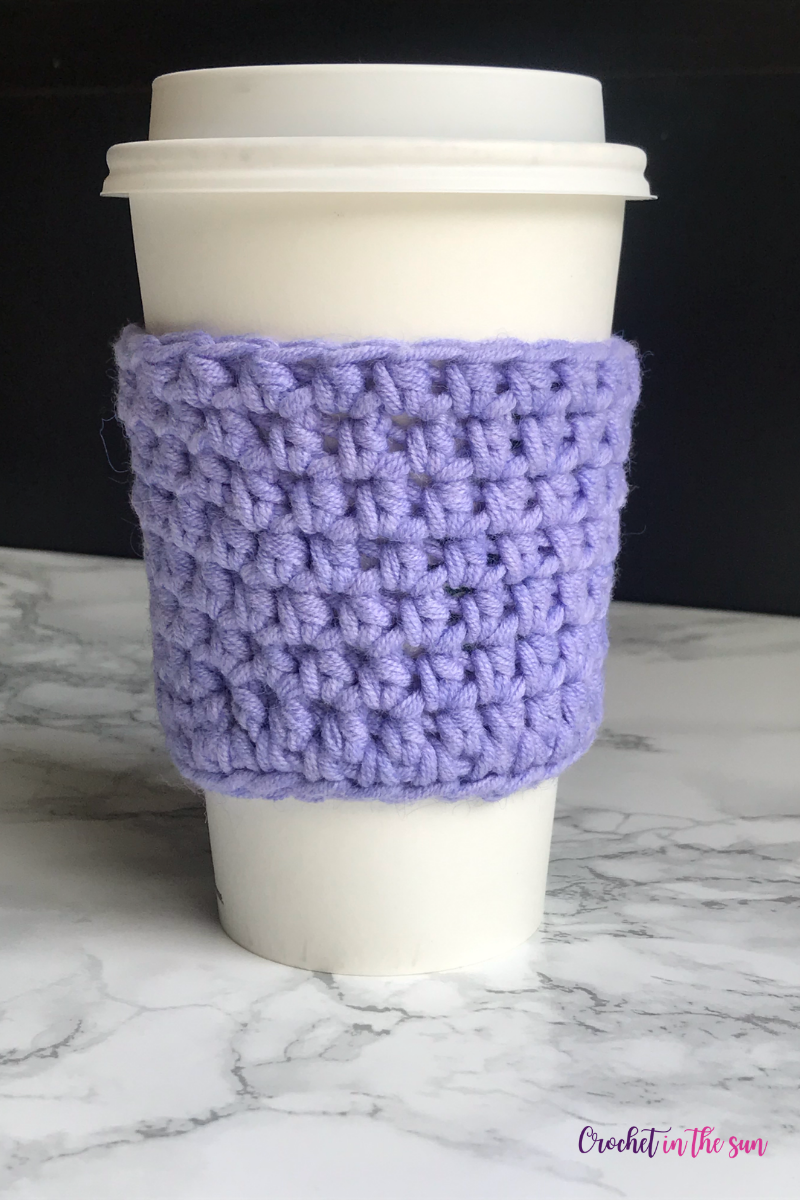
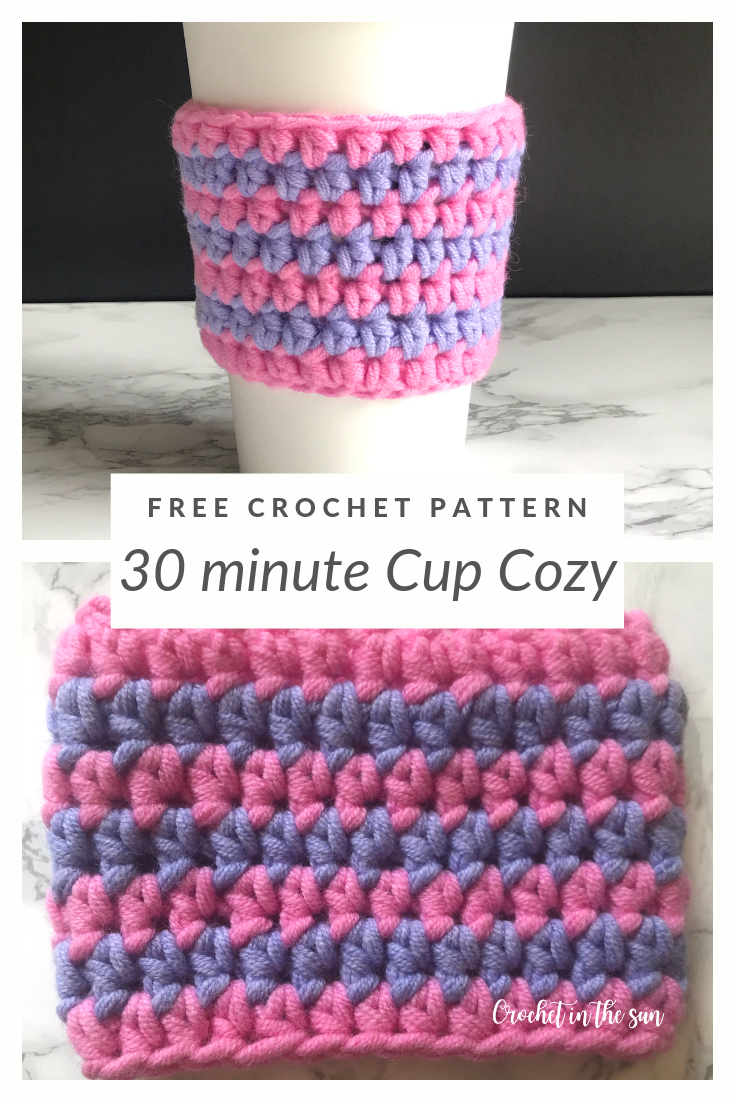
Looking for a crochet pattern that is super quick, easy, and also functional? Enter: crochet cup cozy!
These cup cozies take 30 minutes to make, so it’s easy to finish your project in 1 sitting. Or maybe you’ll be like me and want to make various cozies in different colors for the next couple weeks 🙂
How the crochet cup cozy came to life
When I first saw all the crochet cup cozy ideas on Pinterest, I first thought oh my gosh, how adorable!! Especially the ones with little felties or appliqués. I was SO drawn to them. I was convinced this would be the newest additions to my Etsy shop. But then after making a couple, I thought to myself, “would I actually use one though?” I don’t want to design or make anything I personally wouldn’t use. So, sadly I put the cozies on hold, and abandoned the 10 I had made, putting them to the bottom of my WIP (work in progress) pile.
Well, this morning my husband made this delicious coffee/dessert drink. After holding it for 20 seconds, my hand was numb. I stood there and thought, OMG MY CUP COZY!!! So I ran upstairs and slide on 1 of the cozies I had made. Yahoo my hand thawed out!
So now, I am back to working on some adorable cozies..this time, knowing I would (and will) use them. It means a lot to me that I can stand behind my projects or ideas.
Tried and true
I have tried various different ways to crochet this cup cozy, so when I discovered the perfect method, I wanted to share for others to use! Hopefully you will like this as much as I do, and it will cut down on the time it takes to find a style that works for you.
Some aspects I tested out:
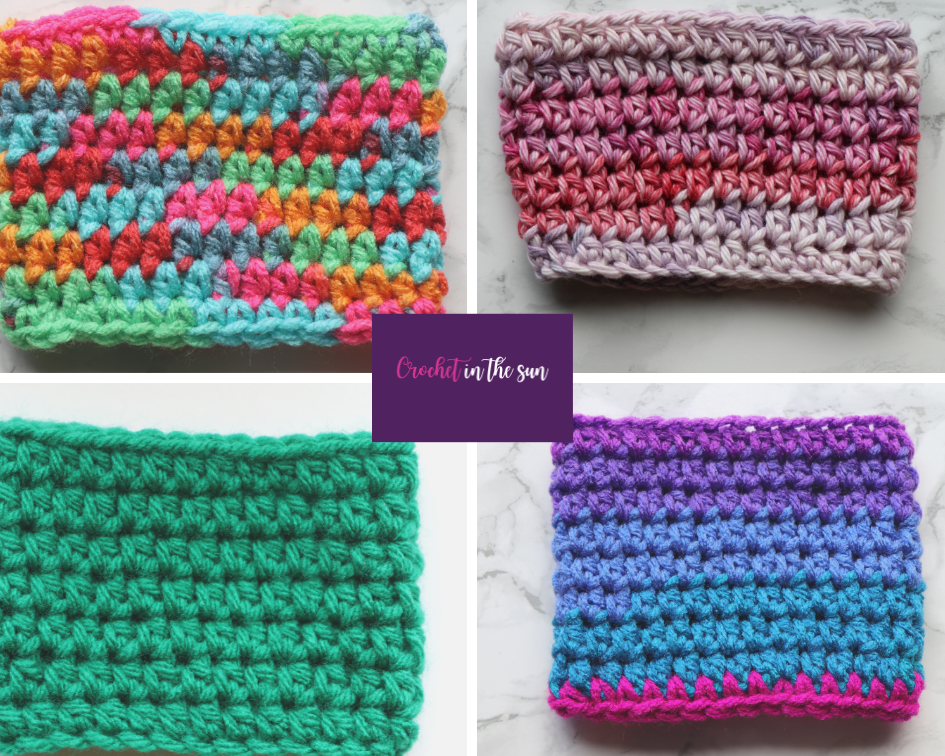
- Which stitches? I tried SC, HDC, DC, and a combination of them, but my favorite is the HDC.
- How is it worked? I worked the cozy flat and sew together, but the seam was a bit too bumpy. I worked HDC in joined rounds, but the seam was too obvious. My favorite is working HDC in a spiral tube.
Use them or gift them
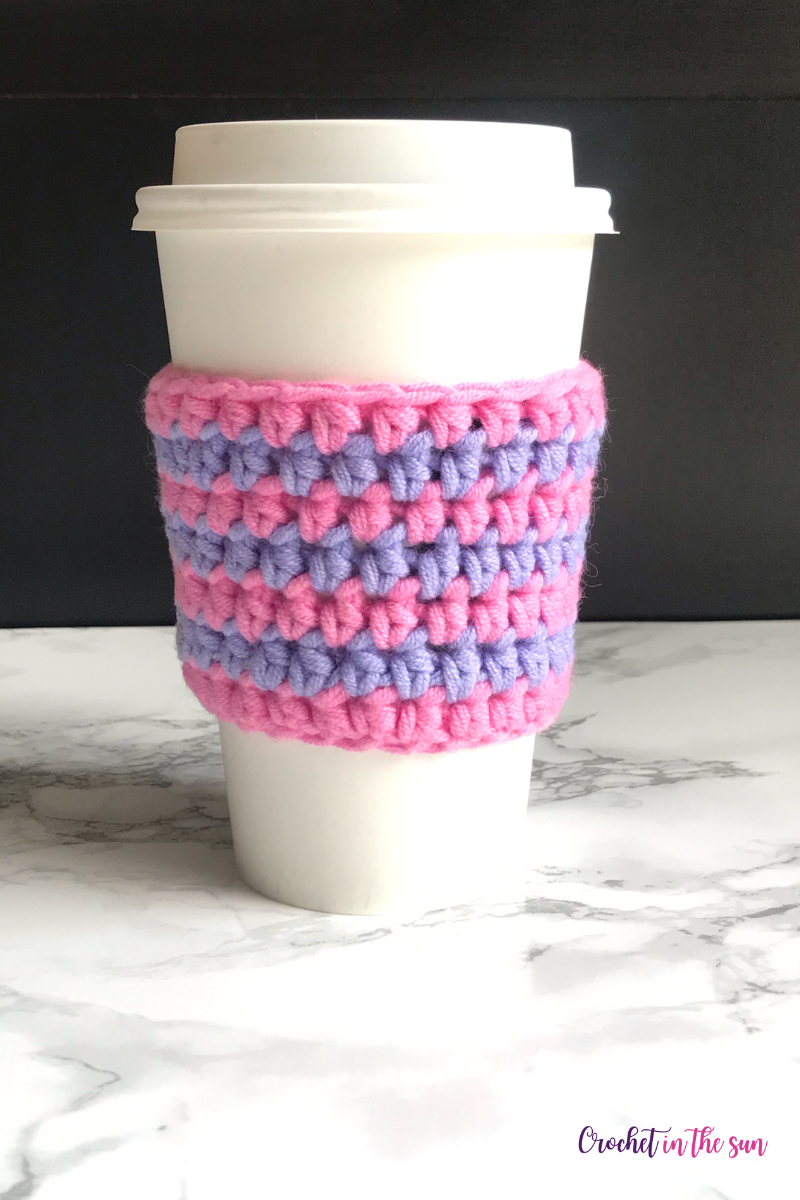
These babies will keep your hands warm in the winter and cool in the summer while you enjoy your drink.
Also, they make great gift ideas (or stocking stuffers for the holidays).
Eco friendly
Yay for making products that reduce waste. Say “no thanks” to your barista next time they give you a cardboard cozy. It’s always nice to know that we can make some impact, even small, to help be kind to the environment.
May not seem like much, but if we saved all of the cozies that came with our to-go cup from our favorite cafe for 1 year, I bet that pile would be bigger than you’d think!
Skill Level
Easy
If you don’t know how to crochet, or maybe just want to brush up on the basics, we have a great resource for you!
Hop over to the Ultimate Beginner’s Guide to Crochet. This breaks down the basics of what you need to learn, in what order, and link you directly to some great resources! And best of all, it’s free! Enjoy 🙂
Materials
- 5mm hook (US H-8) – You can pick one up on Amazon or get the full Clover Hook set (I use these in every single project!)
- Yarn needle and scissors

Stitches (US Terms)
- chain (ch)
- half double crochet (hdc)
- slip stitch (sl st)
If needed, refer to my Beginner’s Guide to crochet. Those stitch tutorials will walk you through how to complete the above stitches. If you need to convert from US to UK terms, have a look at this chart.
Gauge
4 inches = 14 HDC x 10 rows. This varies slightly depending on the yarn used.
Note, the cozies aren’t actually 10 rows tall, but mathematically, 4 inches would equal roughly 10 rows 🙂
Finished measurement
4.5 inches wide x 3 inches tall. Again, this will vary slightly depending on the yarn used.
Your crochet cup cozy will fit most standard to-go cups. This works well for both hot drinks and cold drinks!
Yarn
I used a couple different types of medium weight yarn (size 4), to see how different fiber content and different brands looked. Refer to the list below for the number of chains made to ensure the up cozy remained at 4.5 inches wide.
Foundation Chain variances
Below are the brands with the length of the foundation chain:
- Red heart super saver – Chain 29 (shown in Polo Stripe)
- Simply soft – chain 31 (shown in Pagoda)
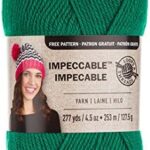
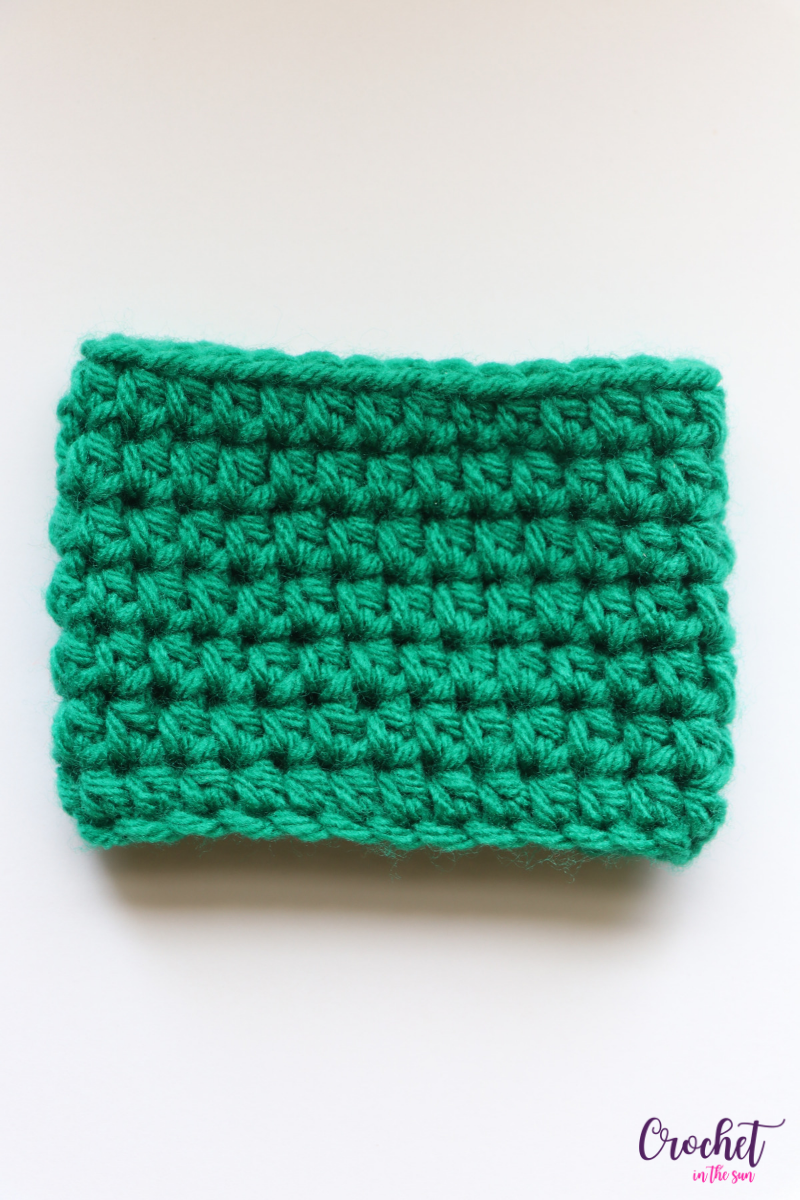
- Loops & Threads Impeccable – chain 27 (shown in Kelly Green)
- Peaches & Creme – chain 30
- Loops & Threads Capri – chain 25 or 26, (I used a 6.5mm hook for this one)
This will also be the same number of HDC’s per row. Therefore, unless you are chaining 29, substitute this number for the [29] in the pattern below.
Pattern Notes
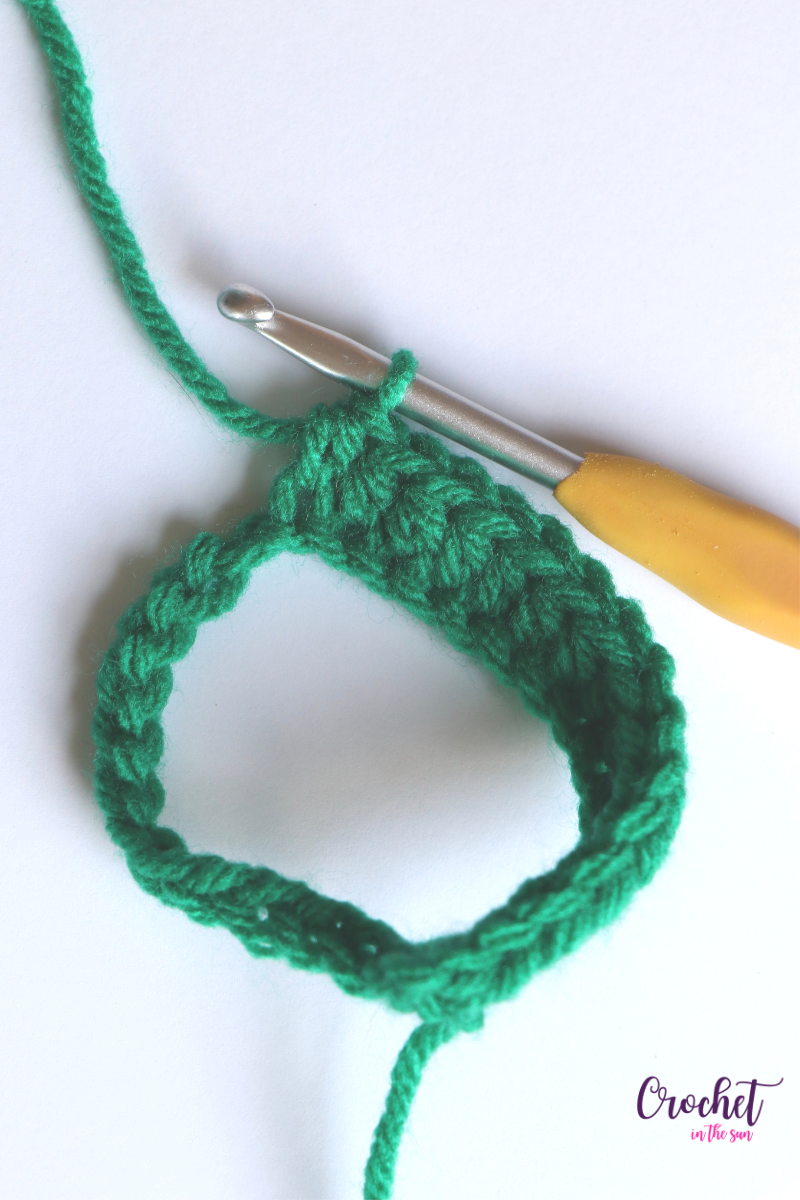
This pattern is worked in a spiral tube.
Spiral, meaning we will NOT join the rounds and NOT chain up to begin a new round. Rather, once we finish one round, we simply move to the next round by working a HDC in the first HDC of the previous round.
Tube, meaning after we complete the foundation chain, you sl st to attach to the 1stchain. Pointing this out in case you were thinking we crocheted a flat piece a sew it together. HINT: I tried that but felt this method looks much cleaner with no seams! I also tried joining the rounds, but the seam was very obvious.
Tips
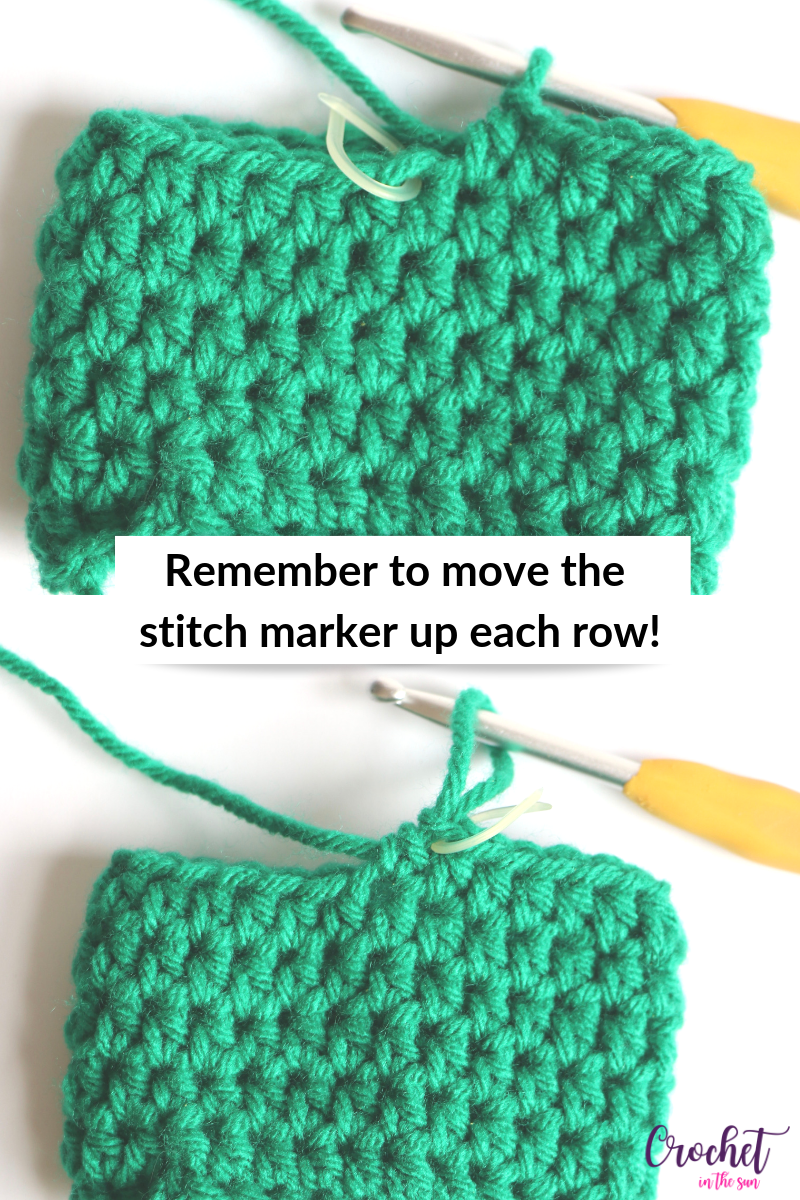
- Put a stitch marker in the last stitch of the row,and keep moving it up as you go from round 1 to the next rounds. To start, put the stitch marker into the last HDC of round 1. Once you finish round 2 and work that last HDC into the stitch with the stitch marker, remove the stitch marker and re-attach it to the HDC you just made. I personally recommend this, so there is no question about where each round ends, and it’s also crystal clear when you’ve finished your cozy. (When working in a spiral, it’s easy to lose track of the first and last stitch of the rows).
- When working Row 1 into the chain, experiment with working the HDC’s into the back bump vs. the loops of the chain. I found that working into the back bump made the bottom of the cozy look tighter and more uniform. When I worked it into the chain loops, the bottom looked like it was stretched or a bit ‘gappy’, which wasn’t ideal.)
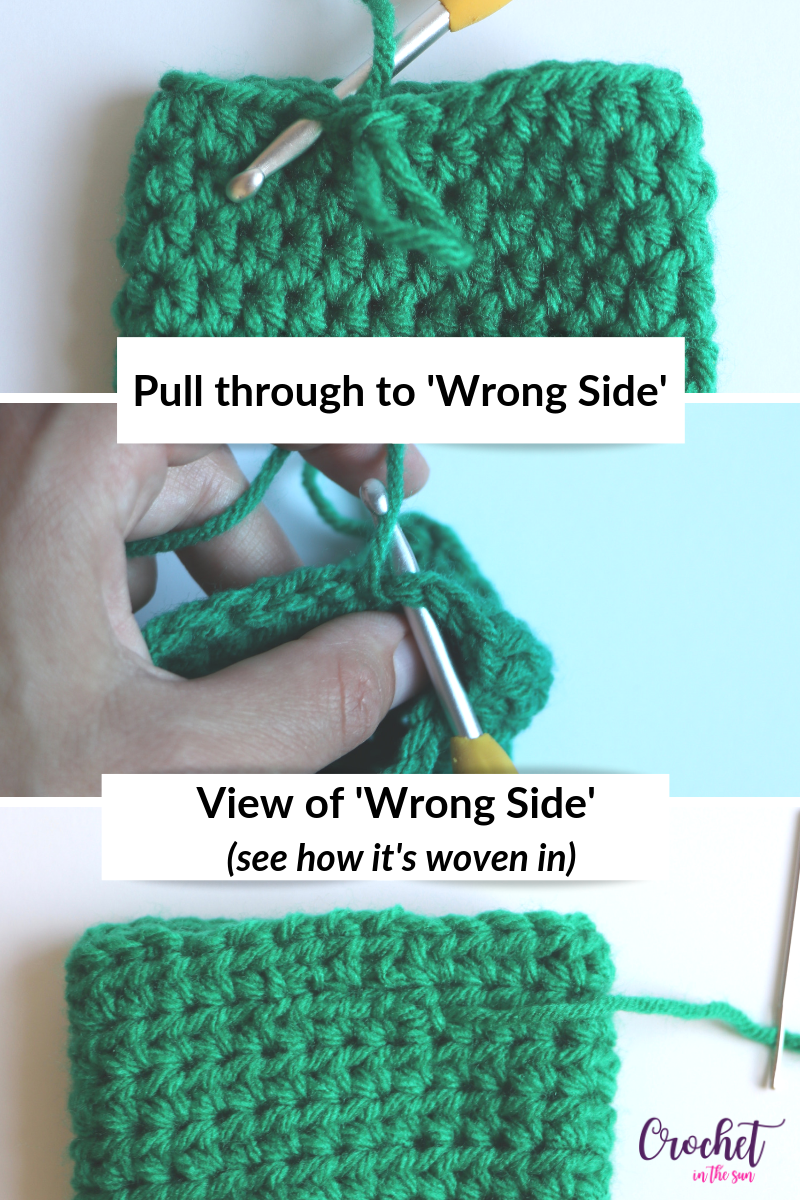
- When weaving in the ends, since this project has a ‘wrong side’, I always slip my yarn needle through to the ‘wrong side’ and weave in the ends, to make it even less noticeable.
- Feel free to work either more or less number of rows depending on the desired height of your cup cozy, and whether you add 1 or both optional borders mentioned below.
Pattern
- Get the inexpensive ad-free PDF printable from my Etsy Shop
- Pin this pattern to your Pinterest Boards here
- Add this pattern to your Ravelry queue
- OR – looking to buy one of the finished crochet cup cozies? These are for sale in my Etsy Shop!
Let’s get started!
- To start: Chain 29 (see Foundation Chain Variances for number in [ ]). Sl st to 1stch to attach. Ch 2, HDC in the same stitch as the chain 2. (Ch 2 does not count as a HDC)
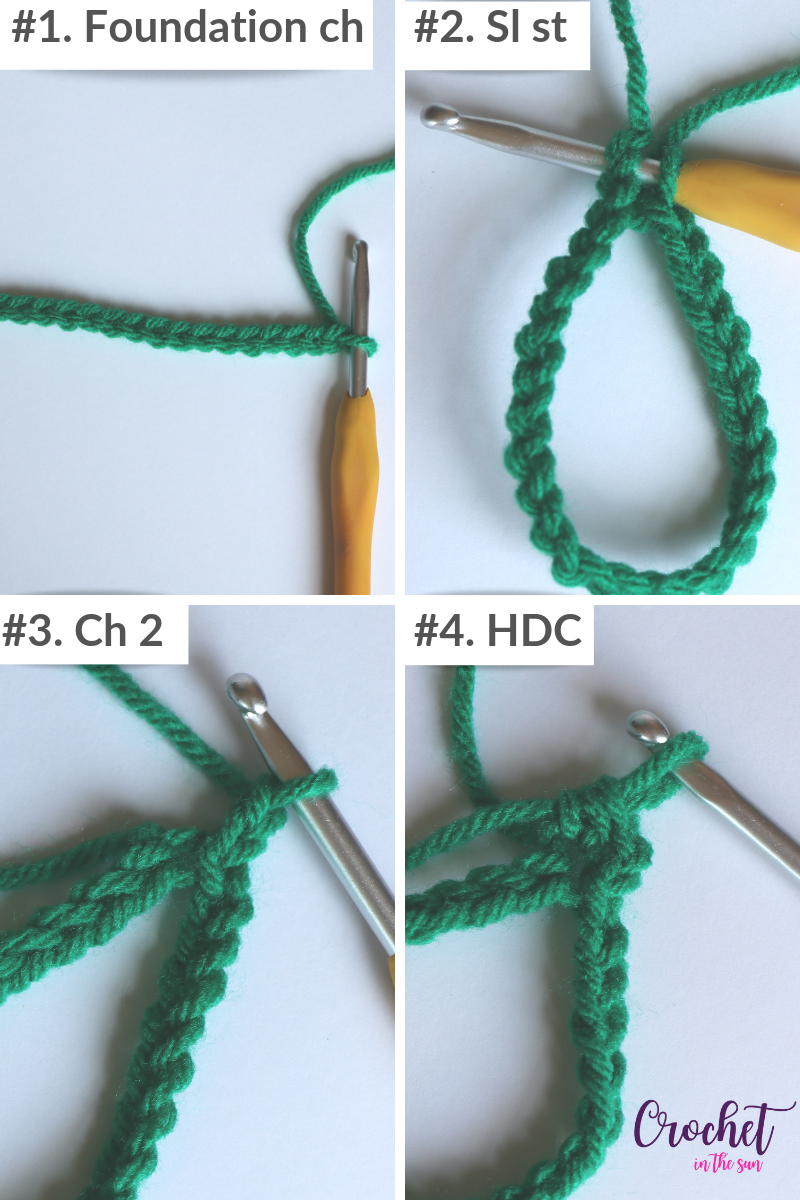
- Row 1: HDC in each chain. Psst, remember to use your stitch marker when you finish this row! [29]
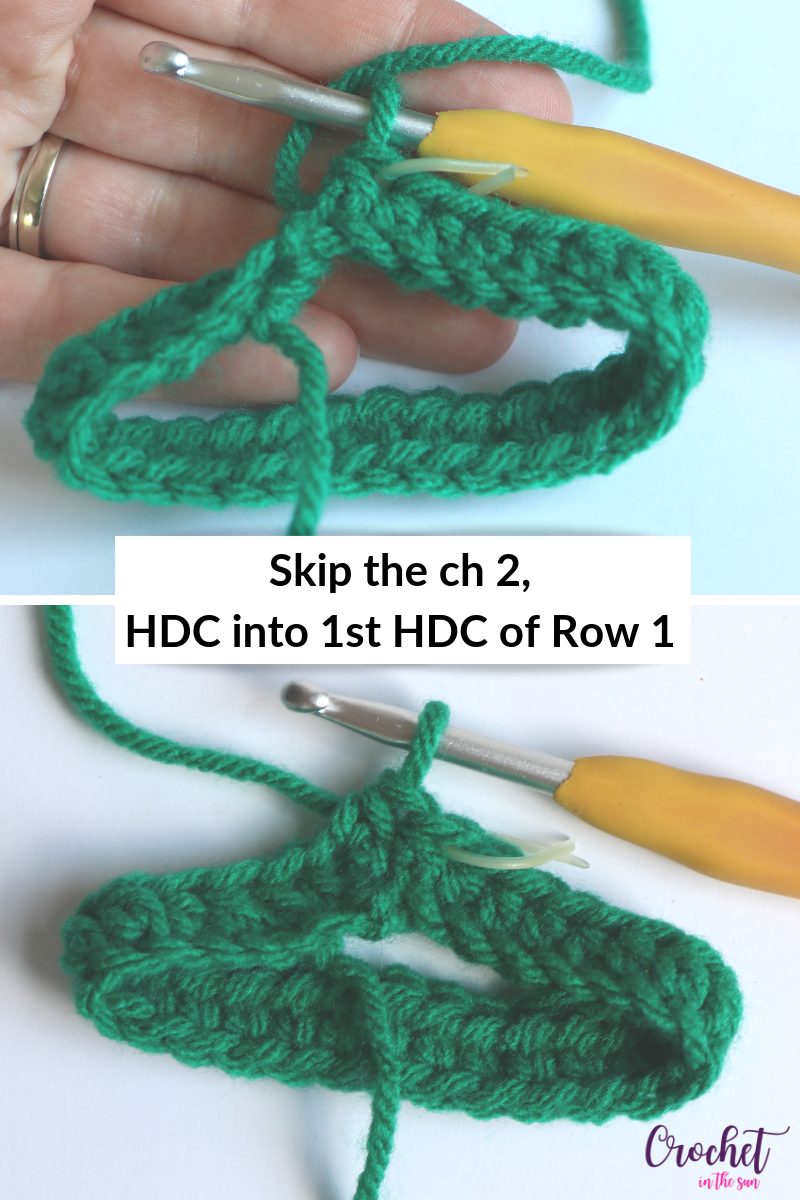
- Row 2: Don’t start with a ch 2, just HDC into 1st HDC of Row 1. HDC in each HDC of the previous row. [29]
- Rows 3-6: HDC in each HDC. [29]
- Row 7: HDC in each HDC. After you complete the row, you will notice that the top row appears really uneven after your last stitch. That’s to be expected. To even this out, after you finish the last HDC of the row, slip stich into the next 2-3 stitches. This trick should straighten out the top as it pulls the 2 “heights” together. Fasten off. [29]

- Lastly, weave in the ends

Top tail-end
Before you attach the tail-end to a yarn needle and weave in the ends as you normally would, I like to do something different first to help straighten the top row even more, if necessary. Insert your hook from the wrong side through to the right side and wrap the tail-end around the hook. Tighten and pull through. Repeat.
Then, once you’ve gone through 5+ stitches, attach to a yarn needle and weave in the end, optionally working it down a couple rows to secure it.
Bottom tail-end
You will notice that the bottom row will look uneven as well. Again, that is to be expected. To fix this, weave in the bottom tail and pull towards the ‘end’ part of the first row. Similar to above, this will help align the rows so they appear even and in-line.
Optional borders
Why add a border? You definitely do not need to, but here are some reasons why some people may want to:
- It might add a more ‘finished’ look to your cup cozy
- This border will automatically even-out the top and bottom rows that appear uneven due to the spiral. When I do this border, I don’t even weave in the ends of the cozy first, rather I single crochet over them. (Although you still have to weave in the ends of the border!)
- Color interest! Whether it’s a complimentary color or the same color, this is a good way to add an accent to your cozy!
Top row border: If you want to even out the rows, attach the yarn NOT where you ended. The uneven part should be about half-way through the border, so attach the yarn ~15 stitches before the last HDC of the last row.
Work 1 sc into each hdc, fasten off, and weave in the end.
Bottom row border: Same as above, attach the yarn ~15 stitches before the last HDC. Turn work upside down with right side still facing out (don’t turn inside out). Work slip stitches either in top loops of the chain (creates tighter finish) or in between posts (creates looser finish). You can use a sc instead of sl st, however the sc makes this border a bit more noticeable, which you may or may not want.
Thanks for following along! I hope you enjoy making these cup cozies. I would love to see them! If you make one (or many) and share on social media, please link back to my blog and provide credit for the pattern. Also tag me @crochetinthesun so we can see those cozies come to life!
Looking for more crochet patterns? Have a look at my Crochet Pattern Bundle on Etsy. It includes some of my best sellers along with other new patterns!
Pin for later
Other useful crochet references
- Crochet hook size conversion chart
- Yarn weight conversion chart
- Stitch conversation chart (US vs UK)
- Ultimate Beginner’s Guide to Crochet
Happy crocheting,
Jennifer


This is a very easy pattern. I also made the Yoda pattern. It turned out very good.
Nice amazing pattern.creative ideas for the crochet lovers.amazing ideas for everyone.thanks for the helpful idea.
Your pattern is very well written! Thank you so much for sharing. I am so pleased with how my sleeves turned out.
Found myself with a ‘too hot to hold’ coffee from a machine last week. Saw your pattern and enjoyed doing it, and it fits 🙂 Pure wool DK 29 chain. Thanks so much.
Perfect simple pattern!
A fun and easy pattern. It is a good pattern to add embellishments to.